¶ Intro
WebDAV (Web Distributed Authoring and Versioning) is a powerful protocol that allows you to access and manage files stored on remote servers as if they were on your local device. In this guide, we’ll walk you through how to connect to your GigaDrive via WebDAV, enabling seamless file management and integration.
¶ Connecting from a Windows Desktop
¶ Step 1: Install SFTPGo On GigaDrive
- Navigate to the Application Manager on your dashboard and search for SFTPGo.
- Click
Installand follow the on-screen instructions to install SFTPGo. - Once SFTPGo is installed, click
Accessbutton to locate your WebDAV connection details. Note down the following:- WebDAV URL
- Username
- Password
¶ Step 2: Connect To WebDAV On Windows
On your Windows PC:
- Click the Start button in the lower-left corner of your screen.
- Type File Explorer in the search bar and select the application to launch it.
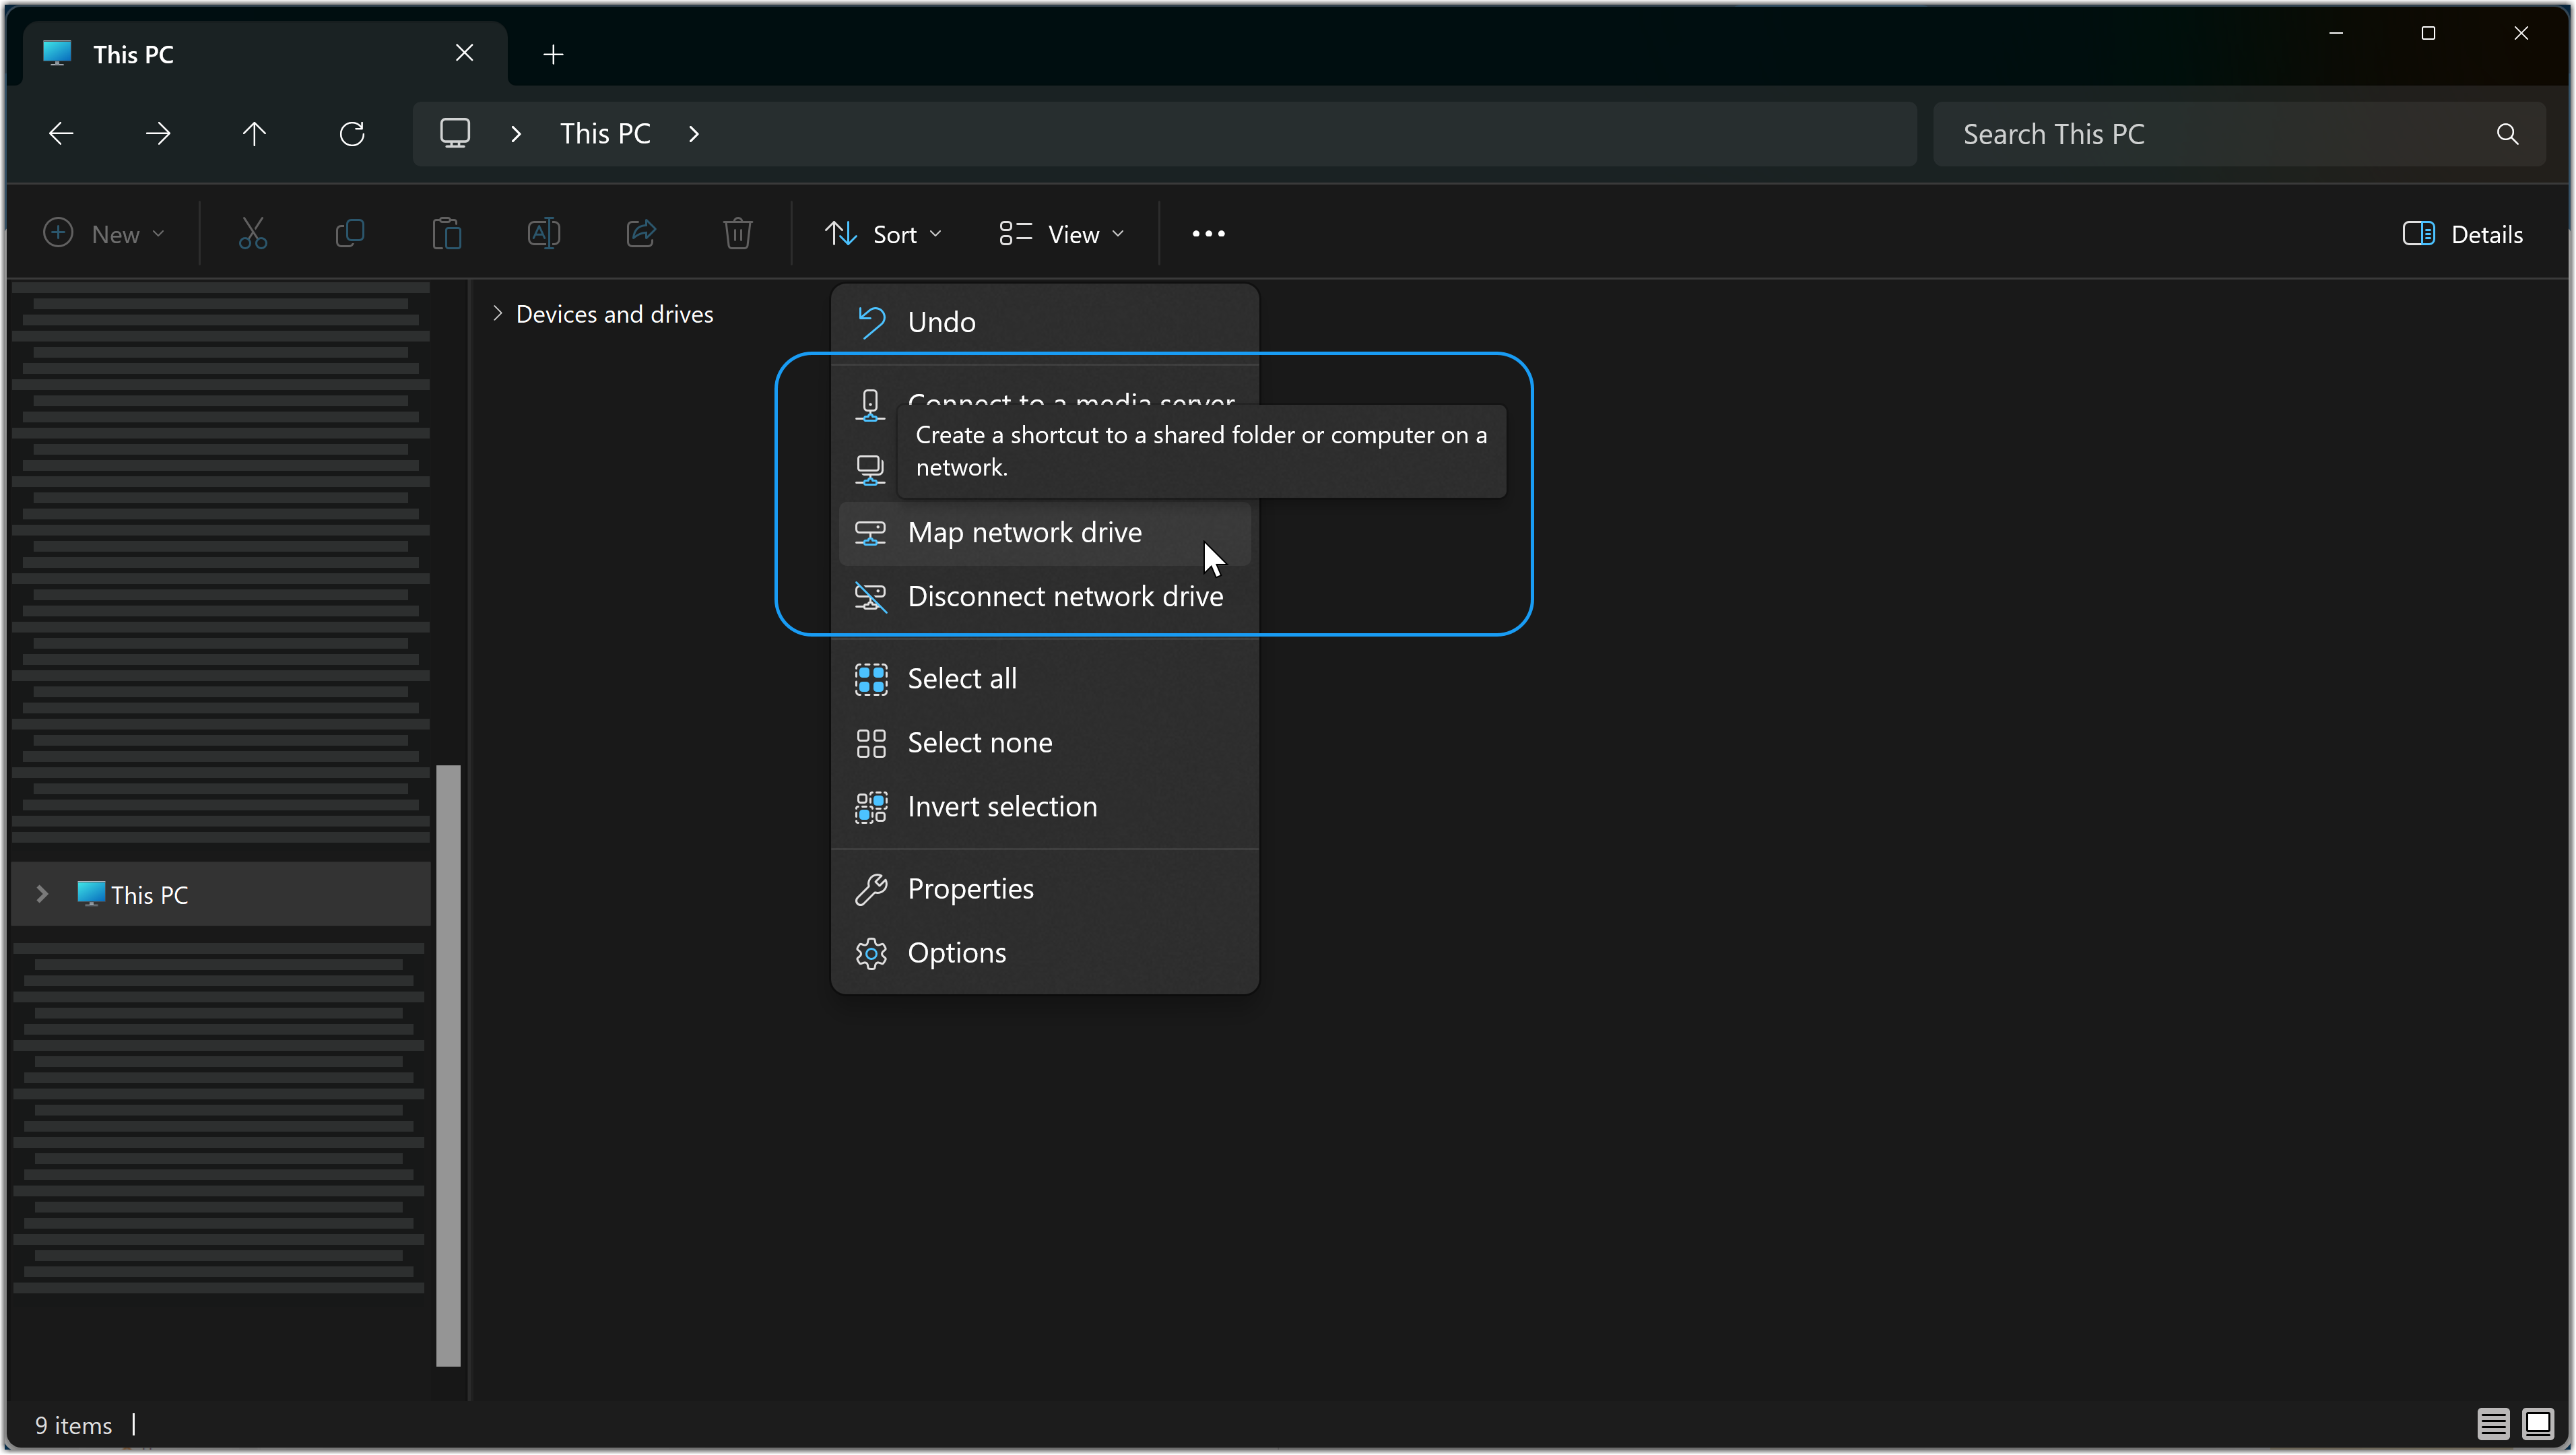
- In File Explorer, select This PC from the navigation pane on the left side.
- Click the three dots in the upper ribbon and choose Map network drive from the dropdown menu.
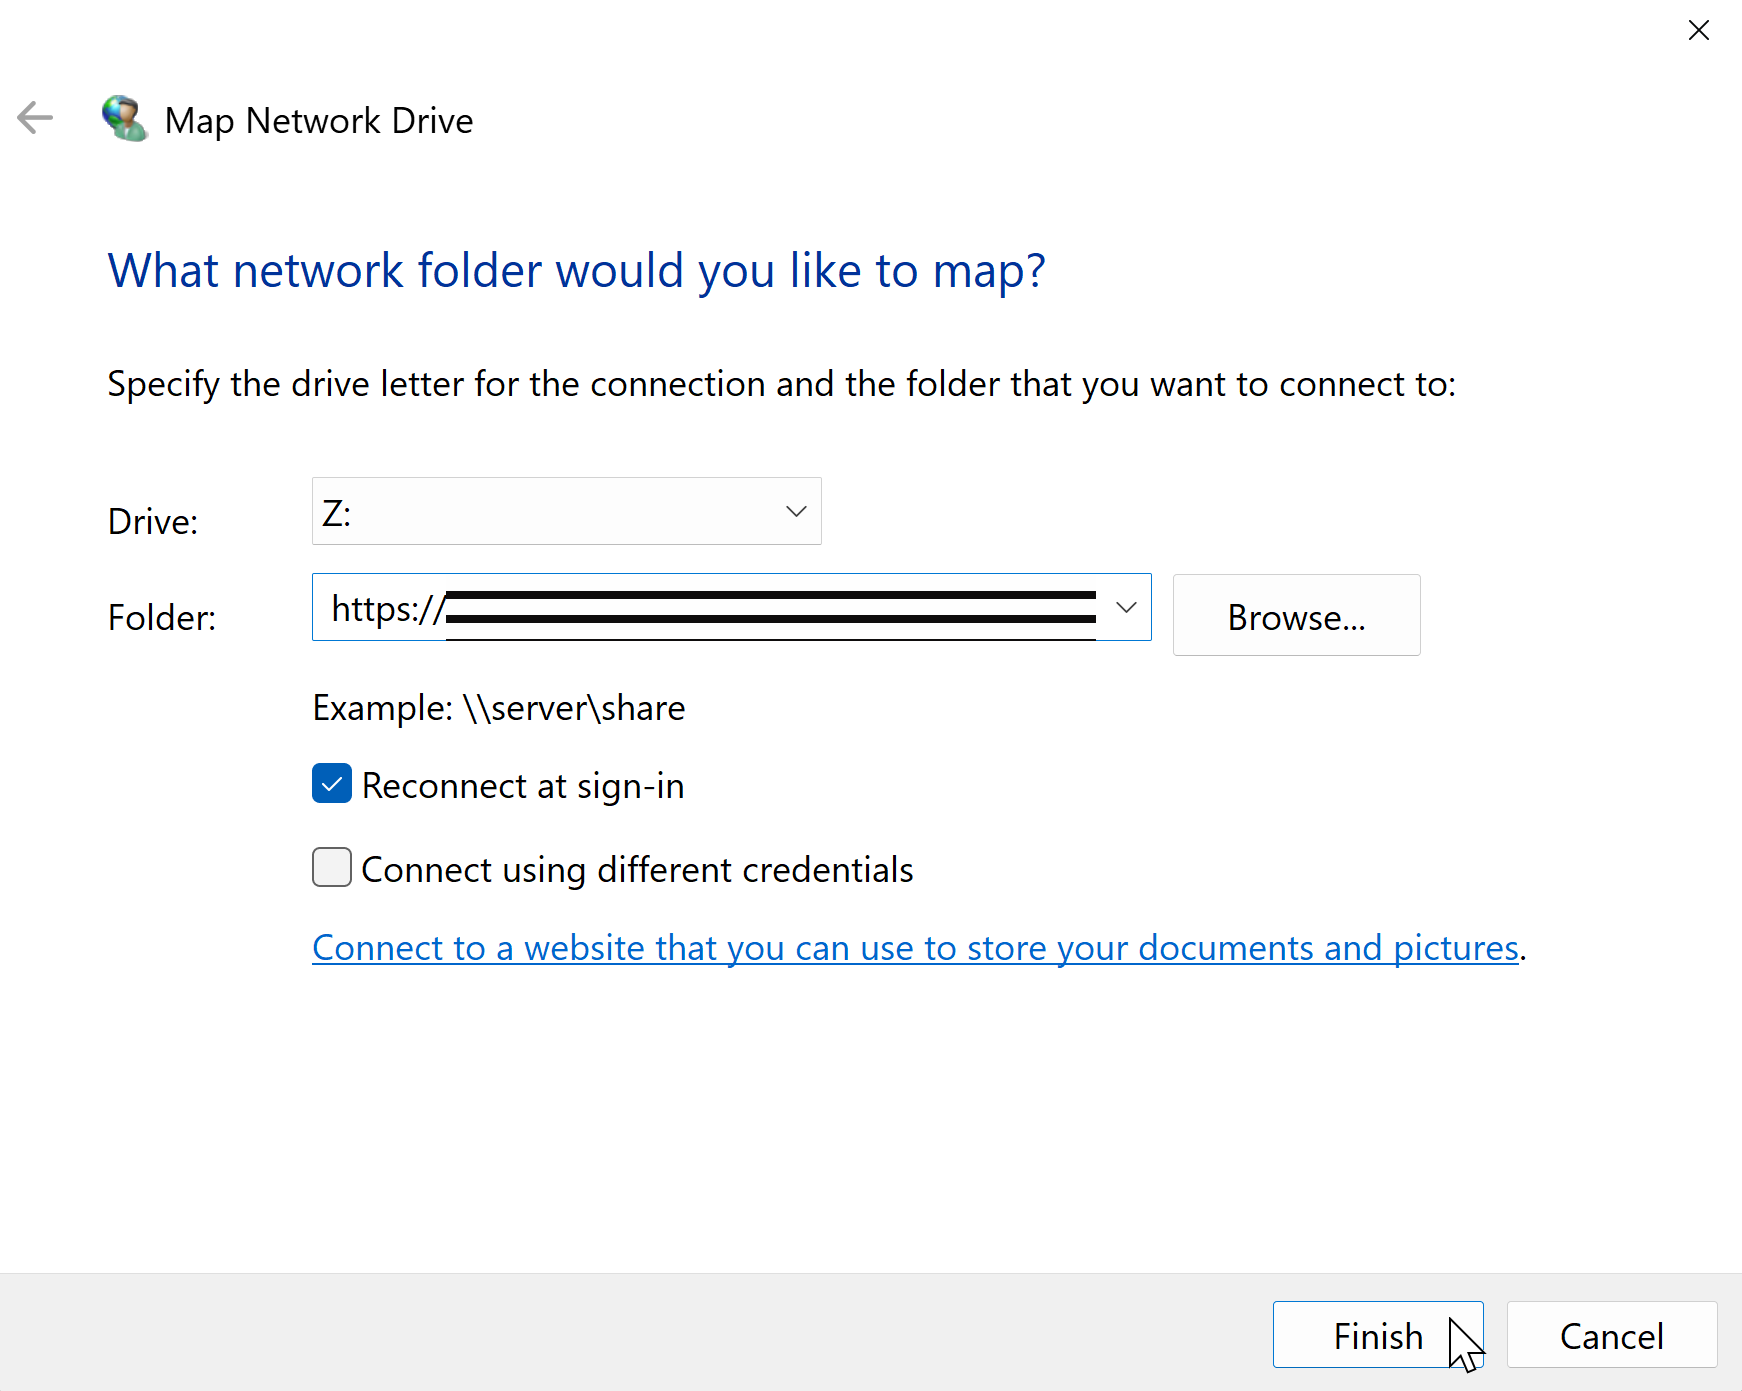
- In the Map Network Drive dialog box:
- Choose a drive letter from the dropdown list (e.g., Z:).
- Enter your WebDAV URL in the Folder field.
- Check the box for Reconnect at sign-in if you want the connection to persist after restarting your computer. Also check Connect using Different Credentials to make sure that windows prompts you for login credentials.
- When prompted, enter your Username and Password from Step-1.
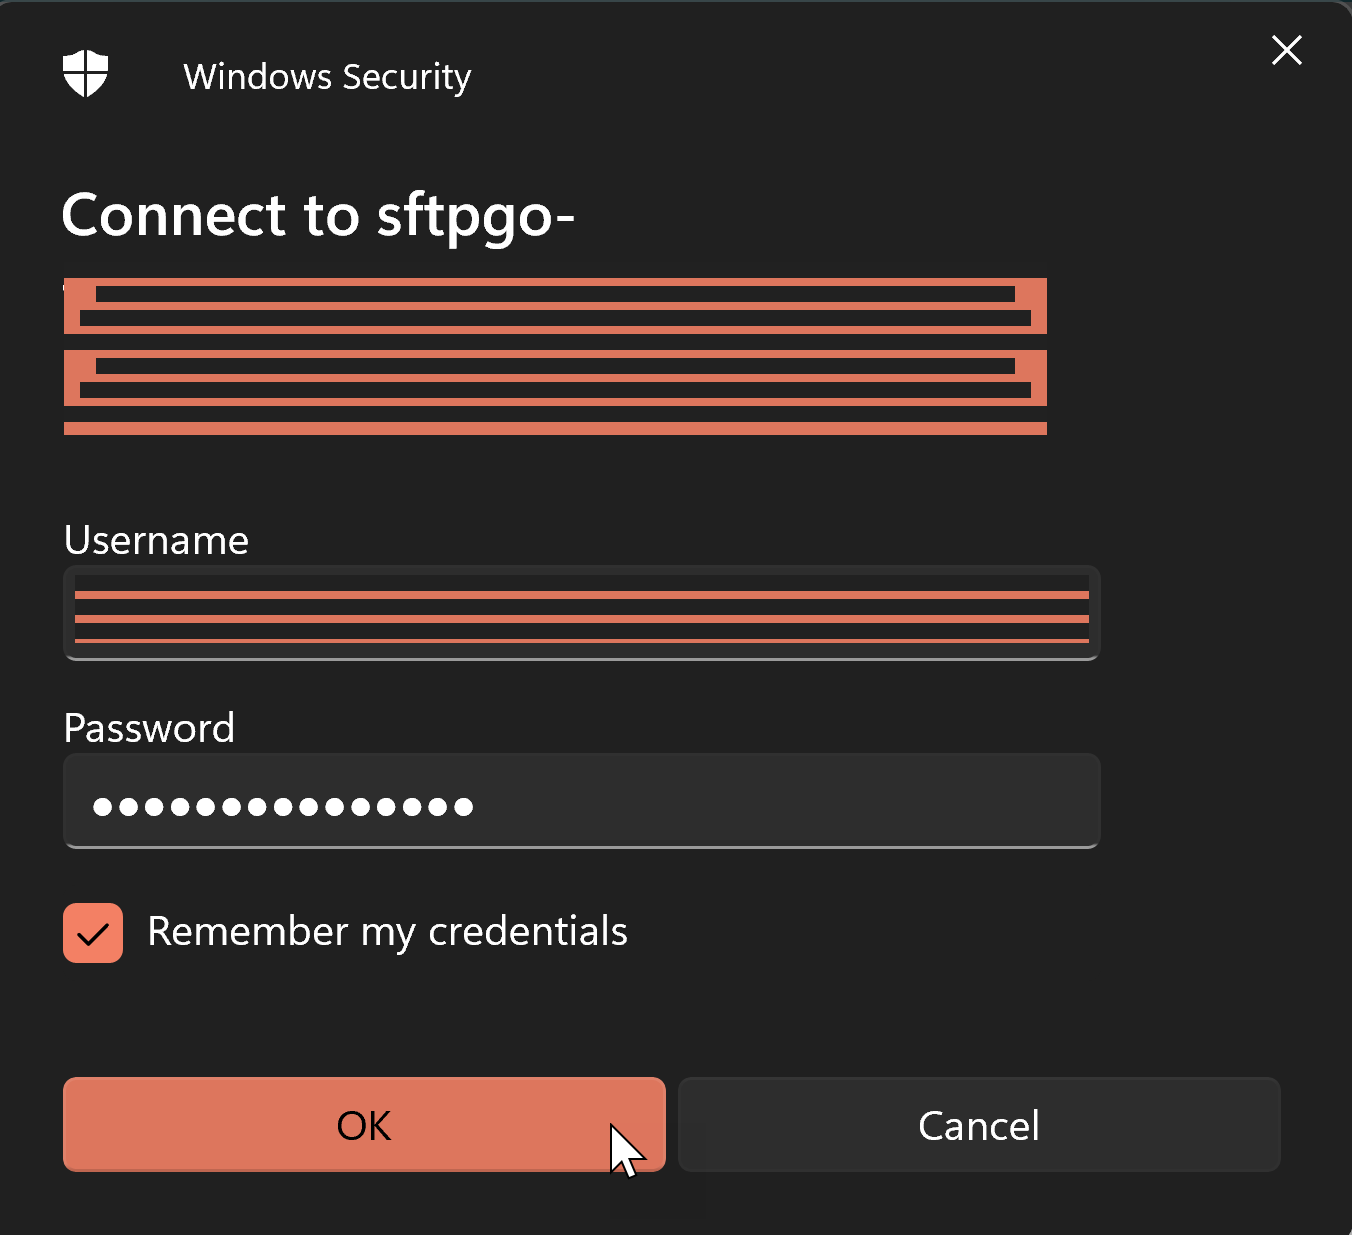
- Check the box for Remember my credentials if you prefer not to re-enter them in the future.
- Click OK to complete the setup.
¶ Step 3: Verify the Connection
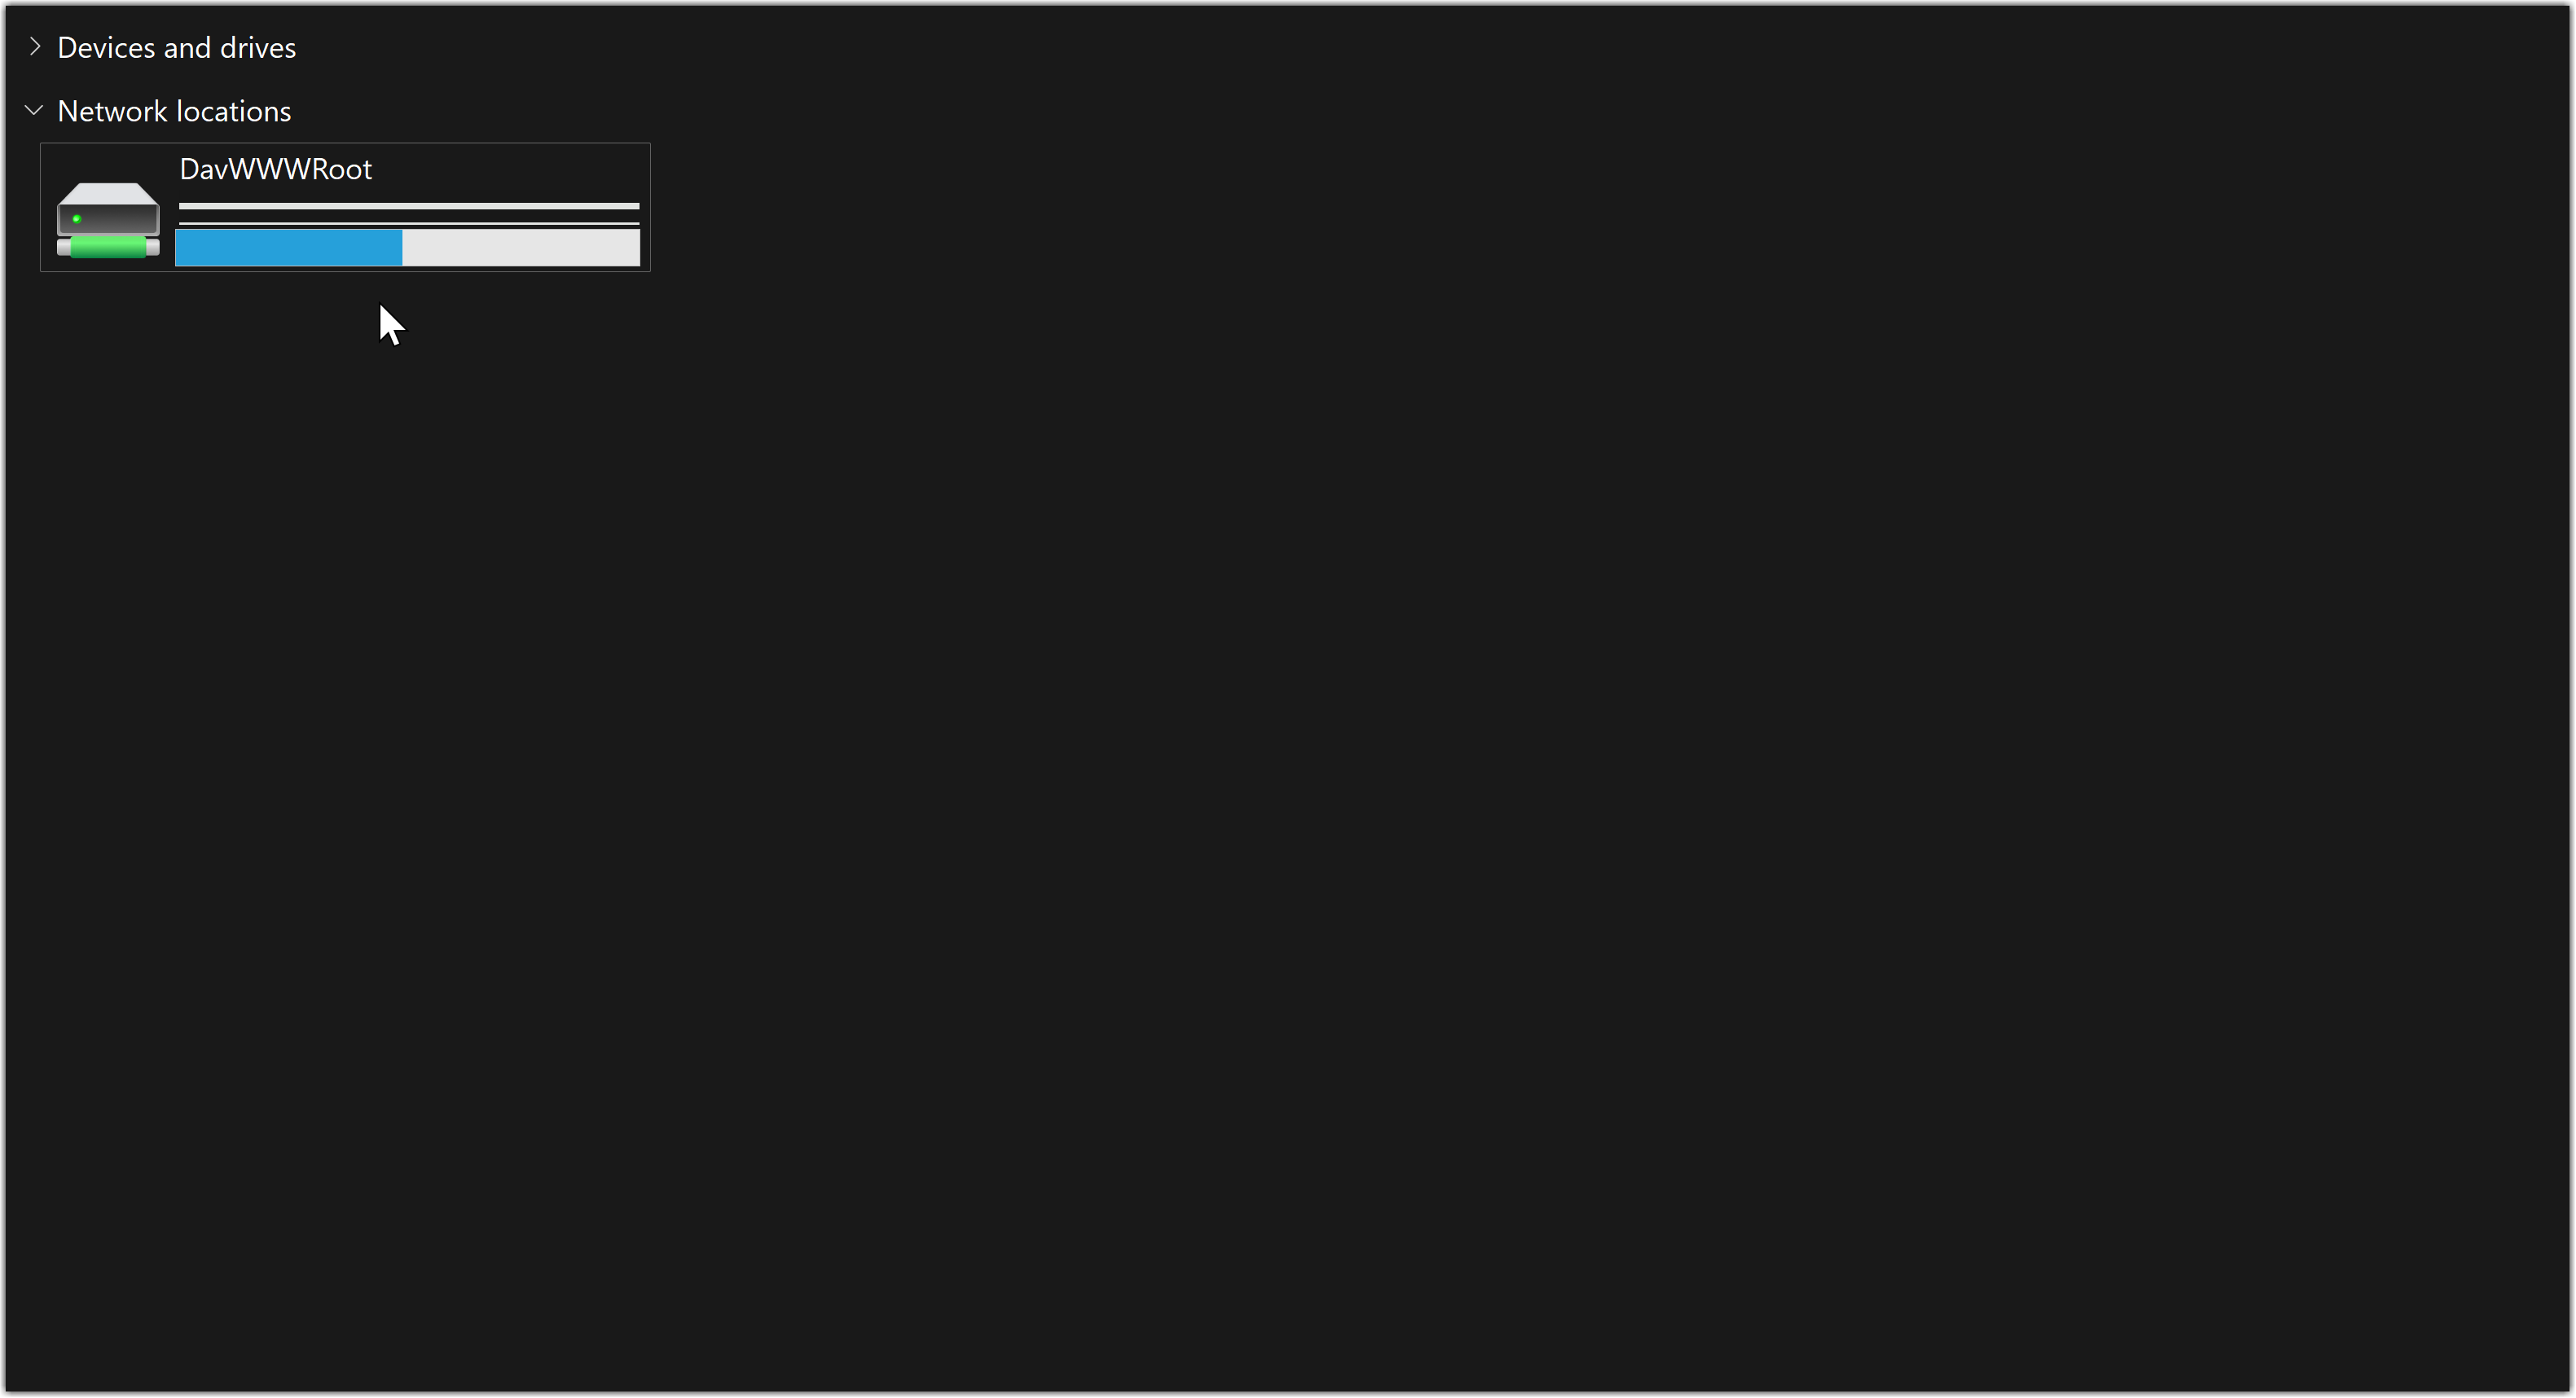
Your GigaDrive should now appear as a network drive under This PC in File Explorer. You can interact with it like any local drive, enabling you to drag and drop files, create folders, and manage your data with ease.
¶ Step 4: Troubleshooting (Optional)
If you are unable to connect to the webdav server, kindly refer to the troubleshooting section.
¶ Connecting from a Linux System
¶ Step 1: Install davfs2
To connect to your GigaDrive via WebDAV, you need to install the davfs2 package, which allows you to mount WebDAV resources as a filesystem. Open a terminal and run the following command:
sudo apt update && sudo apt install davfs2
For other Linux distributions, use the appropriate package manager (e.g., dnf, yum, or pacman).
¶ Step 2: Create a Mount Point
Create a directory that will serve as the mount point for your WebDAV connection. For example:
mkdir ~/GigaDrive
¶ Step 3: Retrieve Connection Details
- Navigate to the Application Manager on your dashboard and search for SFTPGo.
- Click
Installand follow the on-screen instructions to install SFTPGo. - Once SFTPGo is installed, click
Accessbutton to locate your WebDAV connection details. Note down the following:- WebDAV URL
- Username
- Password
¶ Step 4: Mount the WebDAV Resource
Use the following command to mount your GigaDrive to the directory created in Step 2:
sudo mount -t davfs <WebDAV_URL> ~/GigaDrive
Replace <WebDAV_URL> with the URL you noted earlier.
¶ Step 5: Provide Credentials
When prompted, enter your Username and Password. To avoid entering credentials repeatedly, you can add them to a configuration file:
- Edit the davfs2 secrets file:
sudo nano /etc/davfs2/secrets - Add the following line, replacing the placeholders with your details:
<WebDAV_URL> <username> <password> - Save and close the file.
¶ Step 6: Adjust Permissions
To allow non-root users to mount the WebDAV resource, add your user to the davfs2 group:
sudo usermod -aG davfs2 $USER
Log out and log back in for the changes to take effect.
¶ Step 7: Automate Mounting (Optional)
To mount the WebDAV resource automatically at startup:
- Edit the fstab file:
sudo nano /etc/fstab - Add the following line:
<WebDAV_URL> ~/GigaDrive davfs user,rw,auto 0 0 - Save and close the file.
¶ Step 8: Verify the Connection
Navigate to the mount point directory (e.g., ~/GigaDrive) and confirm you can access your files. You can now manage your GigaDrive as if it were a local directory.
¶ Troubleshooting
¶ Windows
If you are unable to mount your GigaDrive on windows using webdav, please follow these steps
- Disable Windows Defender and Windows Firewall and check again.
- If you are using any 3rd party firewall/antivirus, disable that and check again.
- If disabling antivirus resolves the issue, then you need to add the WebDAV URL/Hostname as an exception to your antivirus/firewall.
- If you are still having issues, kindly contact our support.
¶ Alternative WebDAV Clients
-
WinSCP (Free)
A powerful client supporting WebDAV, SFTP, FTP, and SCP with both a graphical interface and command-line functionality. -
Cyberduck (Free & Paid)
An open-source client with an intuitive interface, supporting WebDAV and integration with cloud storage services. -
FileZilla Pro (Paid)
An enhanced version of the popular FileZilla client, offering WebDAV support and connectivity to cloud platforms. -
BitKinex (Free)
A multi-threaded and free client supporting WebDAV, FTP, and SFTP, enabling efficient and fast file transfers. -
SmartFTP (Paid)
A professional-grade file transfer client with WebDAV support, scheduling, remote file editing, and advanced security features. -
RaiDrive (Free & Paid) - Supports Mounting
Allows users to map WebDAV servers as local drives for seamless file management via Windows Explorer. A Pro version unlocks additional features. -
Mountain Duck (Paid) - Supports Mounting
Mounts WebDAV servers as local disks, integrating them directly with the native file explorer for smooth file management. -
ExpanDrive (Paid) - Supports Mounting
A network file system client that maps WebDAV storage as local volumes, making it accessible for applications just like a local drive.