¶ Intro
Syncthing is a free, open-source peer-to-peer file synchronization application available for Windows, Mac, Linux, Android, Solaris, Darwin, and BSD. It synchronizes files between two or more computers in real time, safely protected from prying eyes. Your data is your data alone and you deserve to choose where it is stored, whether it is shared with some third party, and how it’s transmitted over the internet.
![]()
¶ Availability
Please check our application chart to see which GigaDrive Plans are eligible to install this application.
¶ Features
- Powerful Synchronize as many folders as you need with different people or just between your own devices.
- Portable Configure and monitor Syncthing via a responsive and powerful interface accessible via your browser. Works on Mac OS X, Windows, Linux, FreeBSD, Solaris and OpenBSD. Run it on your desktop computers and synchronize them with your server for backup.
- Simple Syncthing doesn’t need IP addresses or advanced configuration: it just works, over LAN and over the Internet. Every machine is identified by an ID. Give your ID to your friends, share a folder and watch: UPnP will do if you don’t want to port forward or you don’t know how.
- Private None of your data is ever stored anywhere else other than on your computers. There is no central server that might be compromised, legally or illegally.
- Encrypted All communication is secured using TLS. The encryption used includes perfect forward secrecy to prevent any eavesdropper from ever gaining access to your data.
- Authenticated Every node is identified by a strong cryptographic certificate. Only nodes you have explicitly allowed can connect to your cluster.
- Open Protocol The protocol is a documented specification — no hidden magic.
- Open Source All source code is available on GitHub — what you see is what you get, there is no hidden funny business.
- Open Development Any bugs found are immediately visible for anyone to browse — no hidden flaws.
¶ Installing Syncthing
- Navigate to the Application Manager page and search for
syncthing. - Click icon to open the installation window and tap Install to start the installation process.
- Once the installation is complete, click icon to open the Access Info page. Then click Go To Application to access
syncthing.
¶ Configuring Syncthing Server
- Once the installation is complete, open syncthing webui.
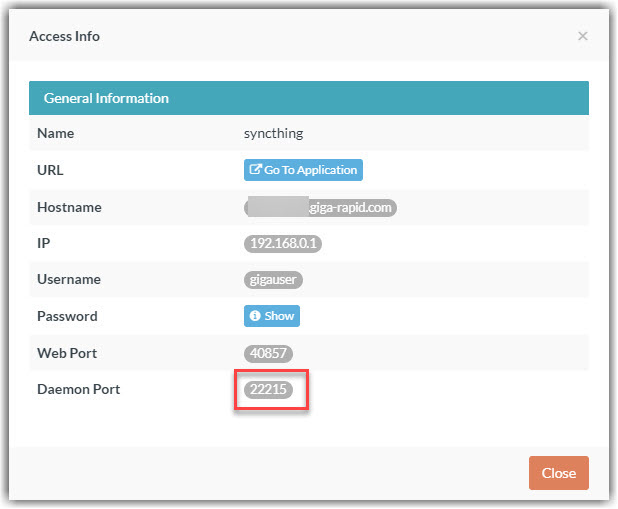
- Click icon to open the Access Info page and note down Daemon Port which will be used later.
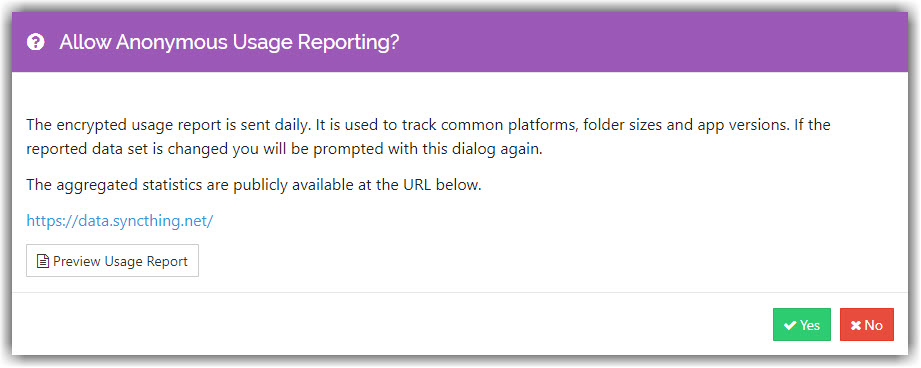
- If you want to send anonymous usage reports to syncthing click Yes. Otherwise click No.
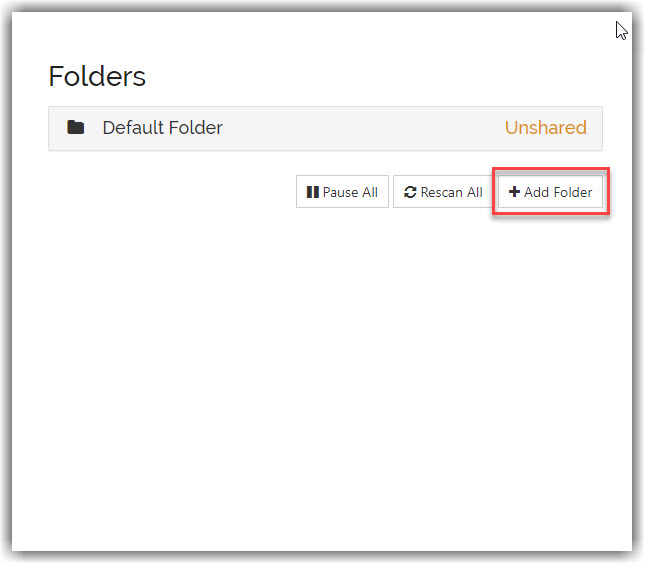
- Click Add Folder under the Folders panel.
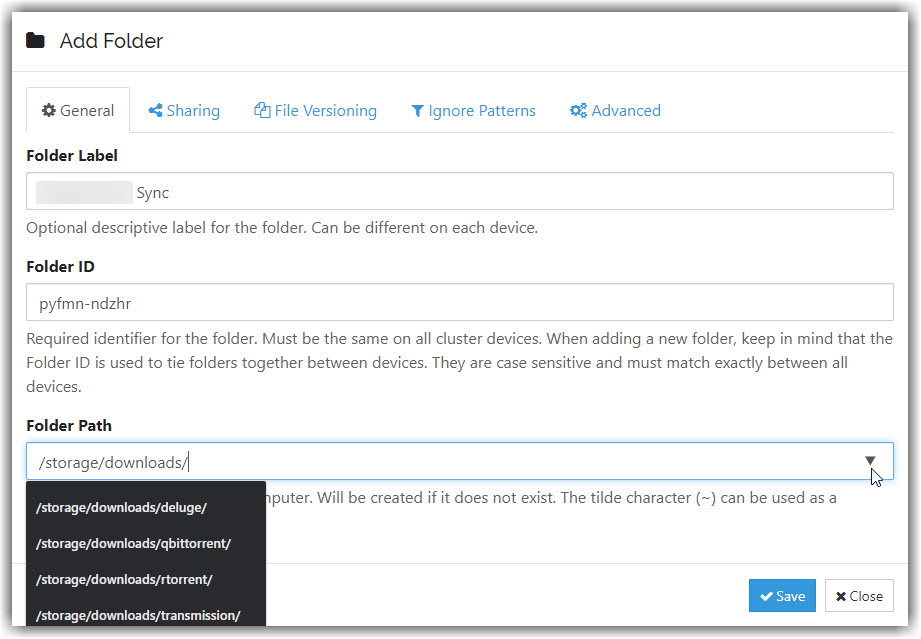
- Set Folder Label to anything. Type
/storage/in the field of Folder Path and select the folder you want to sync from the dropdown menu.
- Click Save.
- Navigate to Actions > Settings > Connections and uncheck the option Enable Relaying.
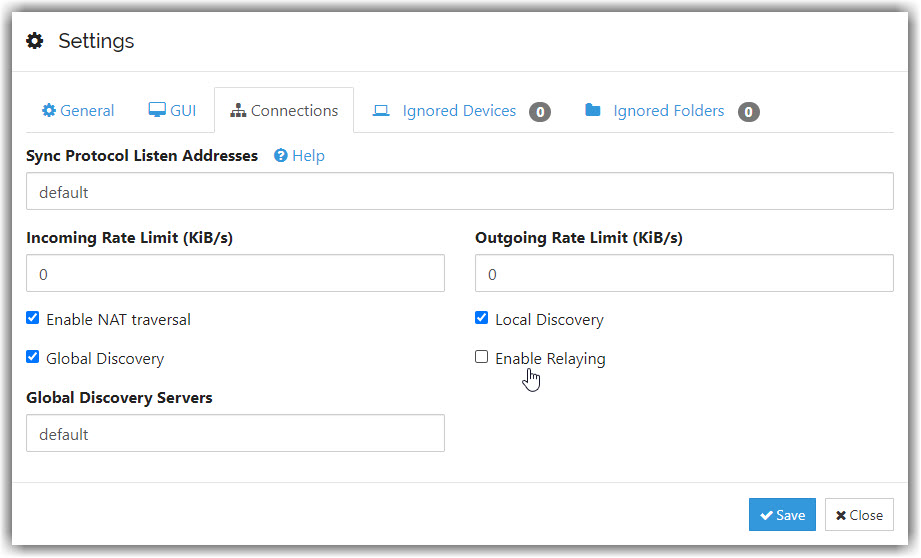
Relaying needs to be disabled if you want to achieve maximum transfer speed. Incase you are unable to establish a direct connection with the syncthing server, you need to keep this option enabled.
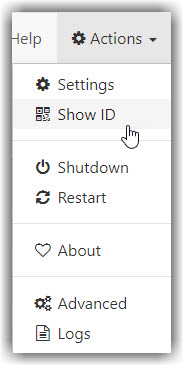
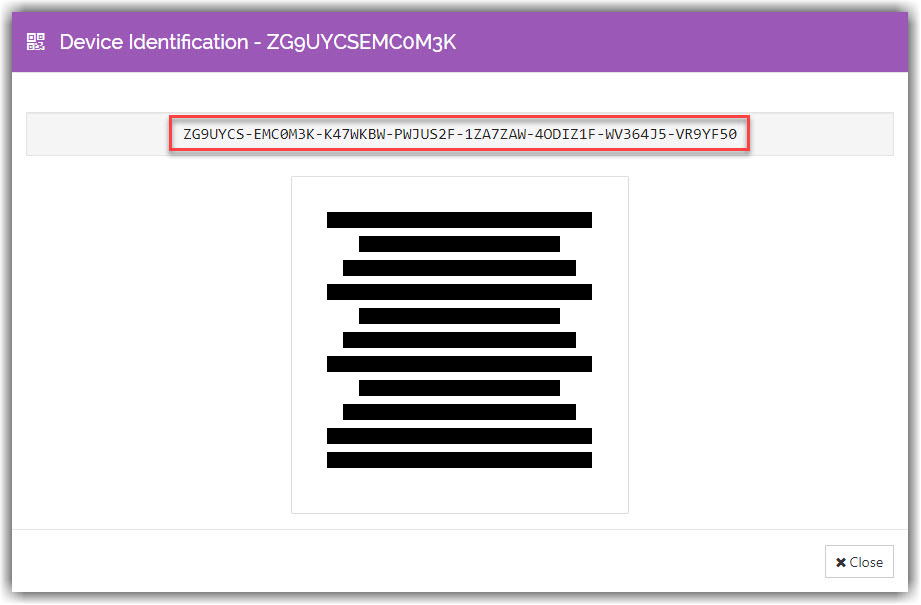
- Navigate to Actions > Show ID on your syncthing server’s webui and note down the device id.
¶ Configuring Syncthing Client
¶ For Windows
- Download and install SyncTrazor.
- If you want to send anonymous usage reports to syncthing click Yes. Otherwise click No.

- Navigate to Actions > Settings > Connections and uncheck the option Enable Relaying.

Relaying needs to be disabled if you want to achieve maximum transfer speed. Incase you are unable to establish a direct connection with the syncthing server, you need to enable this option.
- Then under Remote Devices, click Add Remote Device.
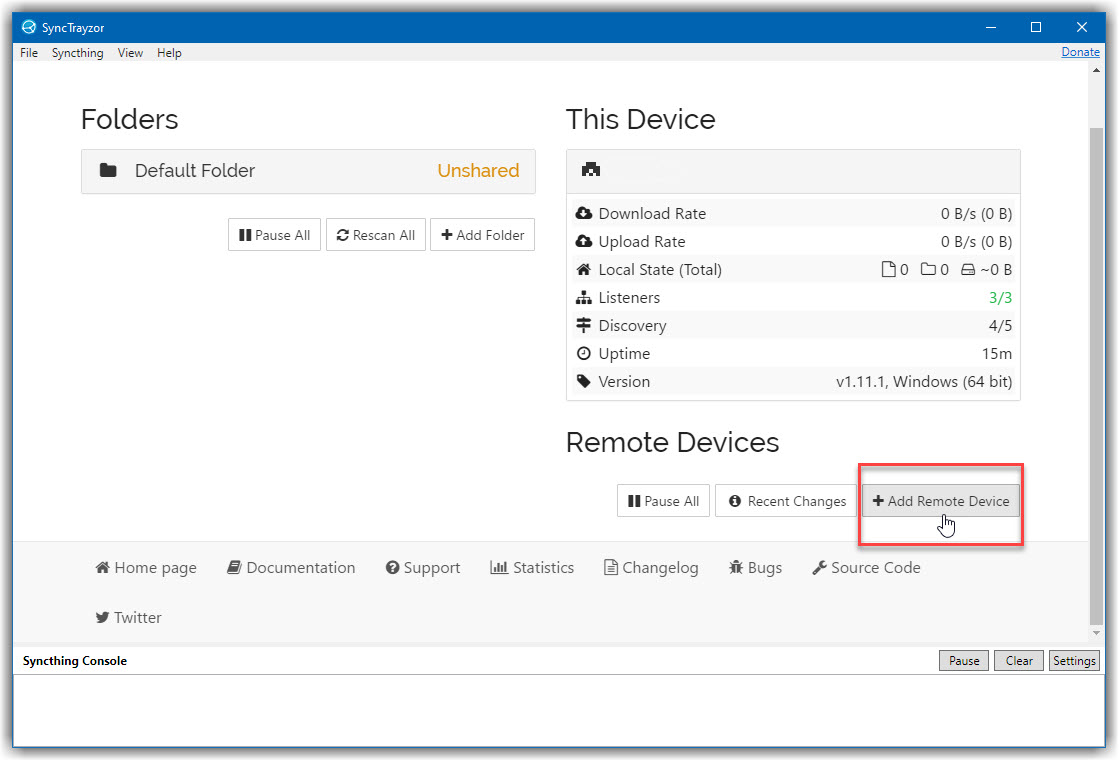
- Enter the Device ID from step 8 of the previous section. Switch to Sharing tab and check the option Auto Accept.
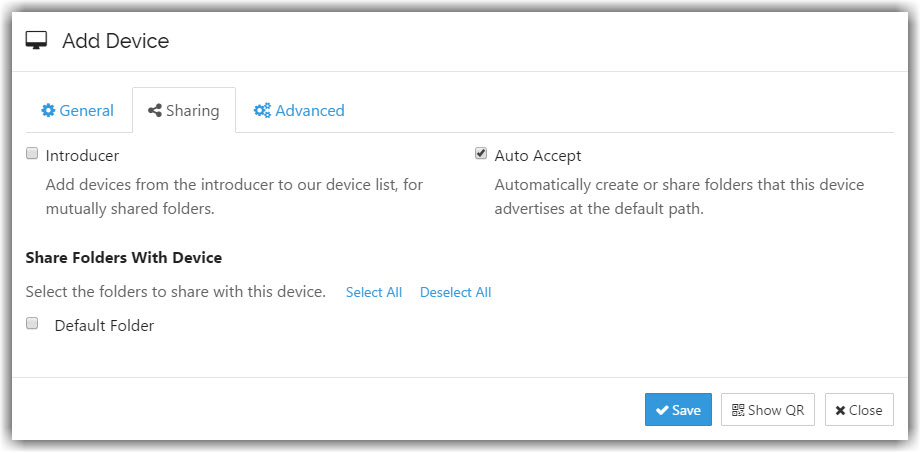
- Switch to the Advanced tab. Change addresses value from
Dynamictotcp://GigaDrive.IP:DAEMON_PORT. Refer to step 2 of the previous section for the DAEMON_PORT value.
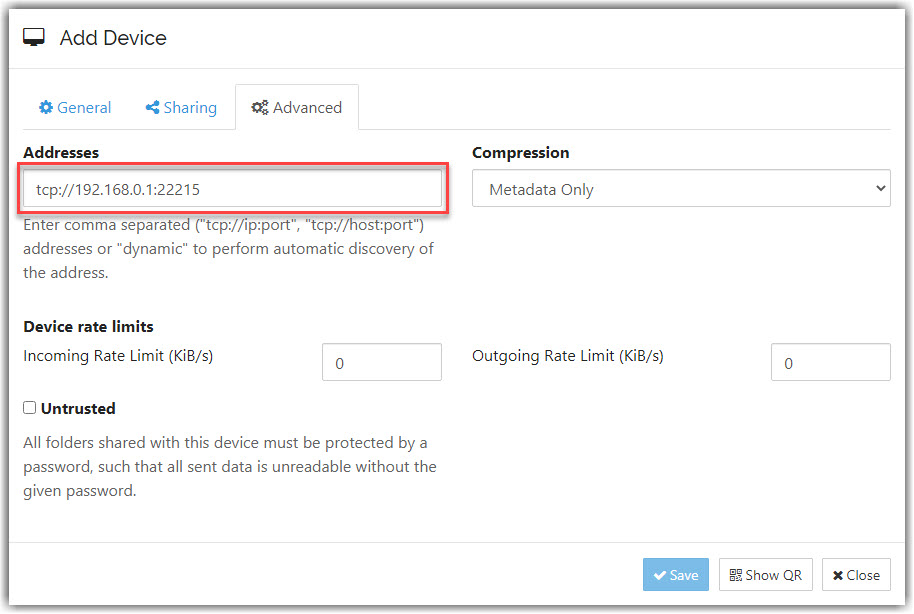
This step is mandatory. If you skip this and leave the addresses field to dynamic, you will get low speed.
- Click Save.
- Open syncthing server webui of your gigadrive. You should see a New Device window. Confirm that it is indeed your device by checking the Device Name and Device ID and click Add device.

- Switch to the Sharing tab. Select the folders to share with this device. Check the option Auto Accept Then click Save.
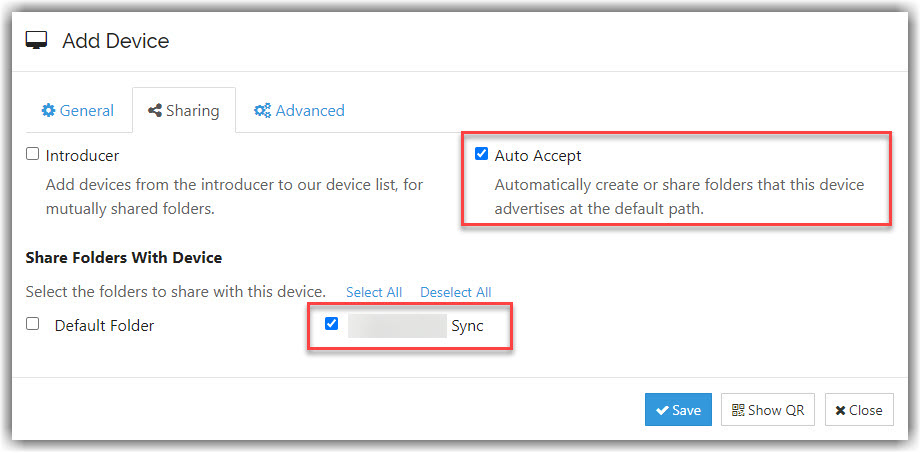
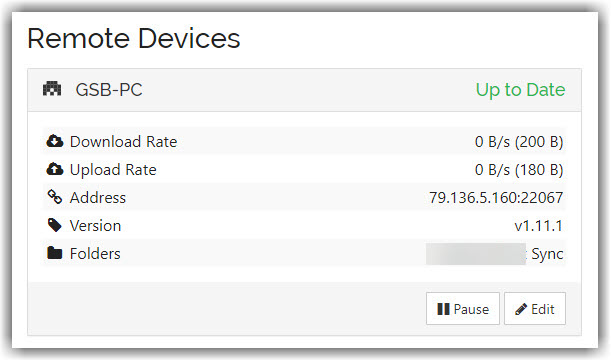
- Once the initial syncing is finished, the Remote Devices panel of your syncthing server’s webui would look like the following.
¶ For Android
- Install Syncthing app from the google play store.
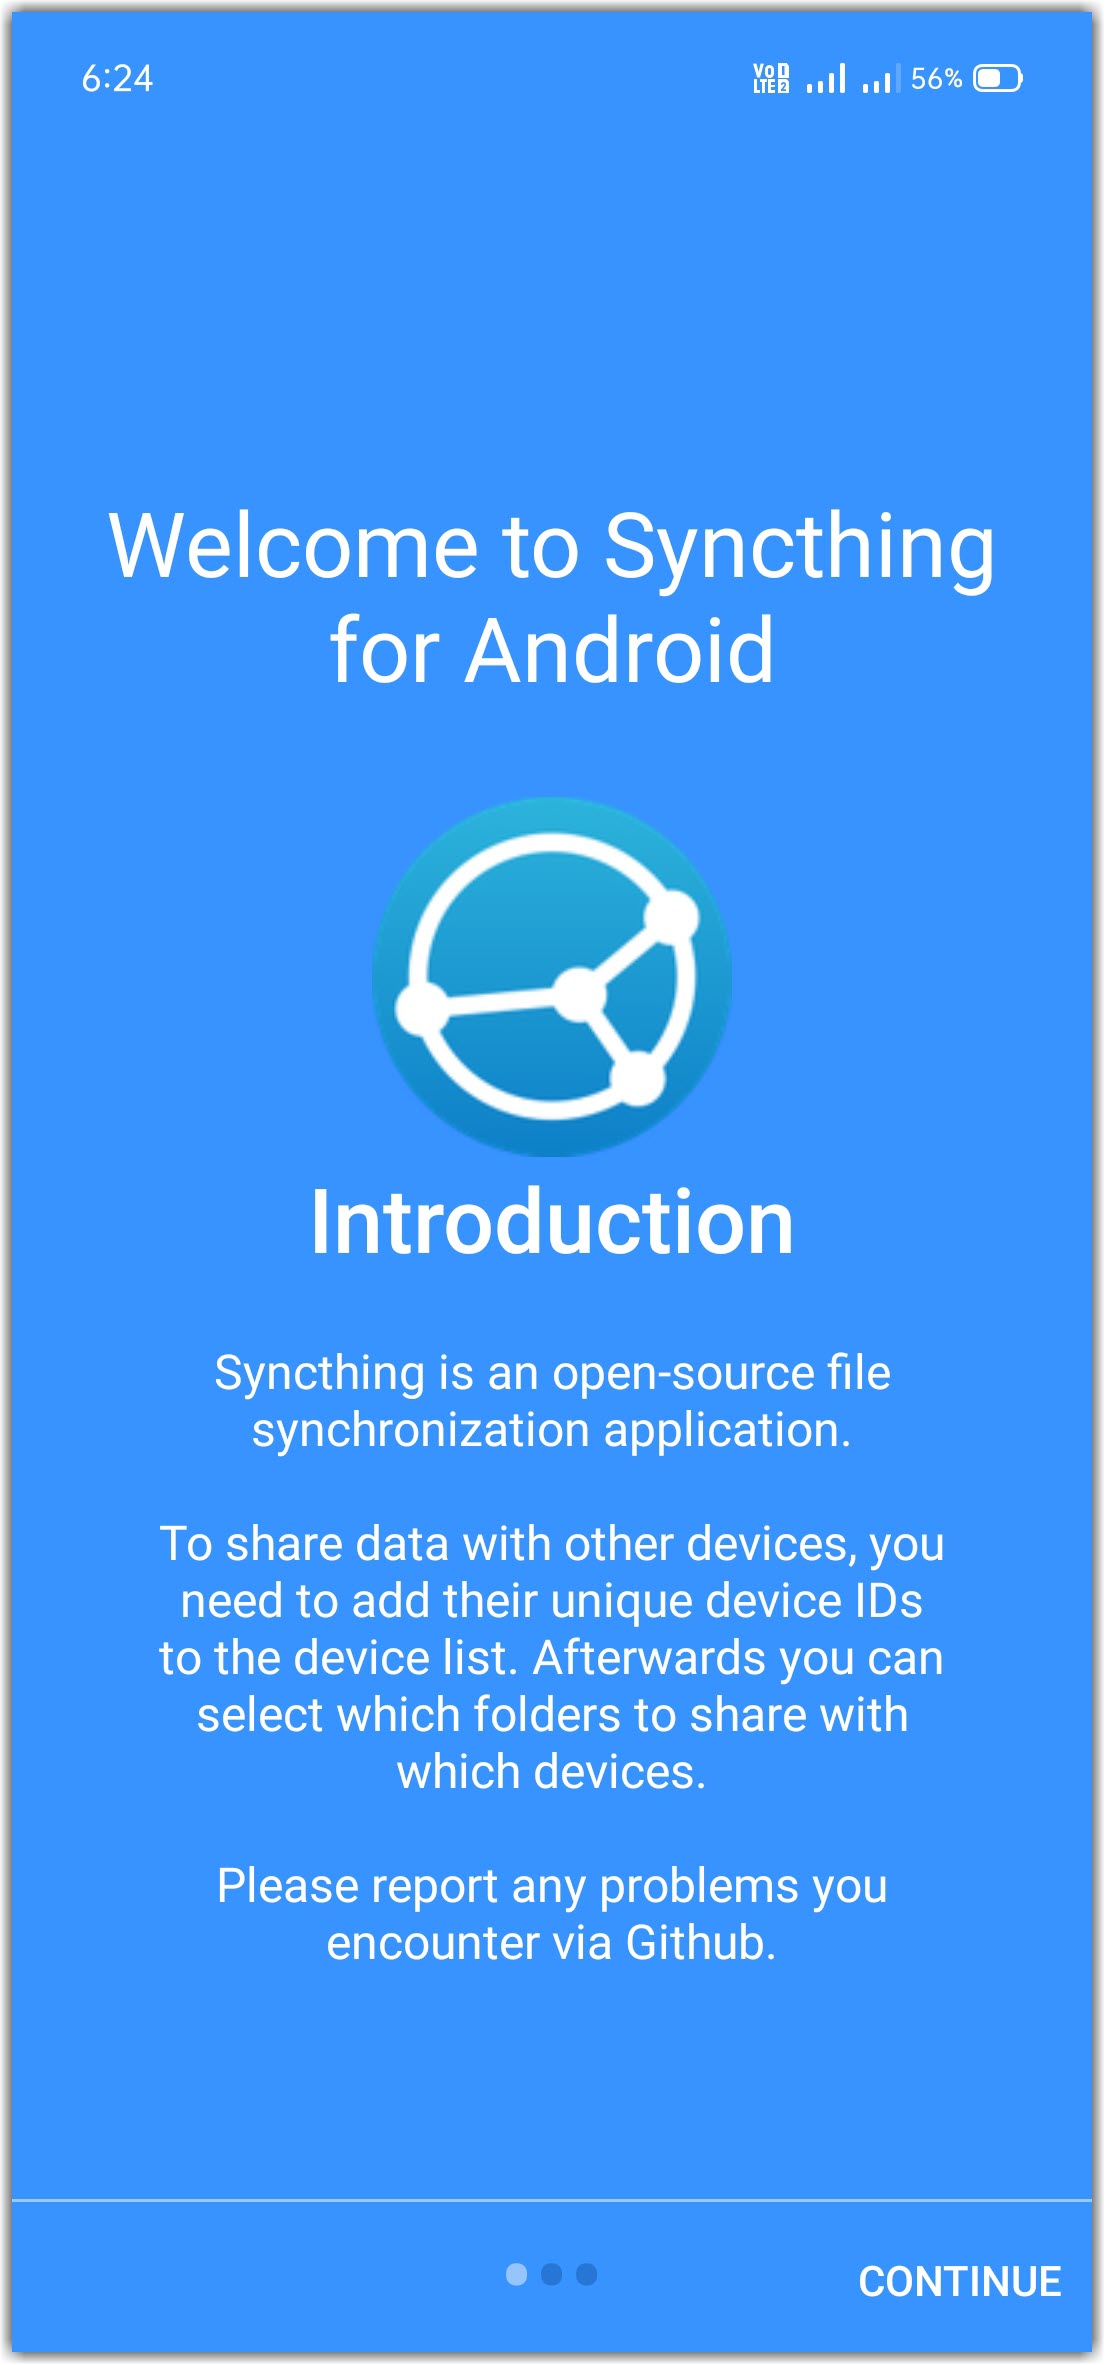
- Open Syncthing app and tap Continue at the bottom right.
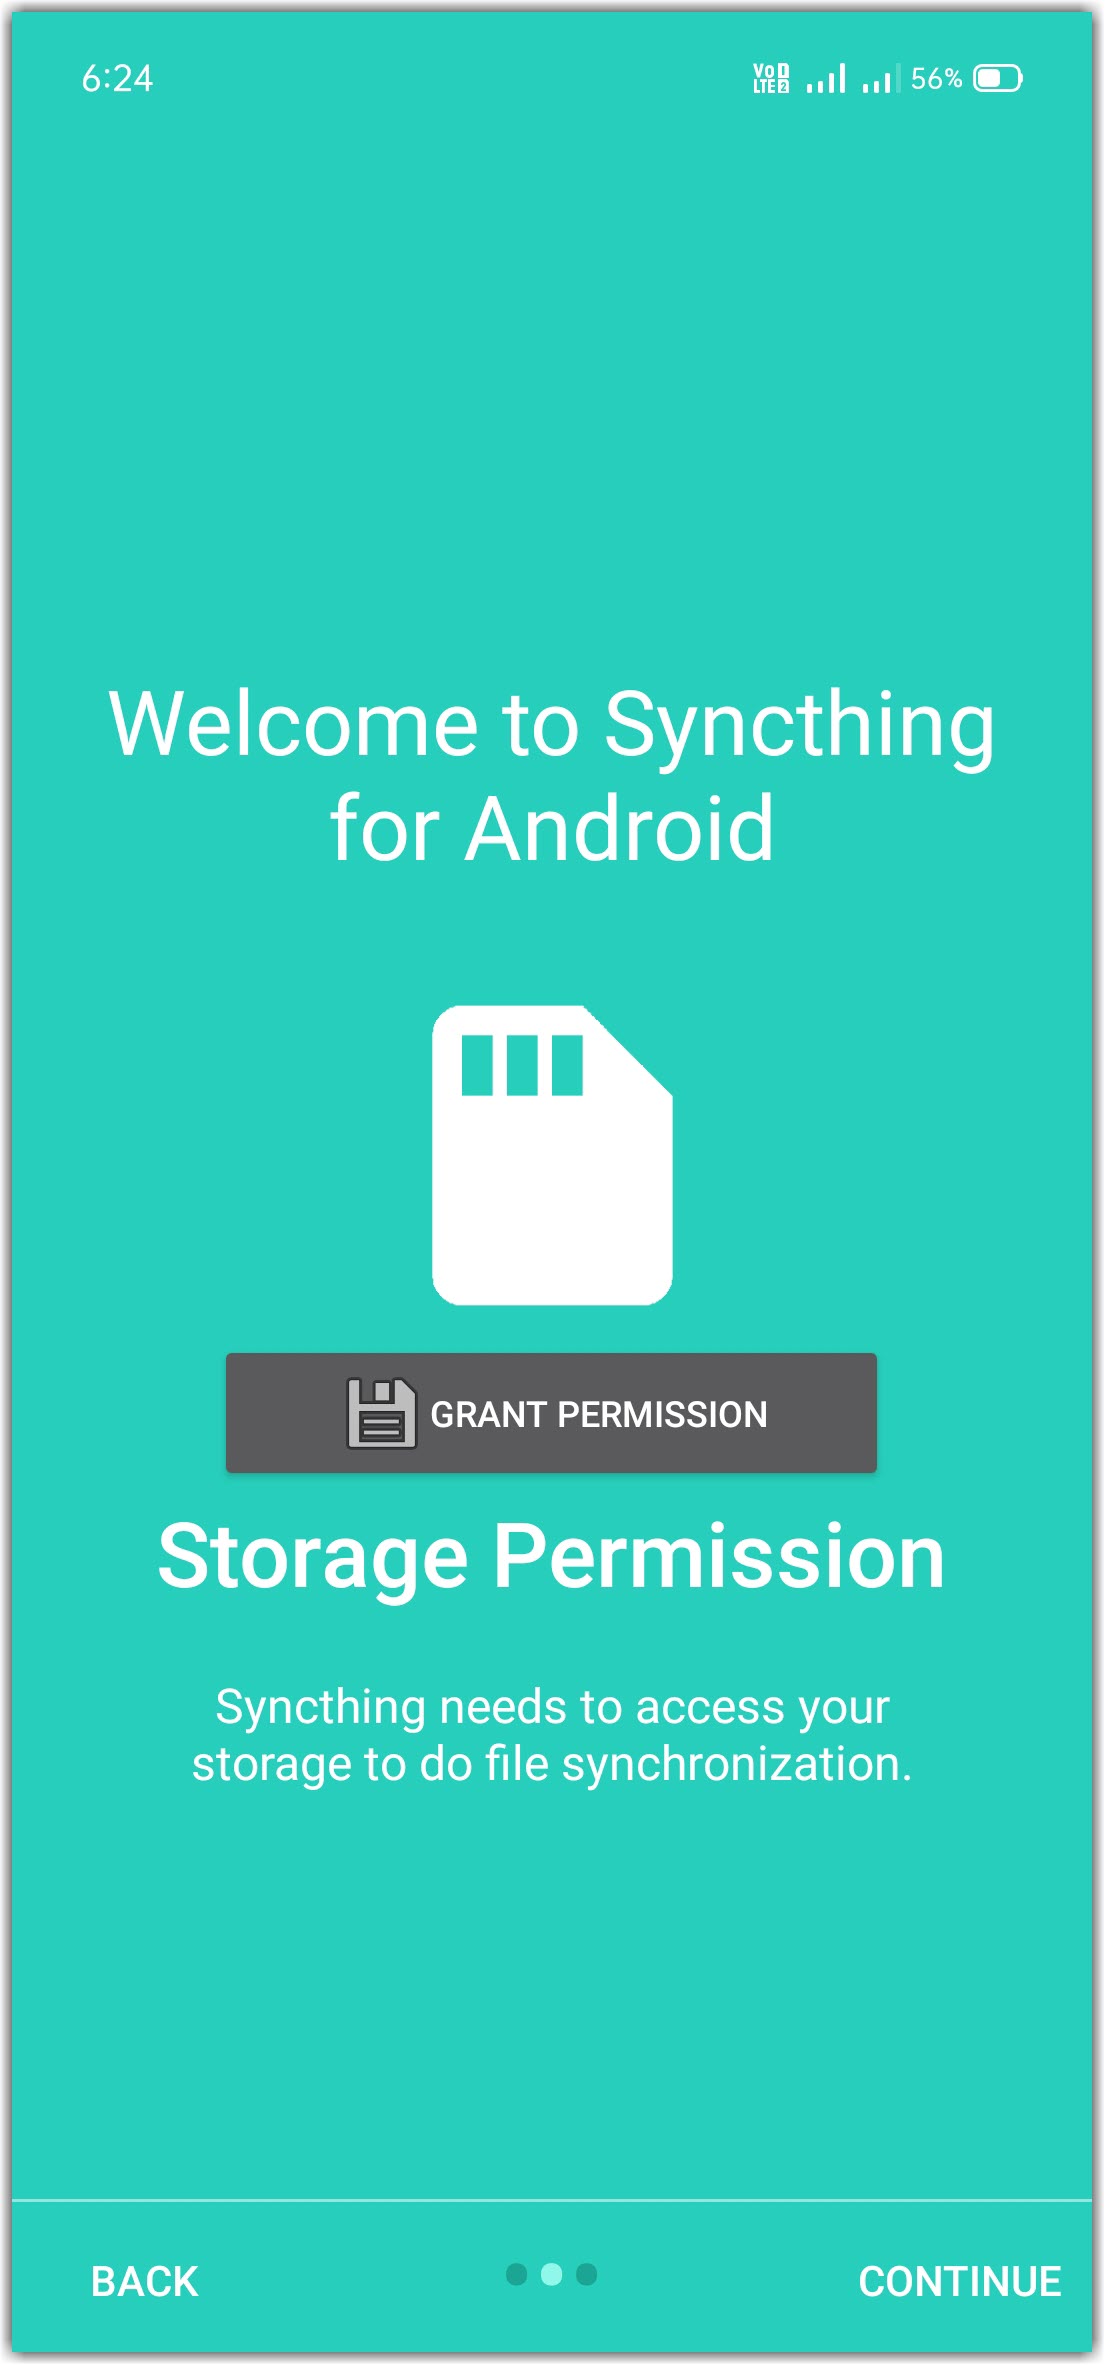
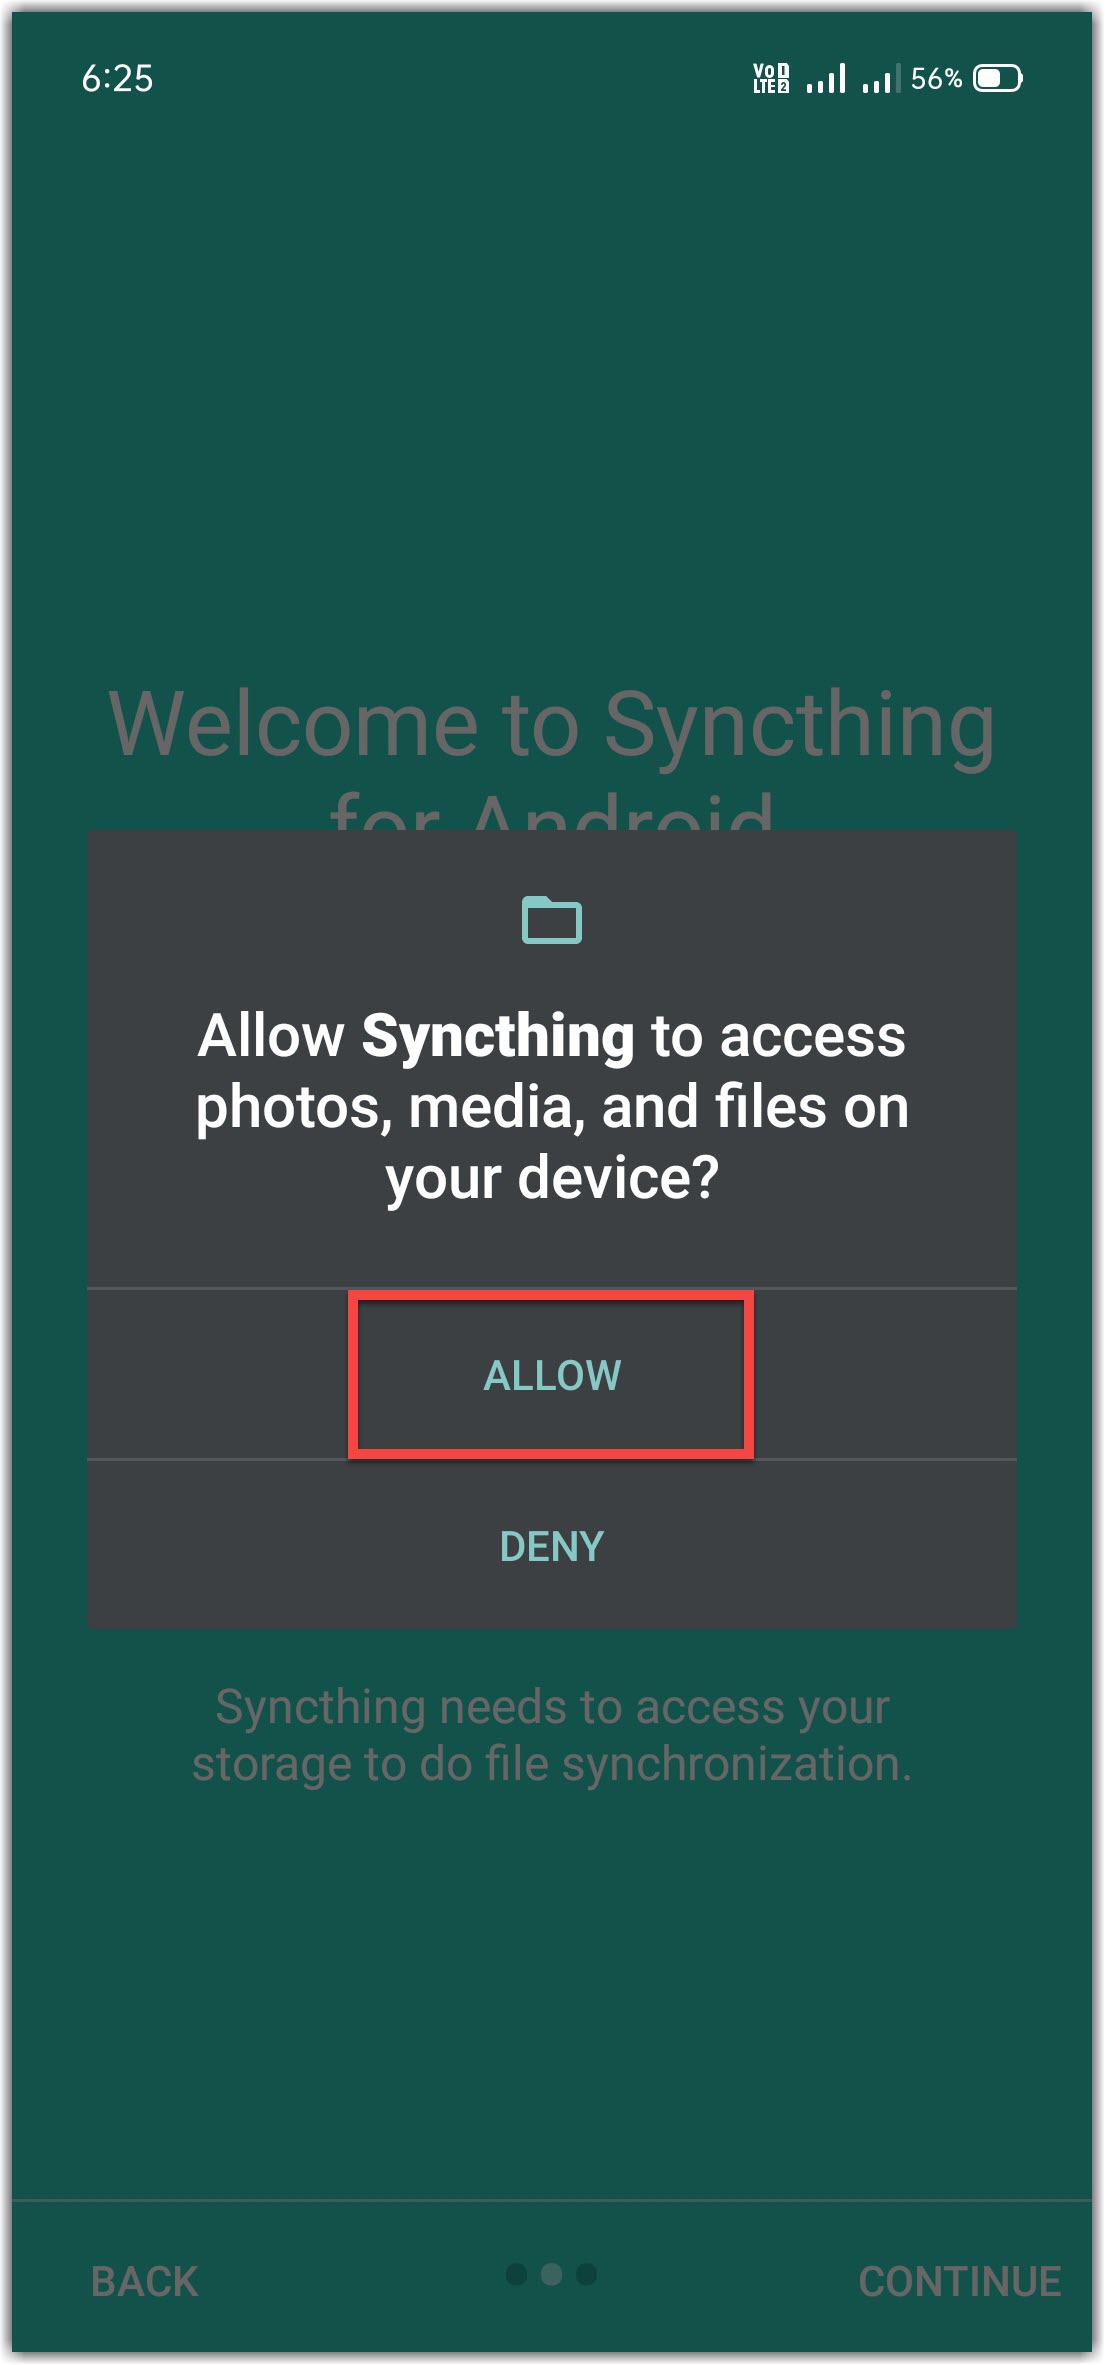
- Tap GRANT PERMISSION to allow storage access and tap Continue.
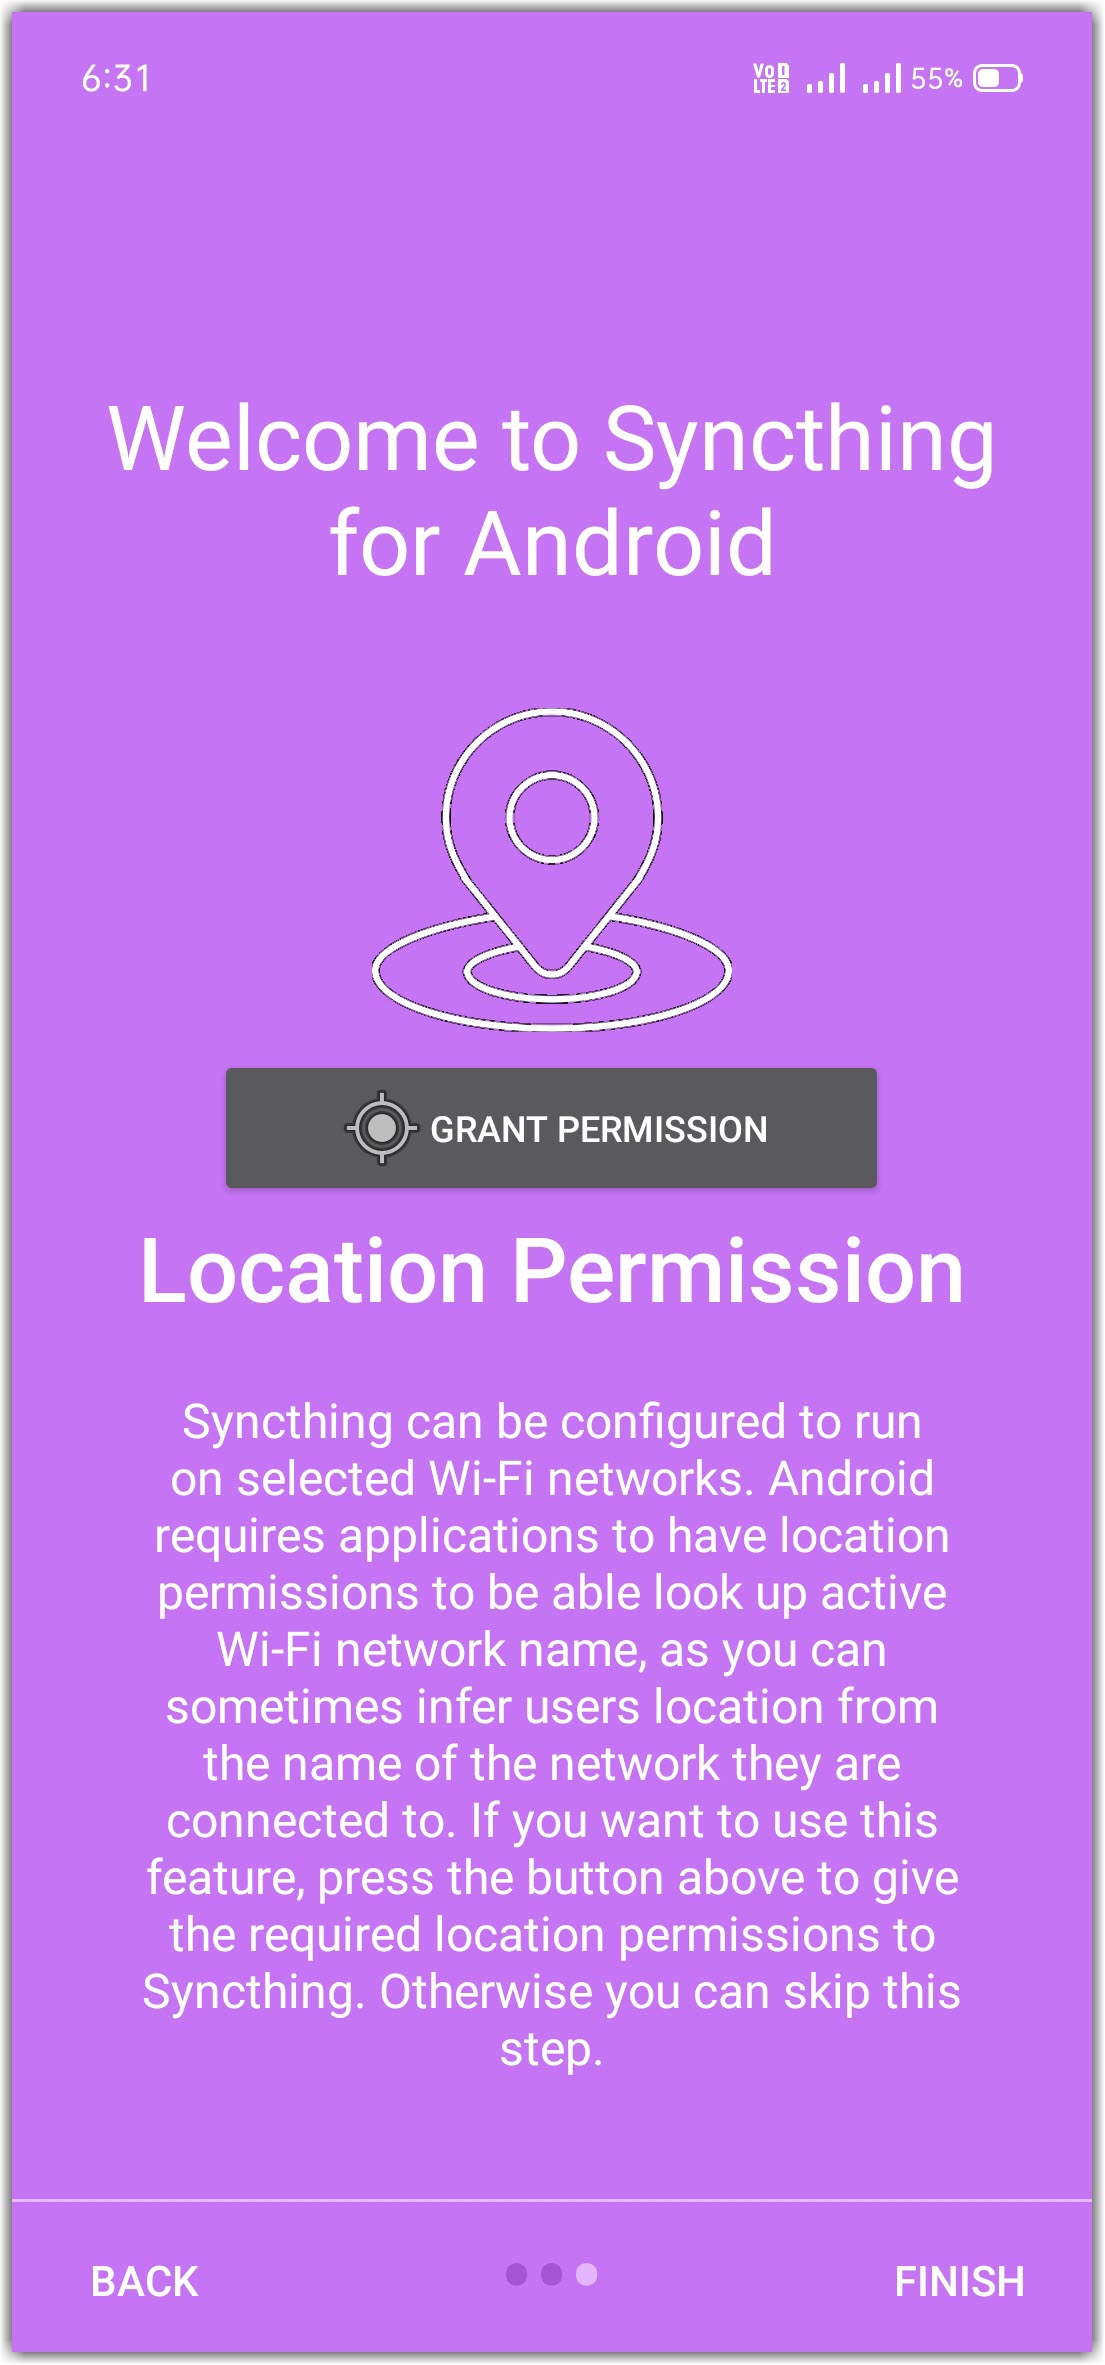
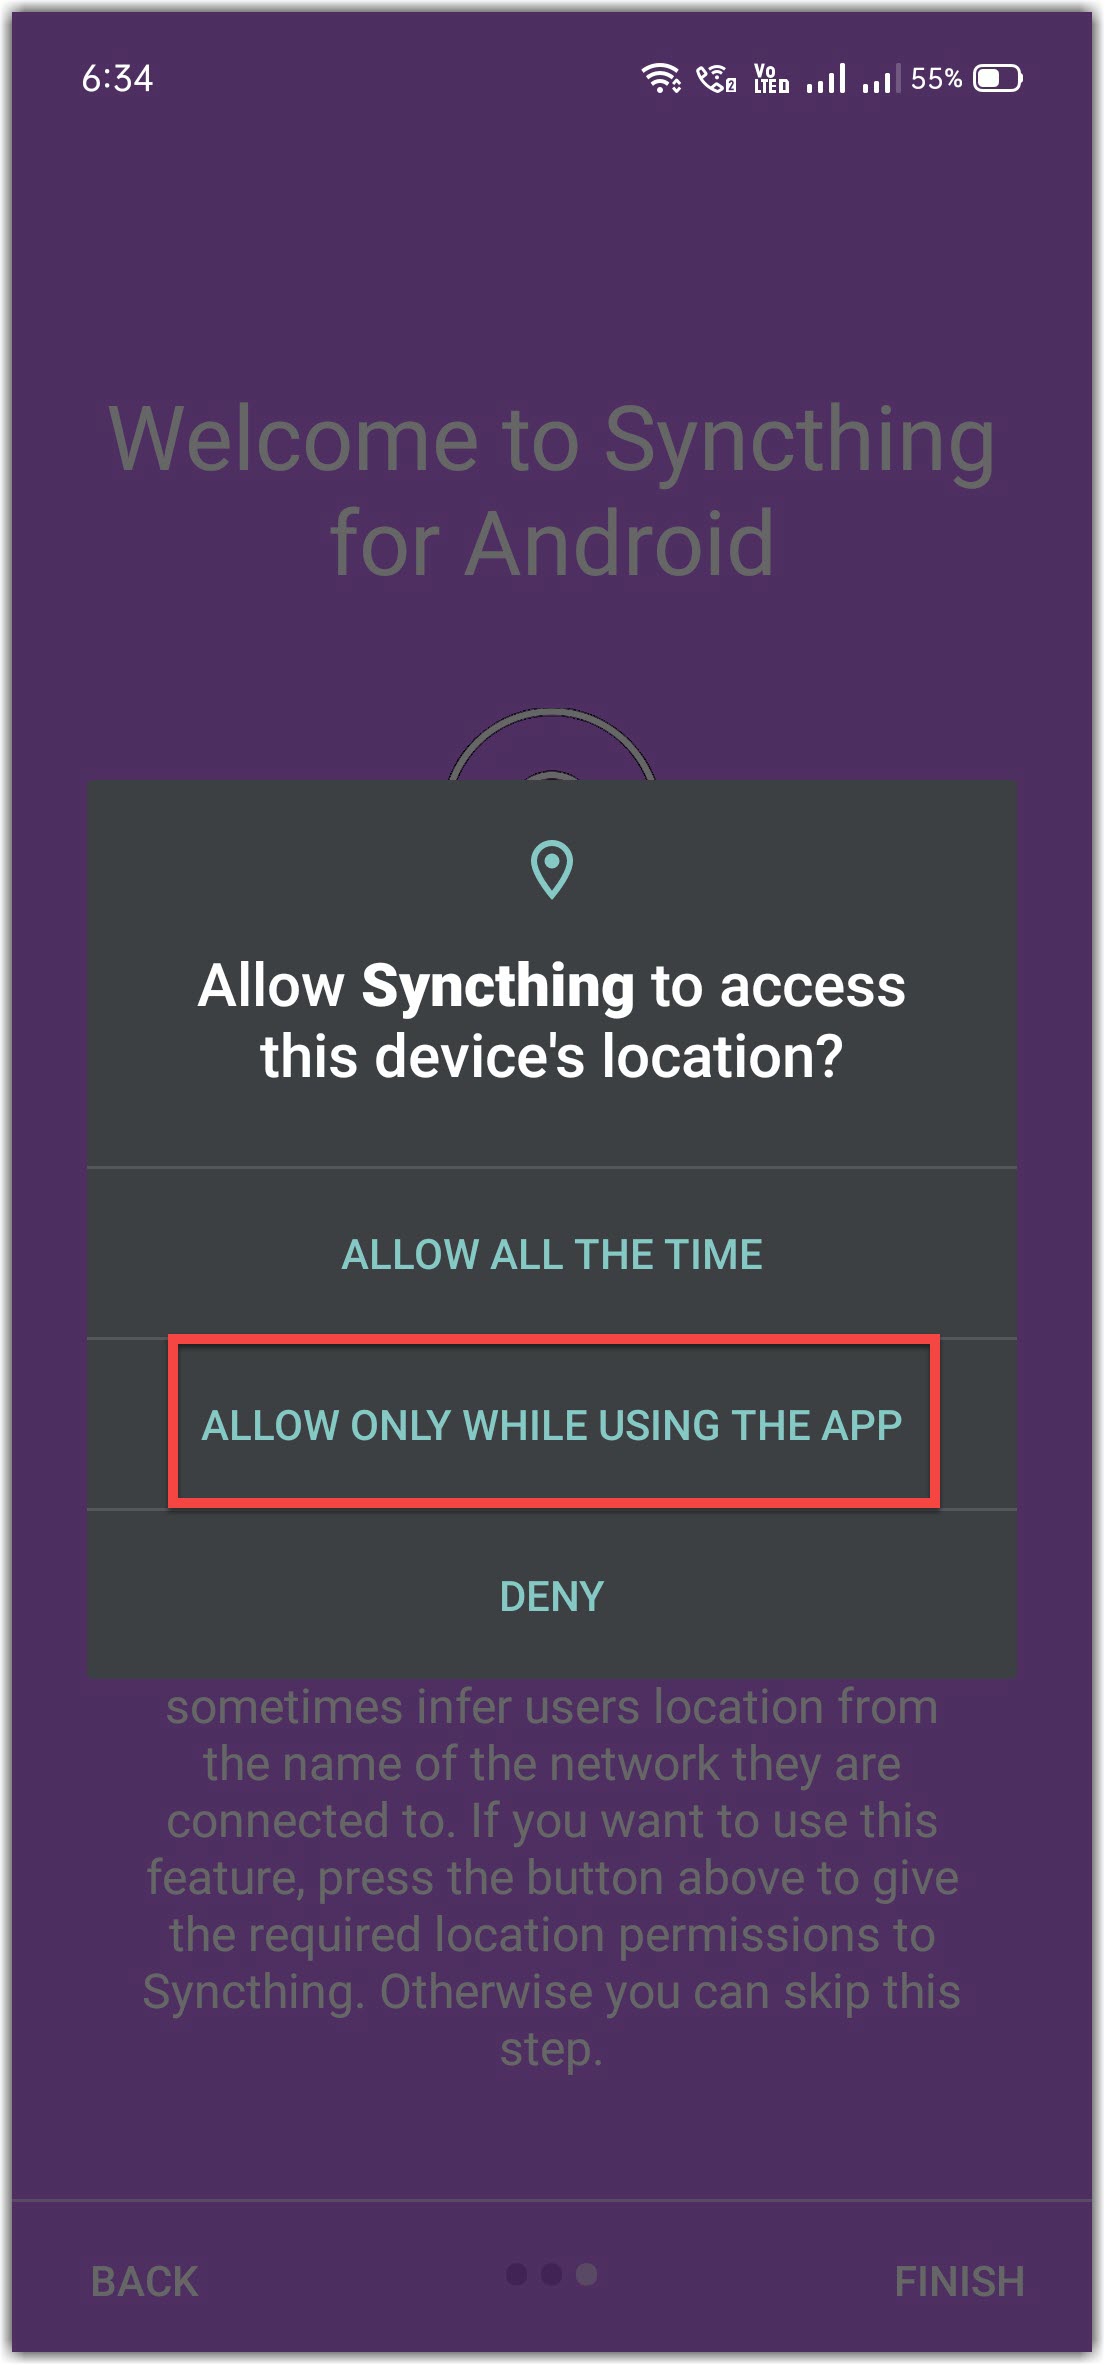
- Tap GRANT PERMISSION to allow location access and tap Continue. You can deny this permission as well.
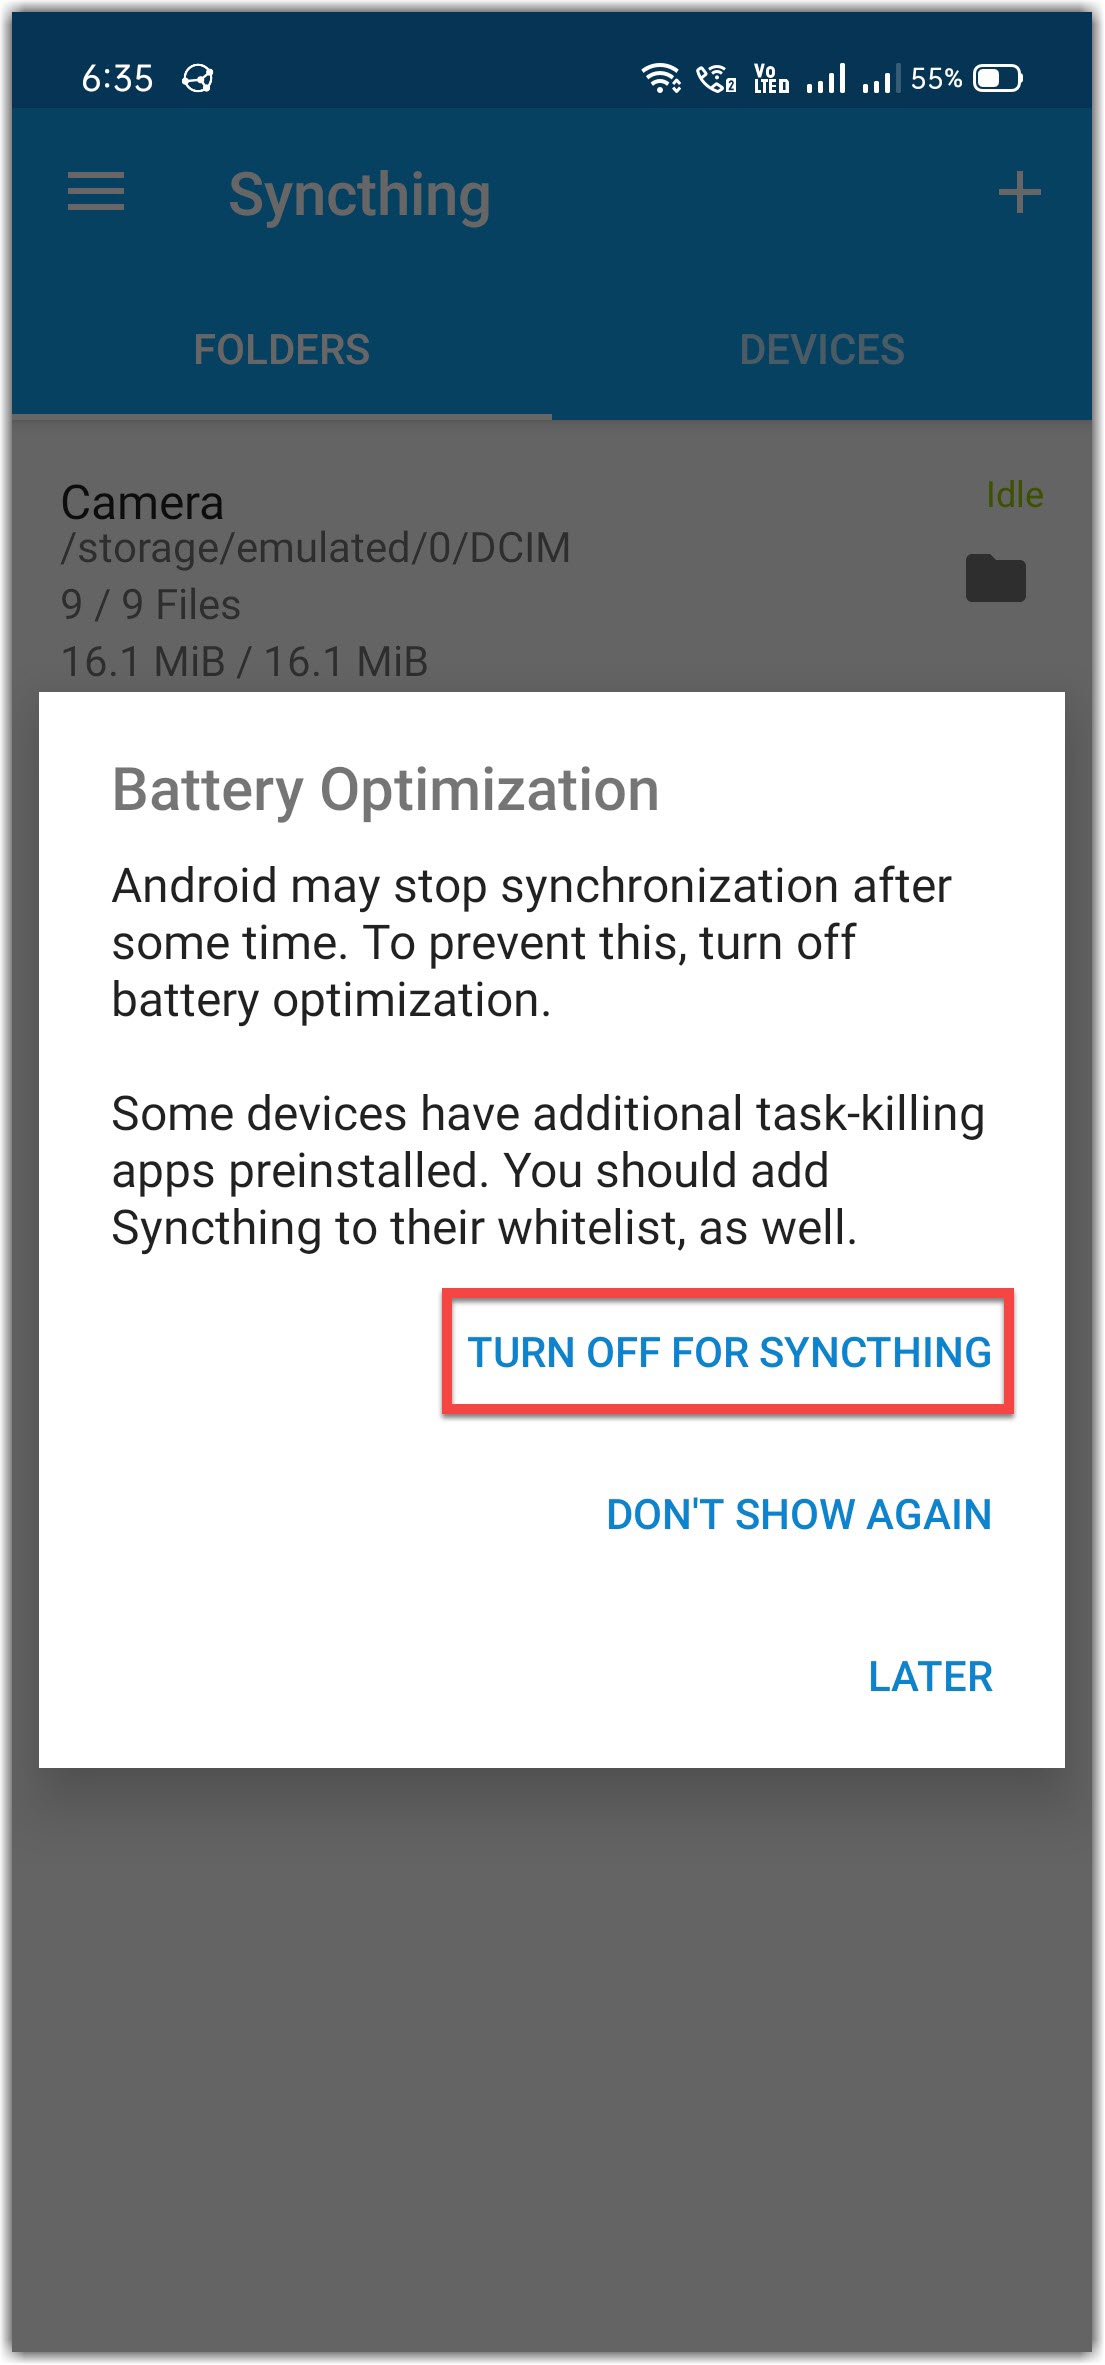
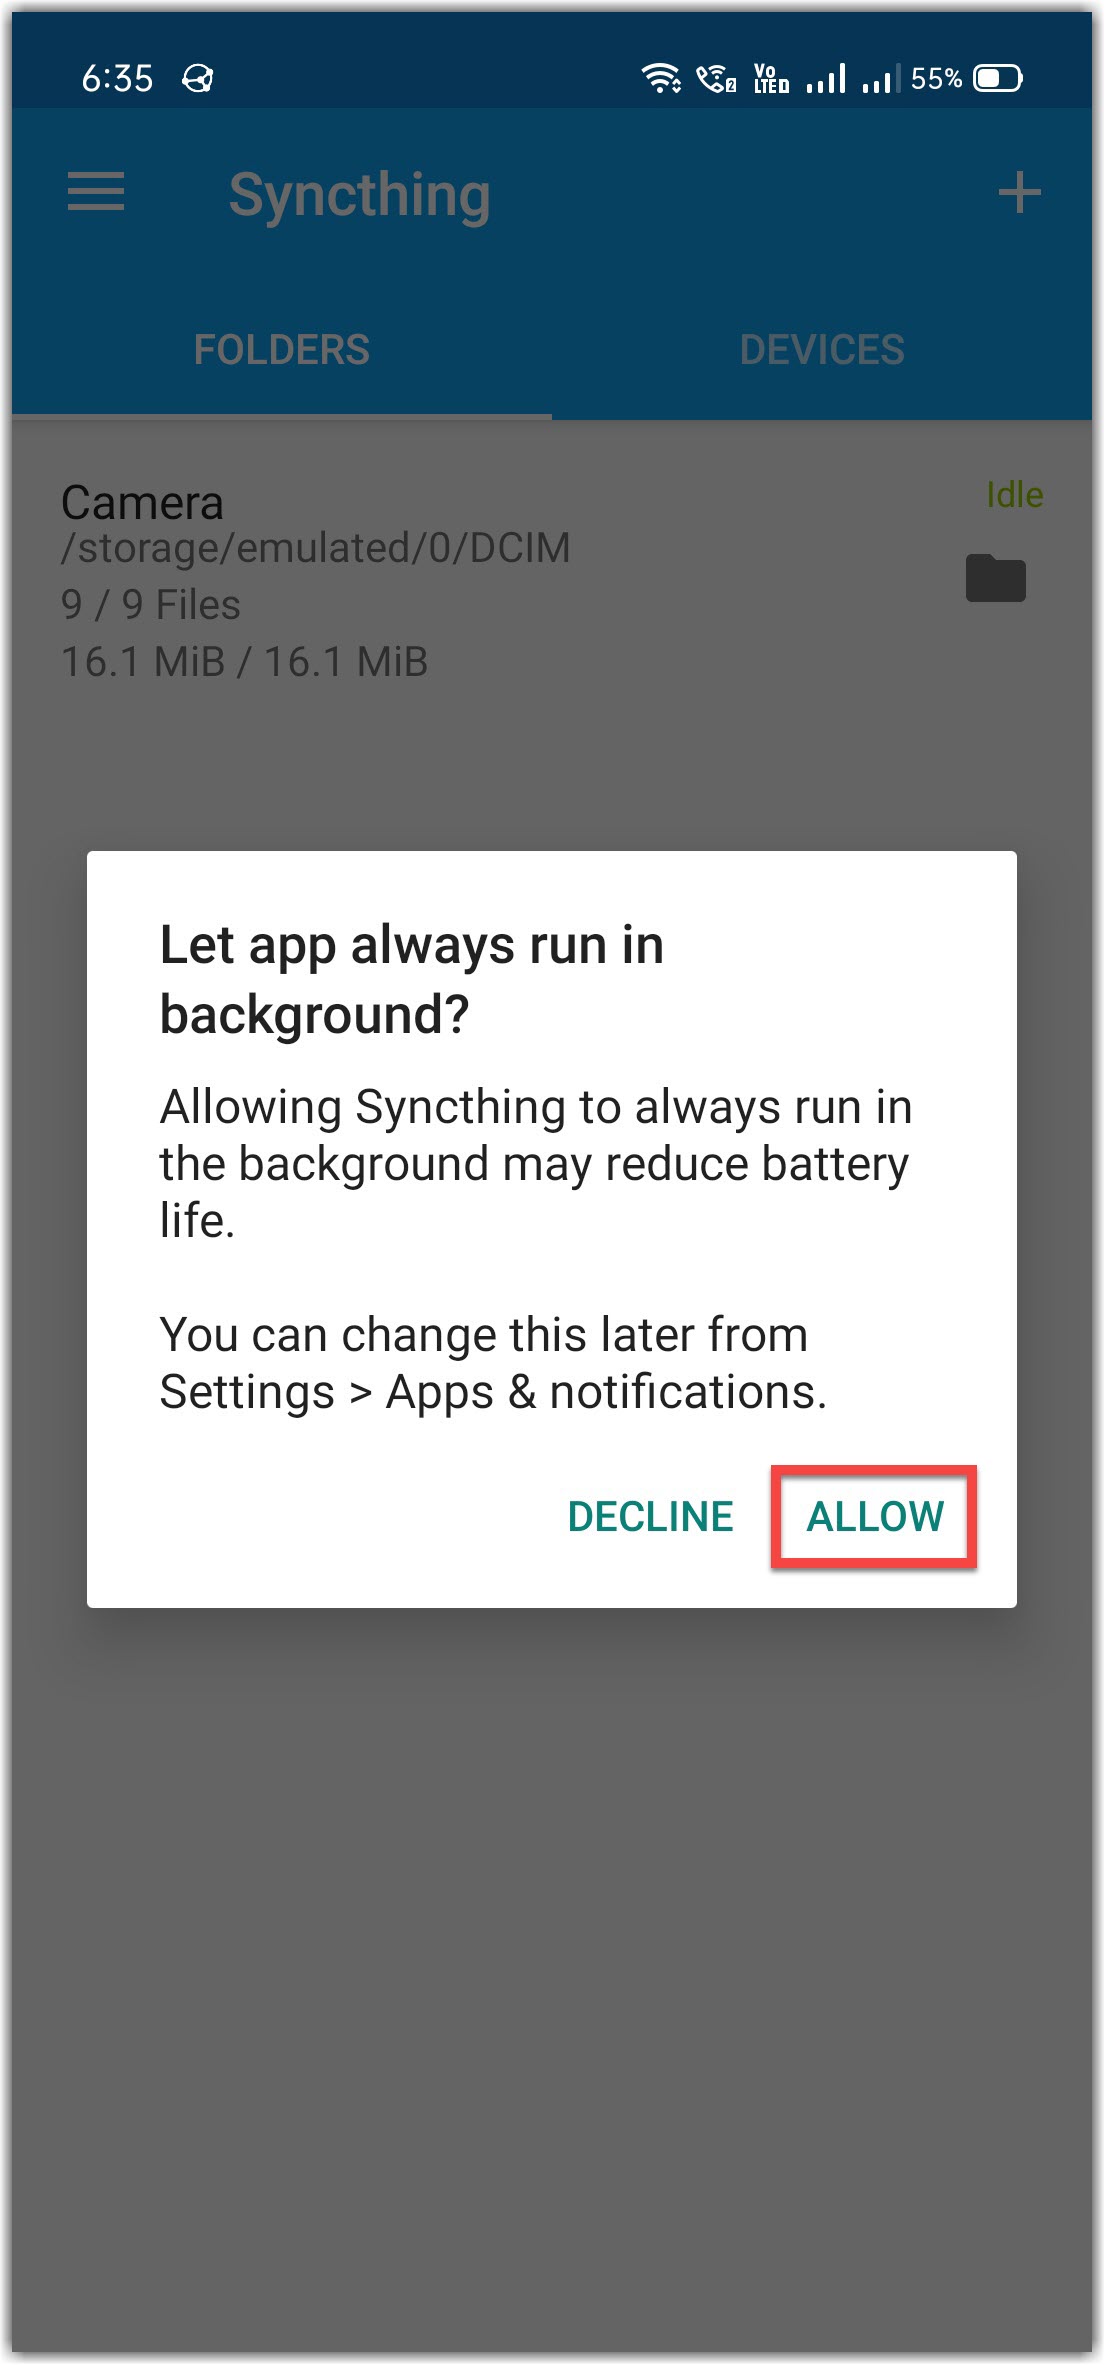
- Tap Turn off for Syncthing and select Allow to disable battery optimization for syncthing.
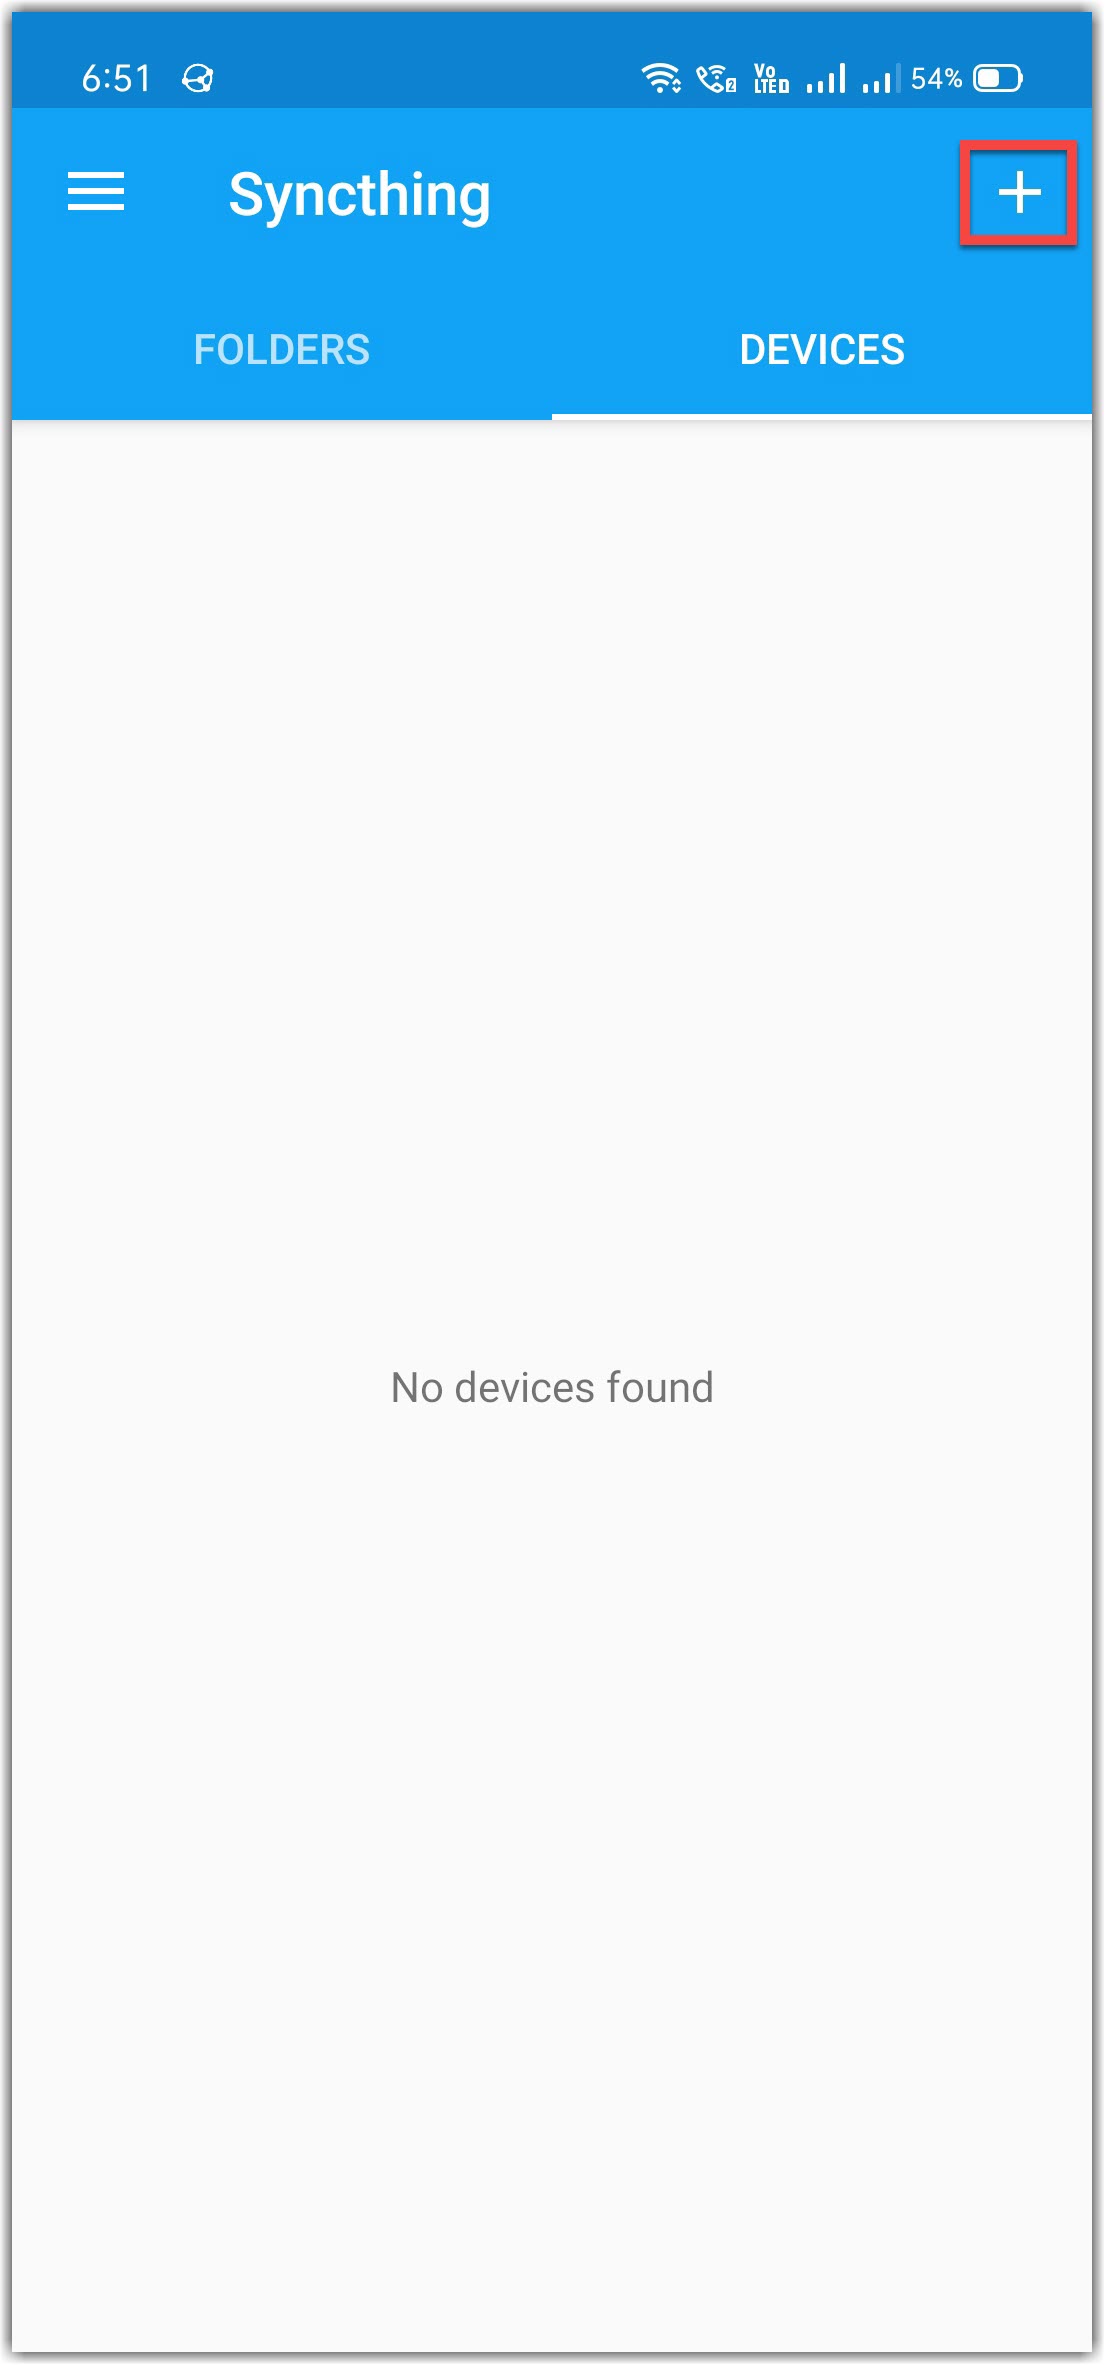
- Switch to the Devices tab. Tap the top-right icon to add your GigaDrive server. Enter Device ID and Device Name from step 7 of the previous section. Alternatively, you can press the icon to scan the QRCode and add the device id.
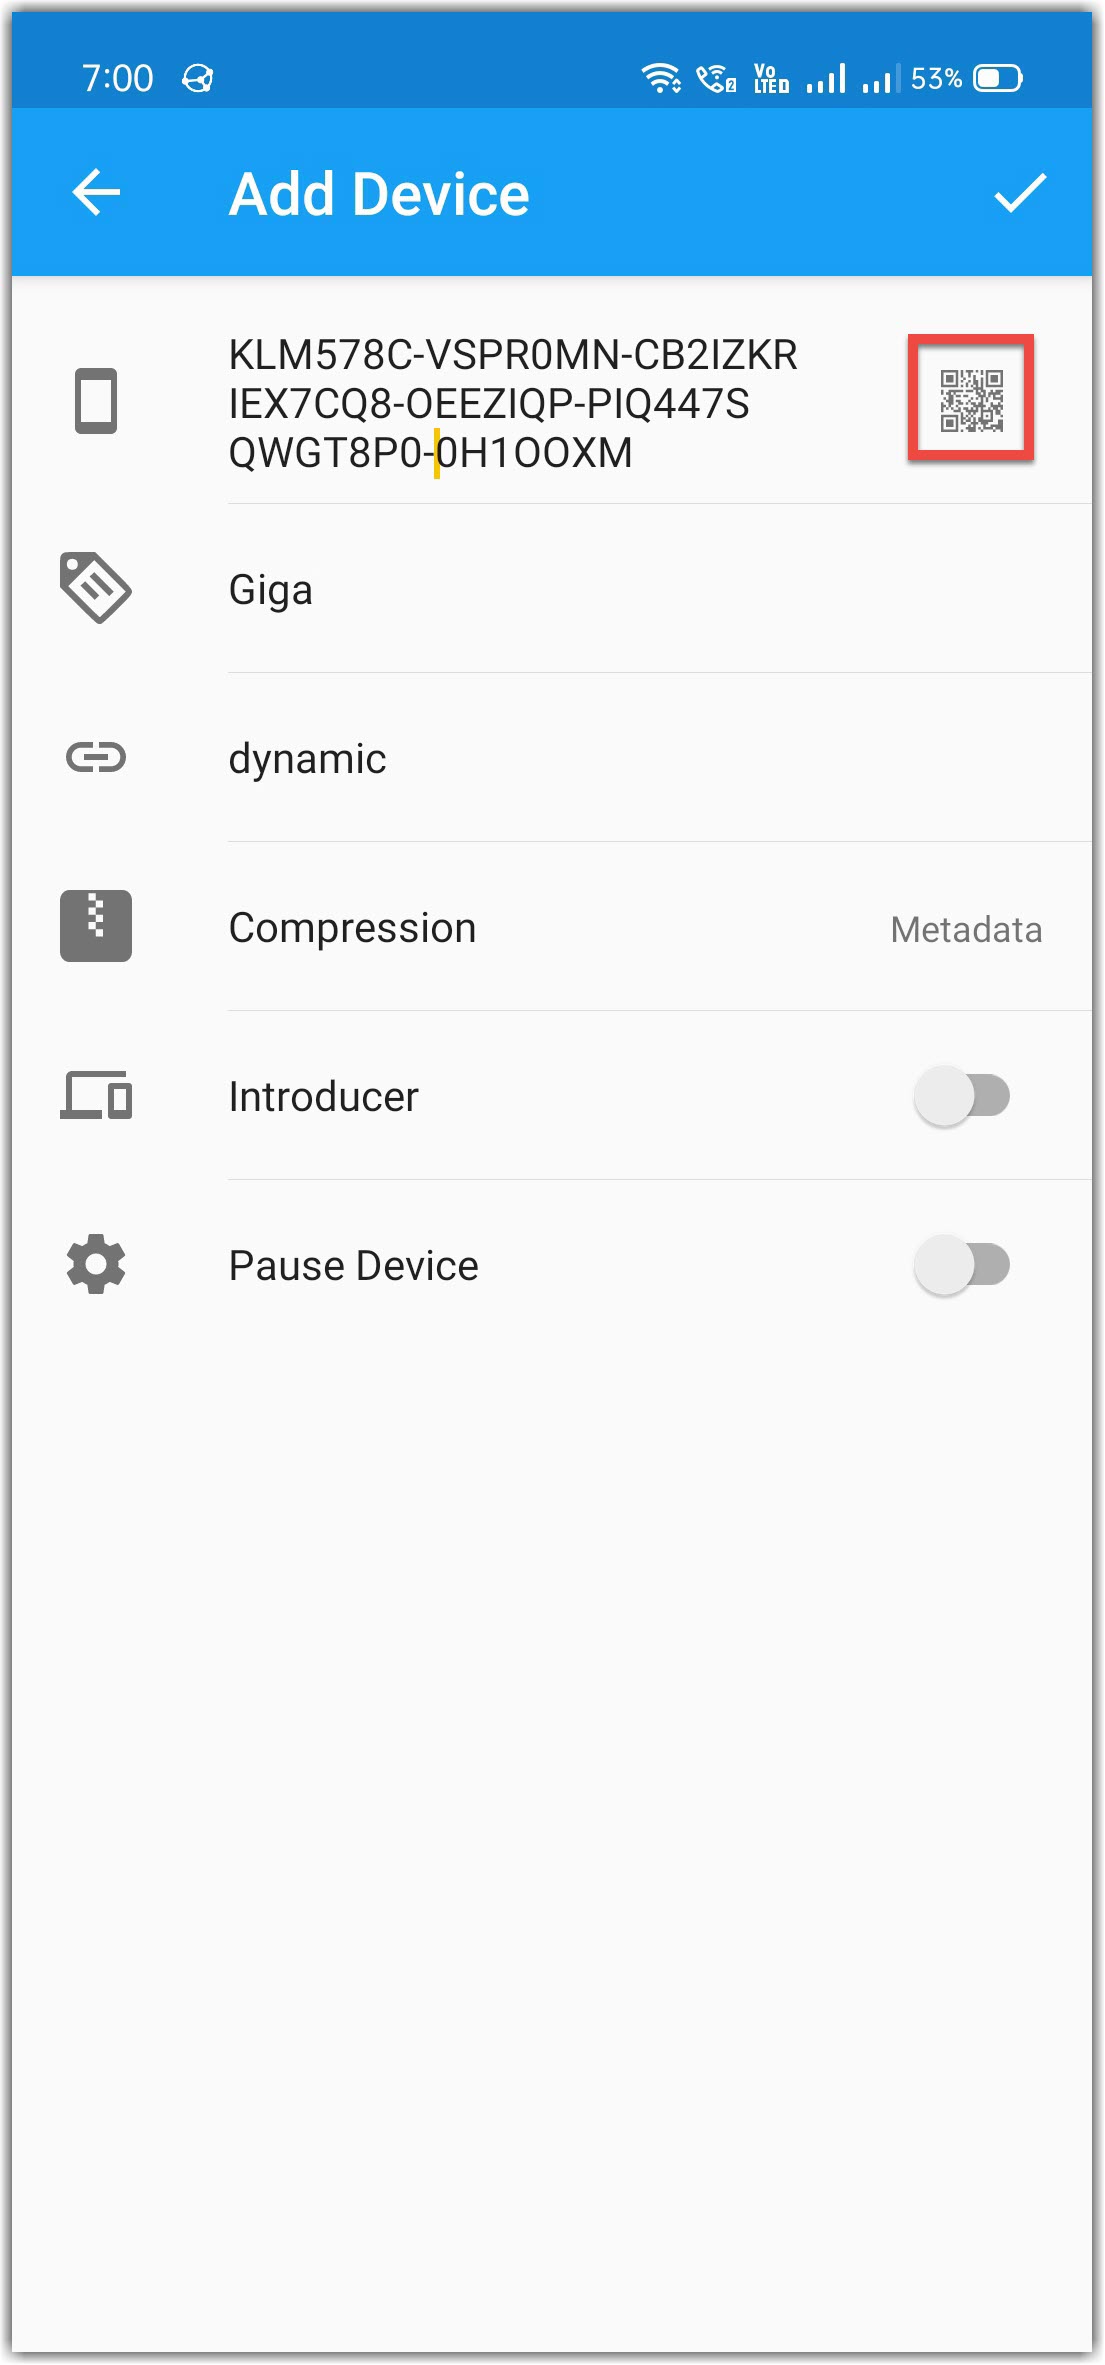
- Change
dynamictotcp://GigaDrive.IP:DAEMON_PORT. Refer to step 6 of the previous section for more details.
This step is mandatory. If you skip this and leave the addresses field to dynamic, you will get low speed.
- Open syncthing server webui of your GigaDrive. You should see a New Device window like the following. Confirm that it is indeed your device by checking the Device Name and Device ID and click Add device.

- Switch to the Sharing tab. Select the folders to share with this device. Then click Save.

- Pull the notification drawer on your android smartphone and tap Accept. It may take a while for the notification to arrive.
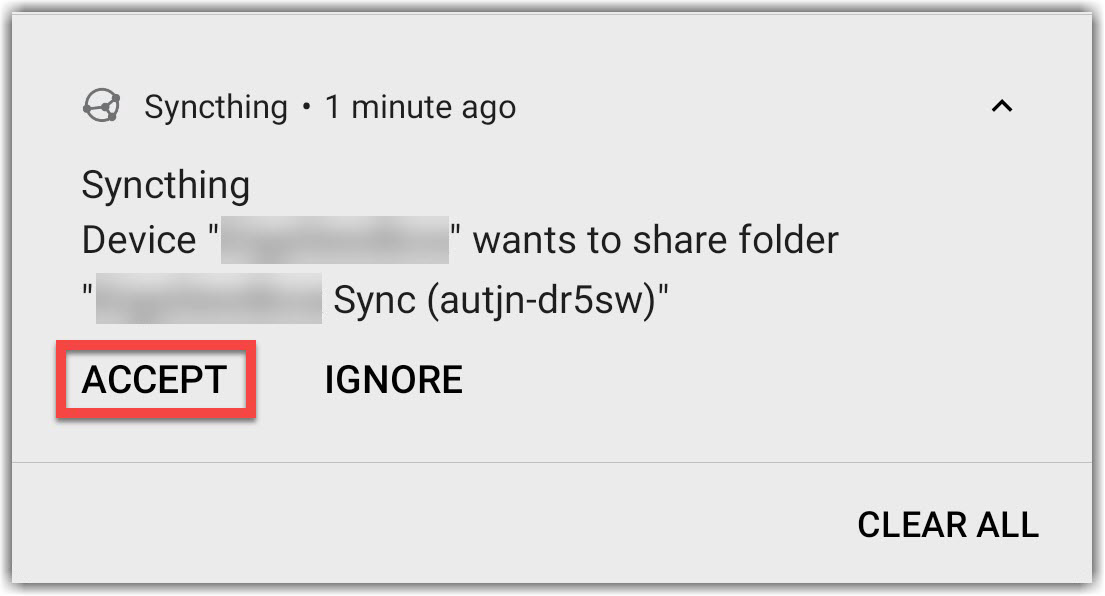
- Then create a new folder as follows.
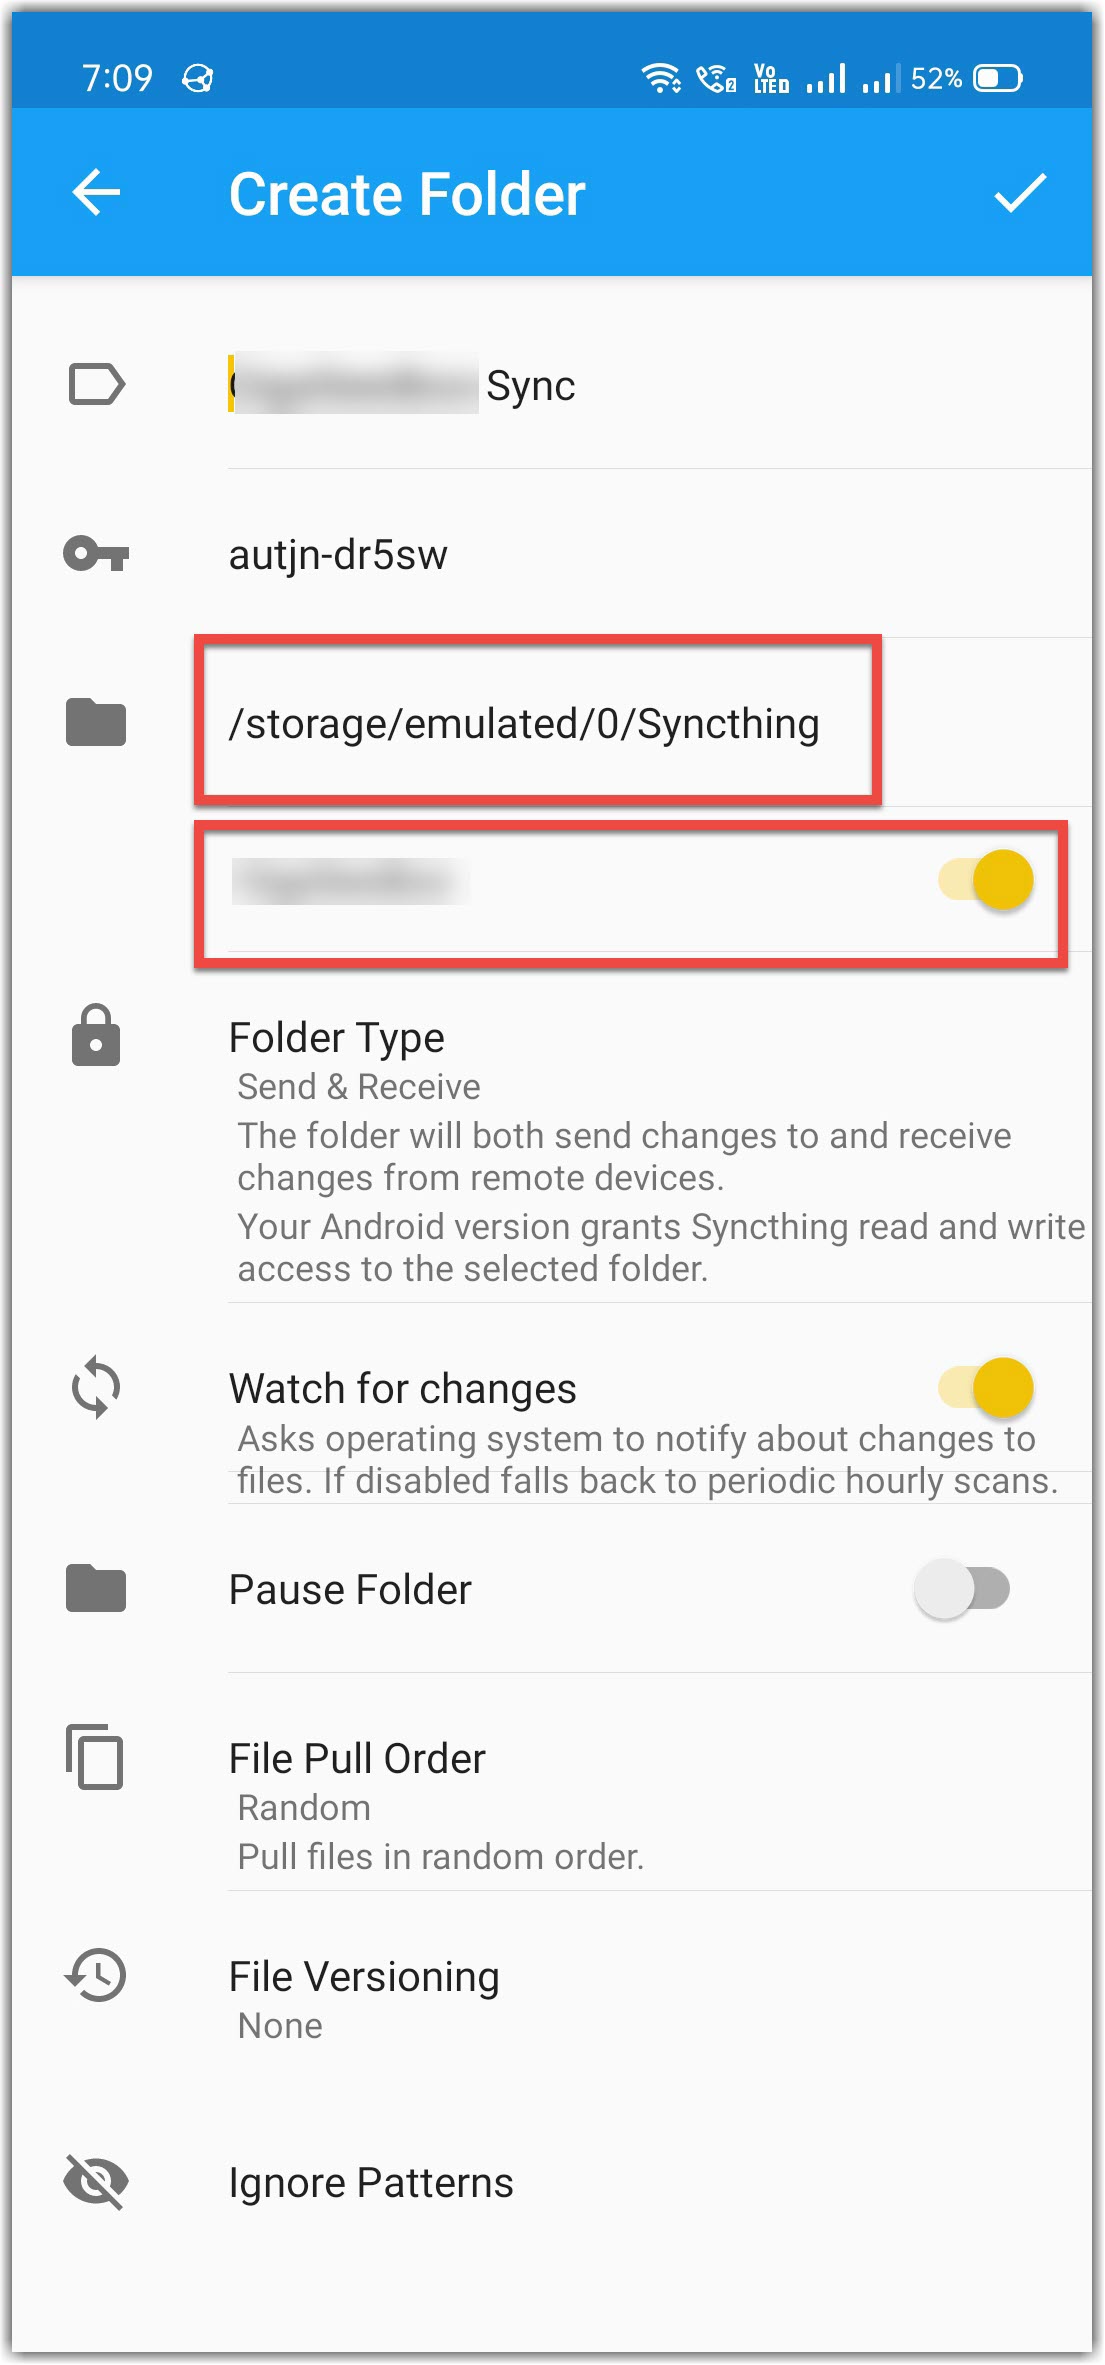
- Tap the top-right icon to save.
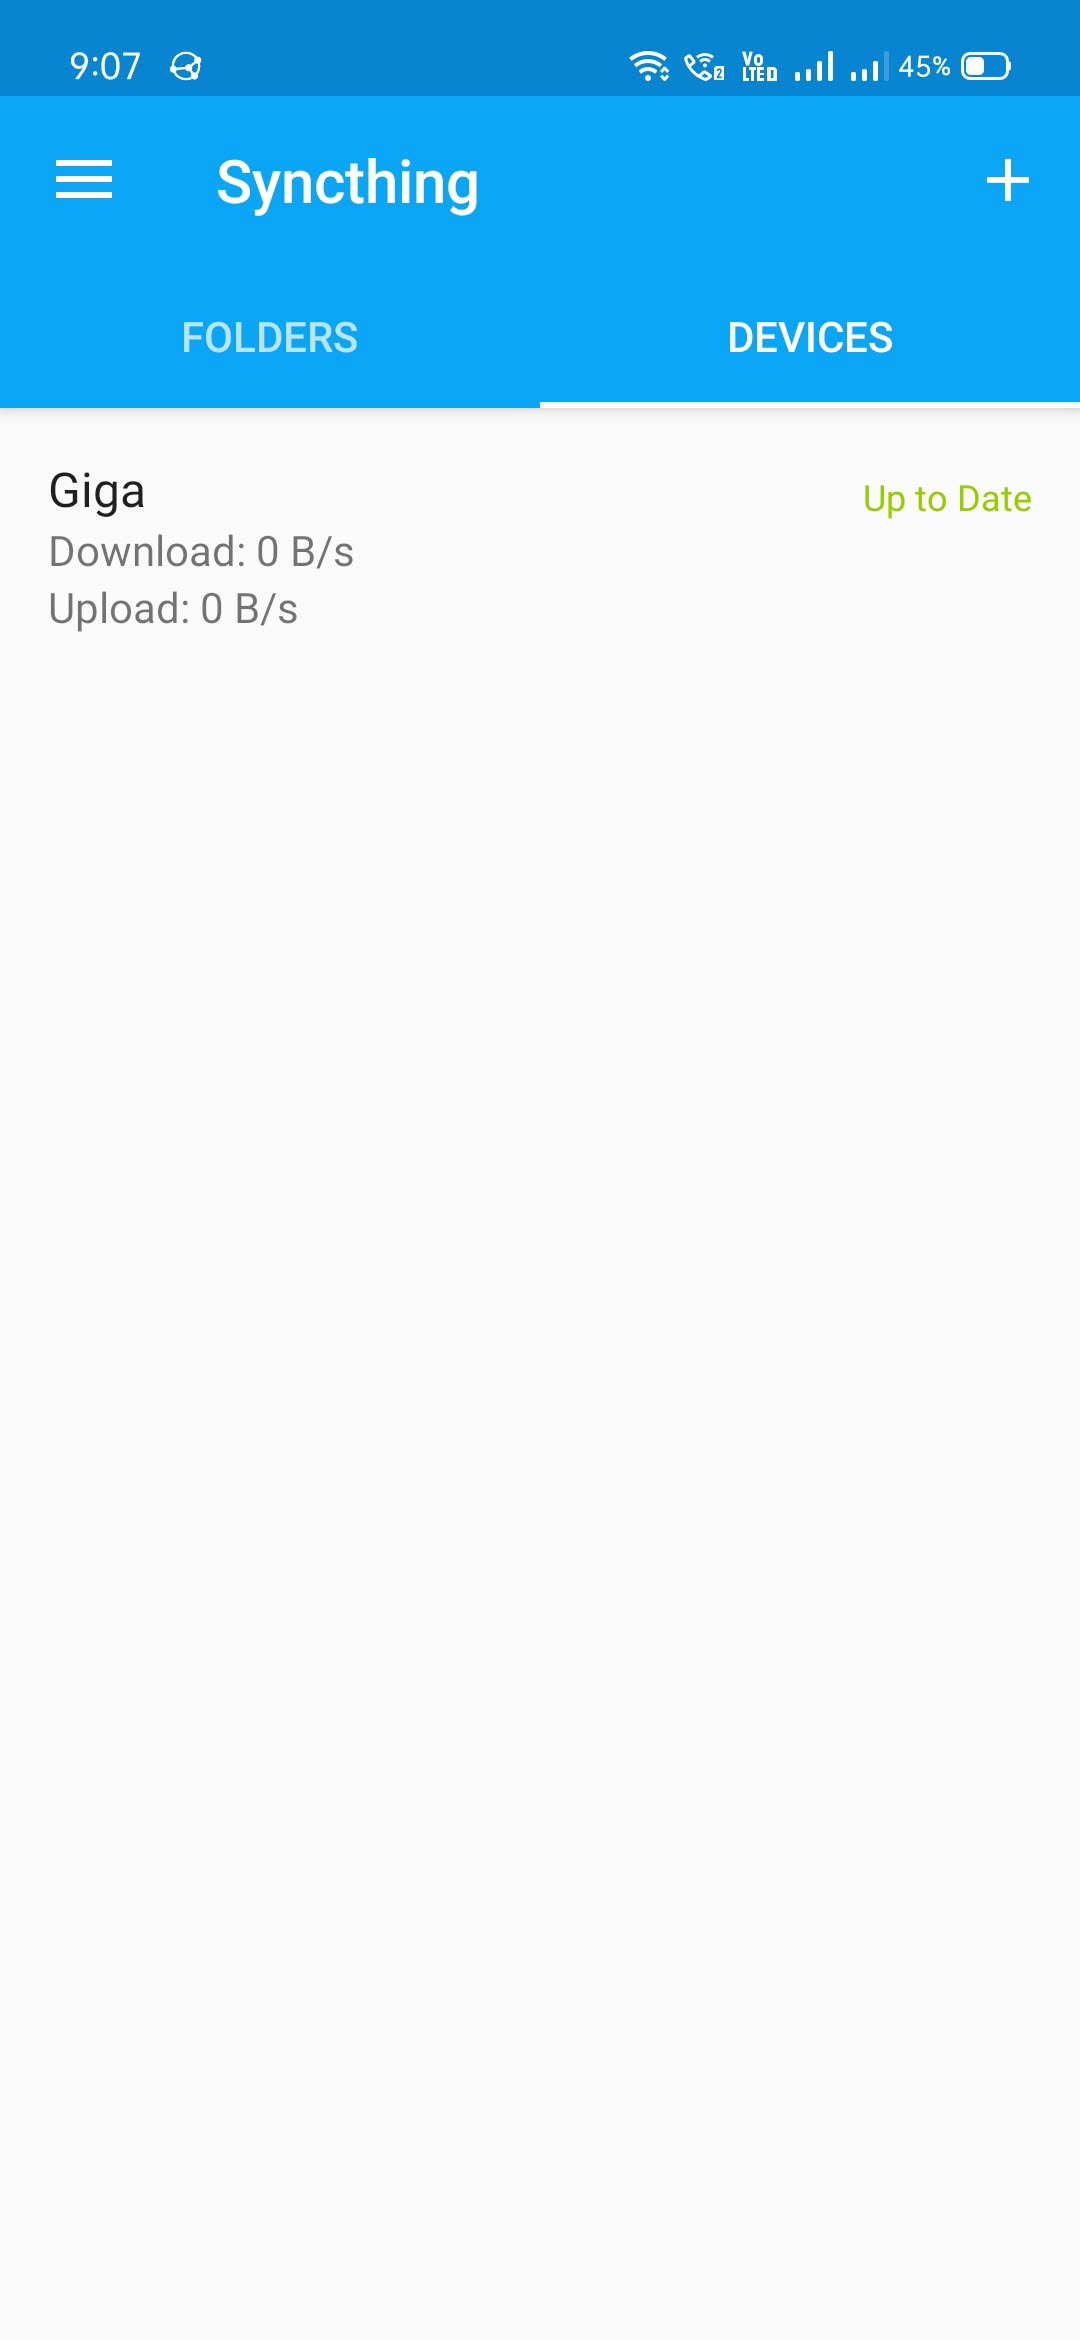
- Once the initial syncing is finished, the Devices tab of your syncthing app would look like the following.
¶ Reset Application Password
- Login to the FTP or the filebrowser app.
- If you are using FTP then you may need to Enable Hidden File Listing.
- Navigate to the directory
/storage/.appdata/syncthing - Search for a file named
config.xmland open it using any text editor. - Search for the following tags
<password>and<user>and remove these tags completely. - For example: Simply delete following lines from your configuration file.
<user>YOUR_USERNAME</user>
<password>xxxxxxxxxxxxxxxxxxxxxxxxxxxxxxxxxxxxxxxxxxx</password>
- Reboot the application.