¶ Intro
SSH (Secure Shell), sometimes referred to as Secure Socket Shell, is a protocol which allows you to connect securely to a remote computer or a server by using a text-based interface. The service was created as a secure replacement for the unencrypted Telnet and uses cryptographic techniques to ensure that all communication to and from the remote server happens in an encrypted manner.
![]()
By default SSH is not enabled on your GigaDrive Slot. In order to enable SSH, you need install any one of the available openssh apps.
¶ Availability
Please check our application chart to see which GigaDrive Plans are eligible to install this application.
¶ Installing OpenSSH Server
- Navigate to the Application Manager page and search for
openssh.

- Choose your preferred linux distribution. If you only need to use basic command line tools such as cp, mv etc then choose
openssh-alpine, otherwise chooseopenssh-debianoropenssh-ubuntu. If you require a range of external ports then useopenssh-ubuntuonly. - Click the button to open the installation window and tap Install to start the installation process.
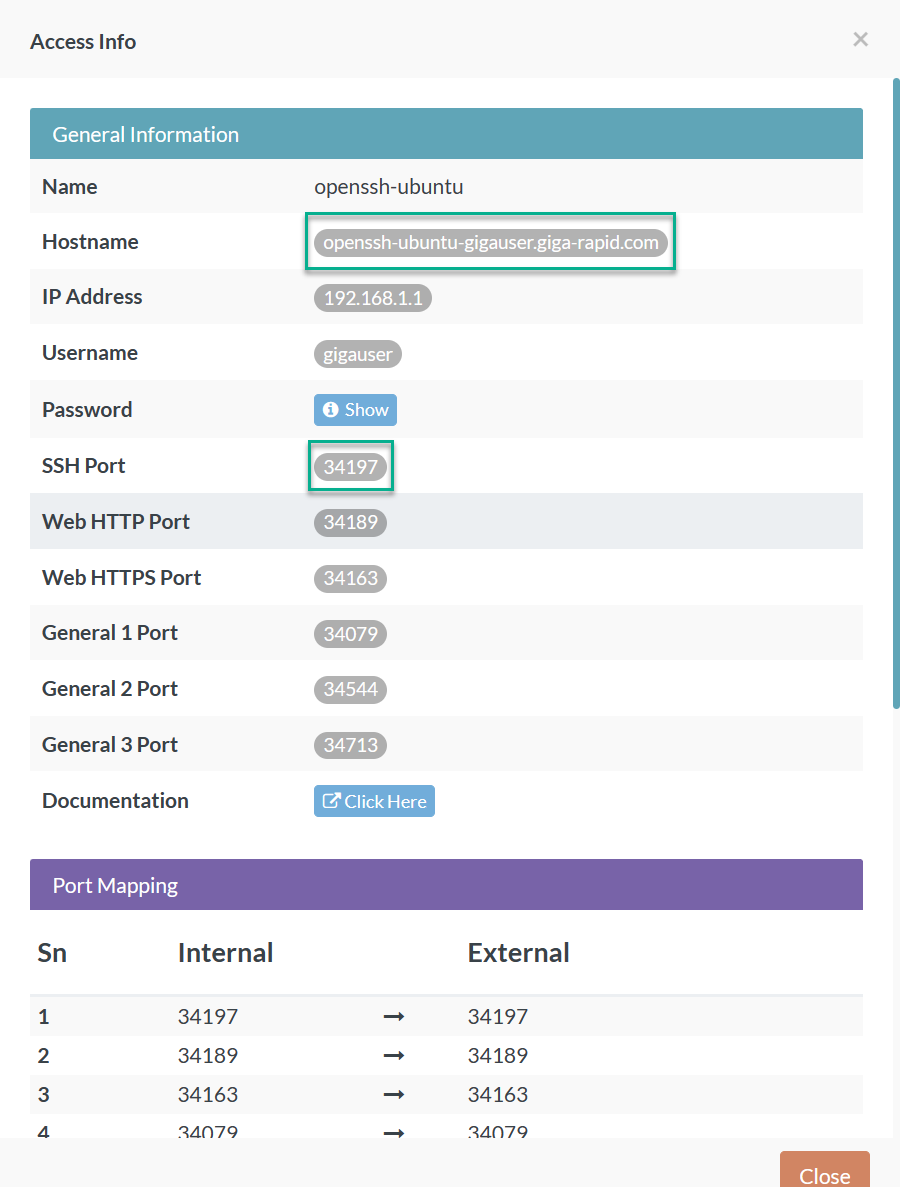
- Once the installation is complete, click the button to open the Access Info page and down your SSH Hostname, IP, Port, Username, Password.
¶ Accessing SSH Server Details
-
Navigate to the Application Manager page of your dashboard.
-
Search for openssh. click the button to get your SSH information. You should have a popup window like the following image. Note down your SSH Hostname, IP, Port, Username, Password.

¶ Connecting To The OpenSSH Server
¶ Windows - Command Prompt
- Press WINDOWS KEY + R on your keyboard.
- This will open
Rundialog. - Type
cmdand pressOK. - Paste the following command.
ssh USERNAME@HOSTNAME -p SSH_PORT
Replace
USERNAME,HOSTNAMEandSSH_PORTwith actual values from the previous step.
- If it prompts you to accept the machines fingerprint, then type
Yesand press Enter. - Now type the password and press Enter.
- That’s all.
¶ Windows - Putty
-
Download the latest release of PuTTY from here.
-
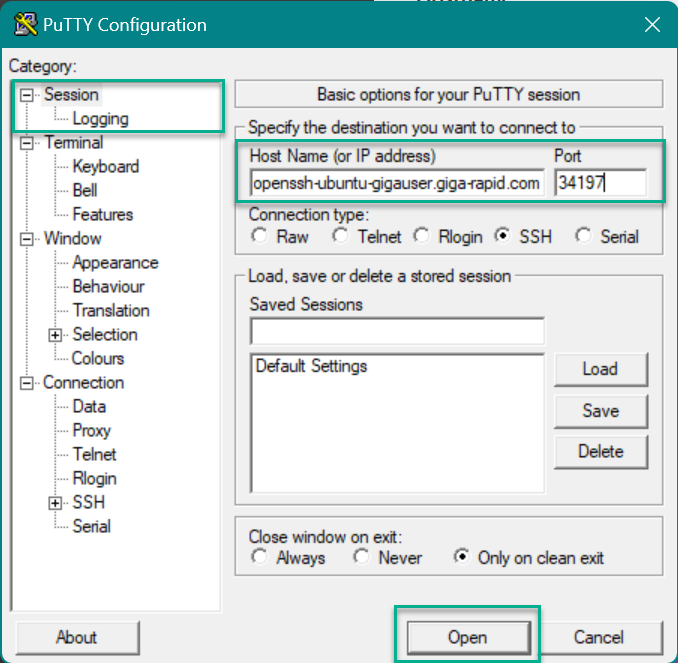
Install and run putty. You should have the following window.

-
Fill in the hostname and port field which you have obtained from the previous step and click open. If you get a security alert popup window, click yes.

-
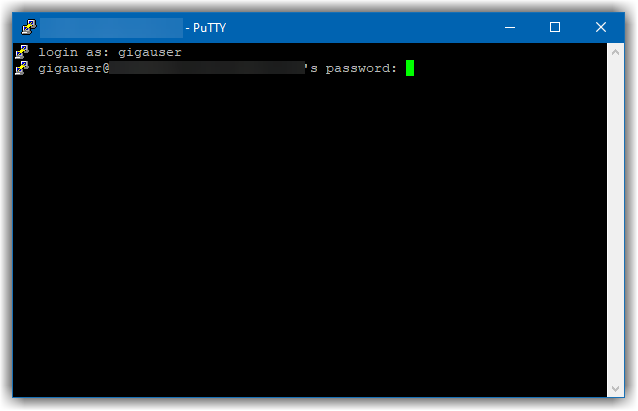
When prompted with login as, enter your GigaDrive username. Then you will be asked for your password. Enter the password you have obtained from step 3.

While typing your SSH password, you will not be able to see the characters you typed. This is normal and it is a security precaution.
If you get
Access Deniederror on the first attempt, then paste the password again and hit Enter.
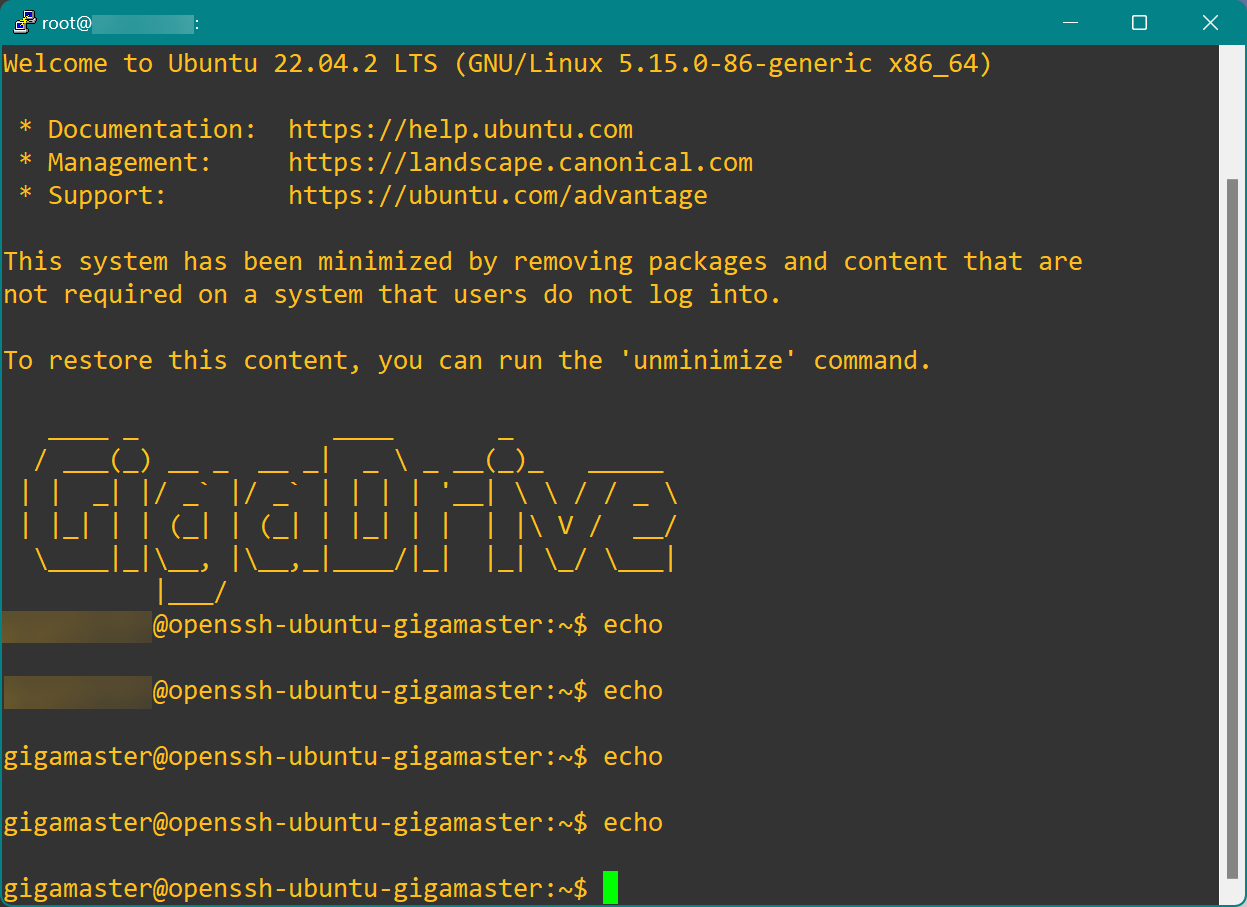
- If you entered your details correctly, you will be greeted with a welcome message and your account shell shall be ready to accept any commands.

¶ Linux/Mac
Openssh is builtin in Linux and Mac operating systems, so you can connect to the SSH by taking the following steps.
- Open the Terminal application in your operating system.
- Type the command:
ssh USERNAME@SSH_HOST -p SSH_PORT
Make sure to replace the USERNAME, SSH_PORT and SSH_HOST with your account username, your ssh hostname and ssh port that you can get by following the step 3 of the previous guide.
- You will be asked for your password. Enter your SSH password. If you entered your details correctly, you will be greeted with a welcome message like below.
¶ Creating a linux service
A service (also known as daemon) is a computer program that runs as a background process, rather than being under the direct control of an interactive user.
¶ Using Systemd
Systemd is not supported. Use supervisord instead.
¶ Using Supervisord (Recommended)
- The program configuration files for supervisor programs are found in the
/etc/supervisor/conf.ddirectory, normally with one program per file and a.confextension. A simple configuration for our script, saved at/etc/supervisor/conf.d/SERVICE_NAME.conf, would look like so:
[program:SERVICE_NAME]
command=/path/to/your/program
user=REPLACE_THIS_WITH_USERNAME
autostart=true
autorestart=true
stderr_logfile=/config/app.stdout.log
stdout_logfile=/config/app.stdout.log
Replace
SERVICE_NAMEwith your program name.
- Once our configuration file is created and saved, we can inform Supervisor of our new program through the supervisorctl command. First we tell Supervisor to look for any new or changed program configurations in the /etc/supervisor/conf.d directory with:
sudo supervisorctl reread
- Followed by telling it to enact any changes with:
sudo supervisorctl update
For more information checkout the documentation of supervisord.
¶ Using Inbuilt Service Manager
Use this if you are good experience with linux. If you misconfigure a service or your service fails to execute, then OpenSSH will not start/reboot.
- Once you are logged in to the terminal, create a new service directory by typing the following command.
SERVICE_NAME=SET_YOUR_SERVICE_NAME
sudo mkdir -p /etc/services.d/$SERVICE_NAME
- Create the service file. Sample service script is available here.
sudo touch /etc/services.d/$SERVICE_NAME/run
sudo chmod +x /etc/services.d/$SERVICE_NAME/run
sudo nano /etc/services.d/$SERVICE_NAME/run
- Reboot your openssh application and check the status of your service.
sudo s6-svstat /var/run/s6/services/$SERVICE_NAME/
Make sure to replace SERVICE_NAME with the actual service name.
If your service is down, you can troubleshoot the issue by executing the run script directly
sudo /etc/services.d/$SERVICE_NAME/run
¶ Sample Service Script
#!/usr/bin/with-contenv bash

exec s6-setuidgid YOUR_SSH_USERNAME nginx -g "daemon off;" >> /config/SERVICE_NAME.stdout.log 2>&1
Make sure to replace YOUR_SSH_USERNAME with the actual username.
¶ Managing services created using the inbuilt service manager
- Listing available services
ls -l /etc/services.d
- Starting a service
sudo s6-svc -u /var/run/s6/services/SERVICE_NAME
- Stopping a service
sudo s6-svc -d /var/run/s6/services/SERVICE_NAME
- Restarting a service
sudo s6-svc -r /var/run/s6/services/SERVICE_NAME
- Deleting a service
sudo rm -rf /etc/services.d/SERVICE_NAME
sudo rm -f /etc/services.d/app/SERVICE_NAME.dep
¶ Understanding internal ports vs external ports
If you click the Access Info button to open the Access Info page for your SSH app, then you will notice a table of IPv4 ports consisting of External and Internal Ports.
Internal ports are ports that you should use within the configuration file while setting up an app. Then you can access that app using the corresponding external port.
¶ Setting up a cron job
- Use Crontab Generator or similar online tool to generate your cron expression. Some general cron expressions are given below.
- Every Minute:
* * * * * /usr/bin/touch /tmp/cron.test >/dev/null 2>&1 - Every 5 Minutes:
*/5 * * * * /usr/bin/touch /tmp/cron.test >/dev/null 2>&1 - Every 10 Minutes:
*/10 * * * * /usr/bin/touch /tmp/cron.test >/dev/null 2>&1 - Every 30 Minutes:
*/5 * * * * /usr/bin/touch /tmp/cron.test >/dev/null 2>&1 - Every Hour:
0 * * * * /usr/bin/touch /tmp/cron.test >/dev/null 2>&1 - Every 6 Hours:
0 */6 * * * /usr/bin/touch /tmp/cron.test >/dev/null 2>&1 - Every 12 Hours:
0 */6 * * * /usr/bin/touch /tmp/cron.test >/dev/null 2>&1 - Every Day:
0 0 * * * /usr/bin/touch /tmp/cron.test >/dev/null 2>&1 - Every Week:
0 0 */7 * * /usr/bin/touch /tmp/cron.test >/dev/null 2>&1 - Every Month:
0 0 1 * * /usr/bin/touch /tmp/cron.test >/dev/null 2>&1
- Type the following command to open the crontab configuration for the current user.
EDITOR=nano crontab -e
- Paste your cron expression at the end of the configuration file. Then, press CTRL+O and hit Enter to save the changes.
- Finally press CTRL+X to exit the configuration window.
¶ Changing SSH password
To change the SSH password for a user on Ubuntu, follow these steps:
-
Log in to the Server:
Use SSH to log in to the server if you’re not logged in already. -
Change the Password:
Use thepasswdcommand followed by the username to change the password. For example, to change the password for the current user:passwdOr to change it for another user (if you have root privileges):
passwd USERNAME
Replace
USERNAMEwith your actual username
- Enter the New Password:
You’ll be prompted to enter the new password twice to confirm. After this, the password will be updated.