¶ Intro
Pydio Cells, previously known as just Pydio and formerly known as AjaXplorer, is an open-source file-sharing and synchronisation software that runs on the user’s own server or in the cloud.
![]()
¶ Availability
Please check our application chart to see which GigaDrive Plans are eligible to install this application.
¶ Features
- File sharing between different internal users and across other Pydio instances
- SSL/TLS Encryption
- WebDAV file server
- Creation of dedicated workspaces, for each line of business / project / client, with a dedicated user rights management for each workspace
- File-sharing with external users (private links, public links, password protection, download limitation, etc.)
- Online viewing and editing of documents with Collabora Office
- Preview and editing of image files
- Integrated audio and video reader
- Client applications are available for all major desktop and mobile platforms
¶ Installing Pydio
- Navigate to the Application Manager page and search for
pydio. - Click icon to open the installation window and tap Install to start the installation process.
- Once the installation is complete, click icon to open the Access Info page. Then click Go To Application to access
pydio.
¶ Configuring Pydio
Our system will automatically configure and map the default /storage directory for you, so there’s no need to follow the instructions below. However, if you prefer to use a custom directory for data storage, please follow the steps provided.
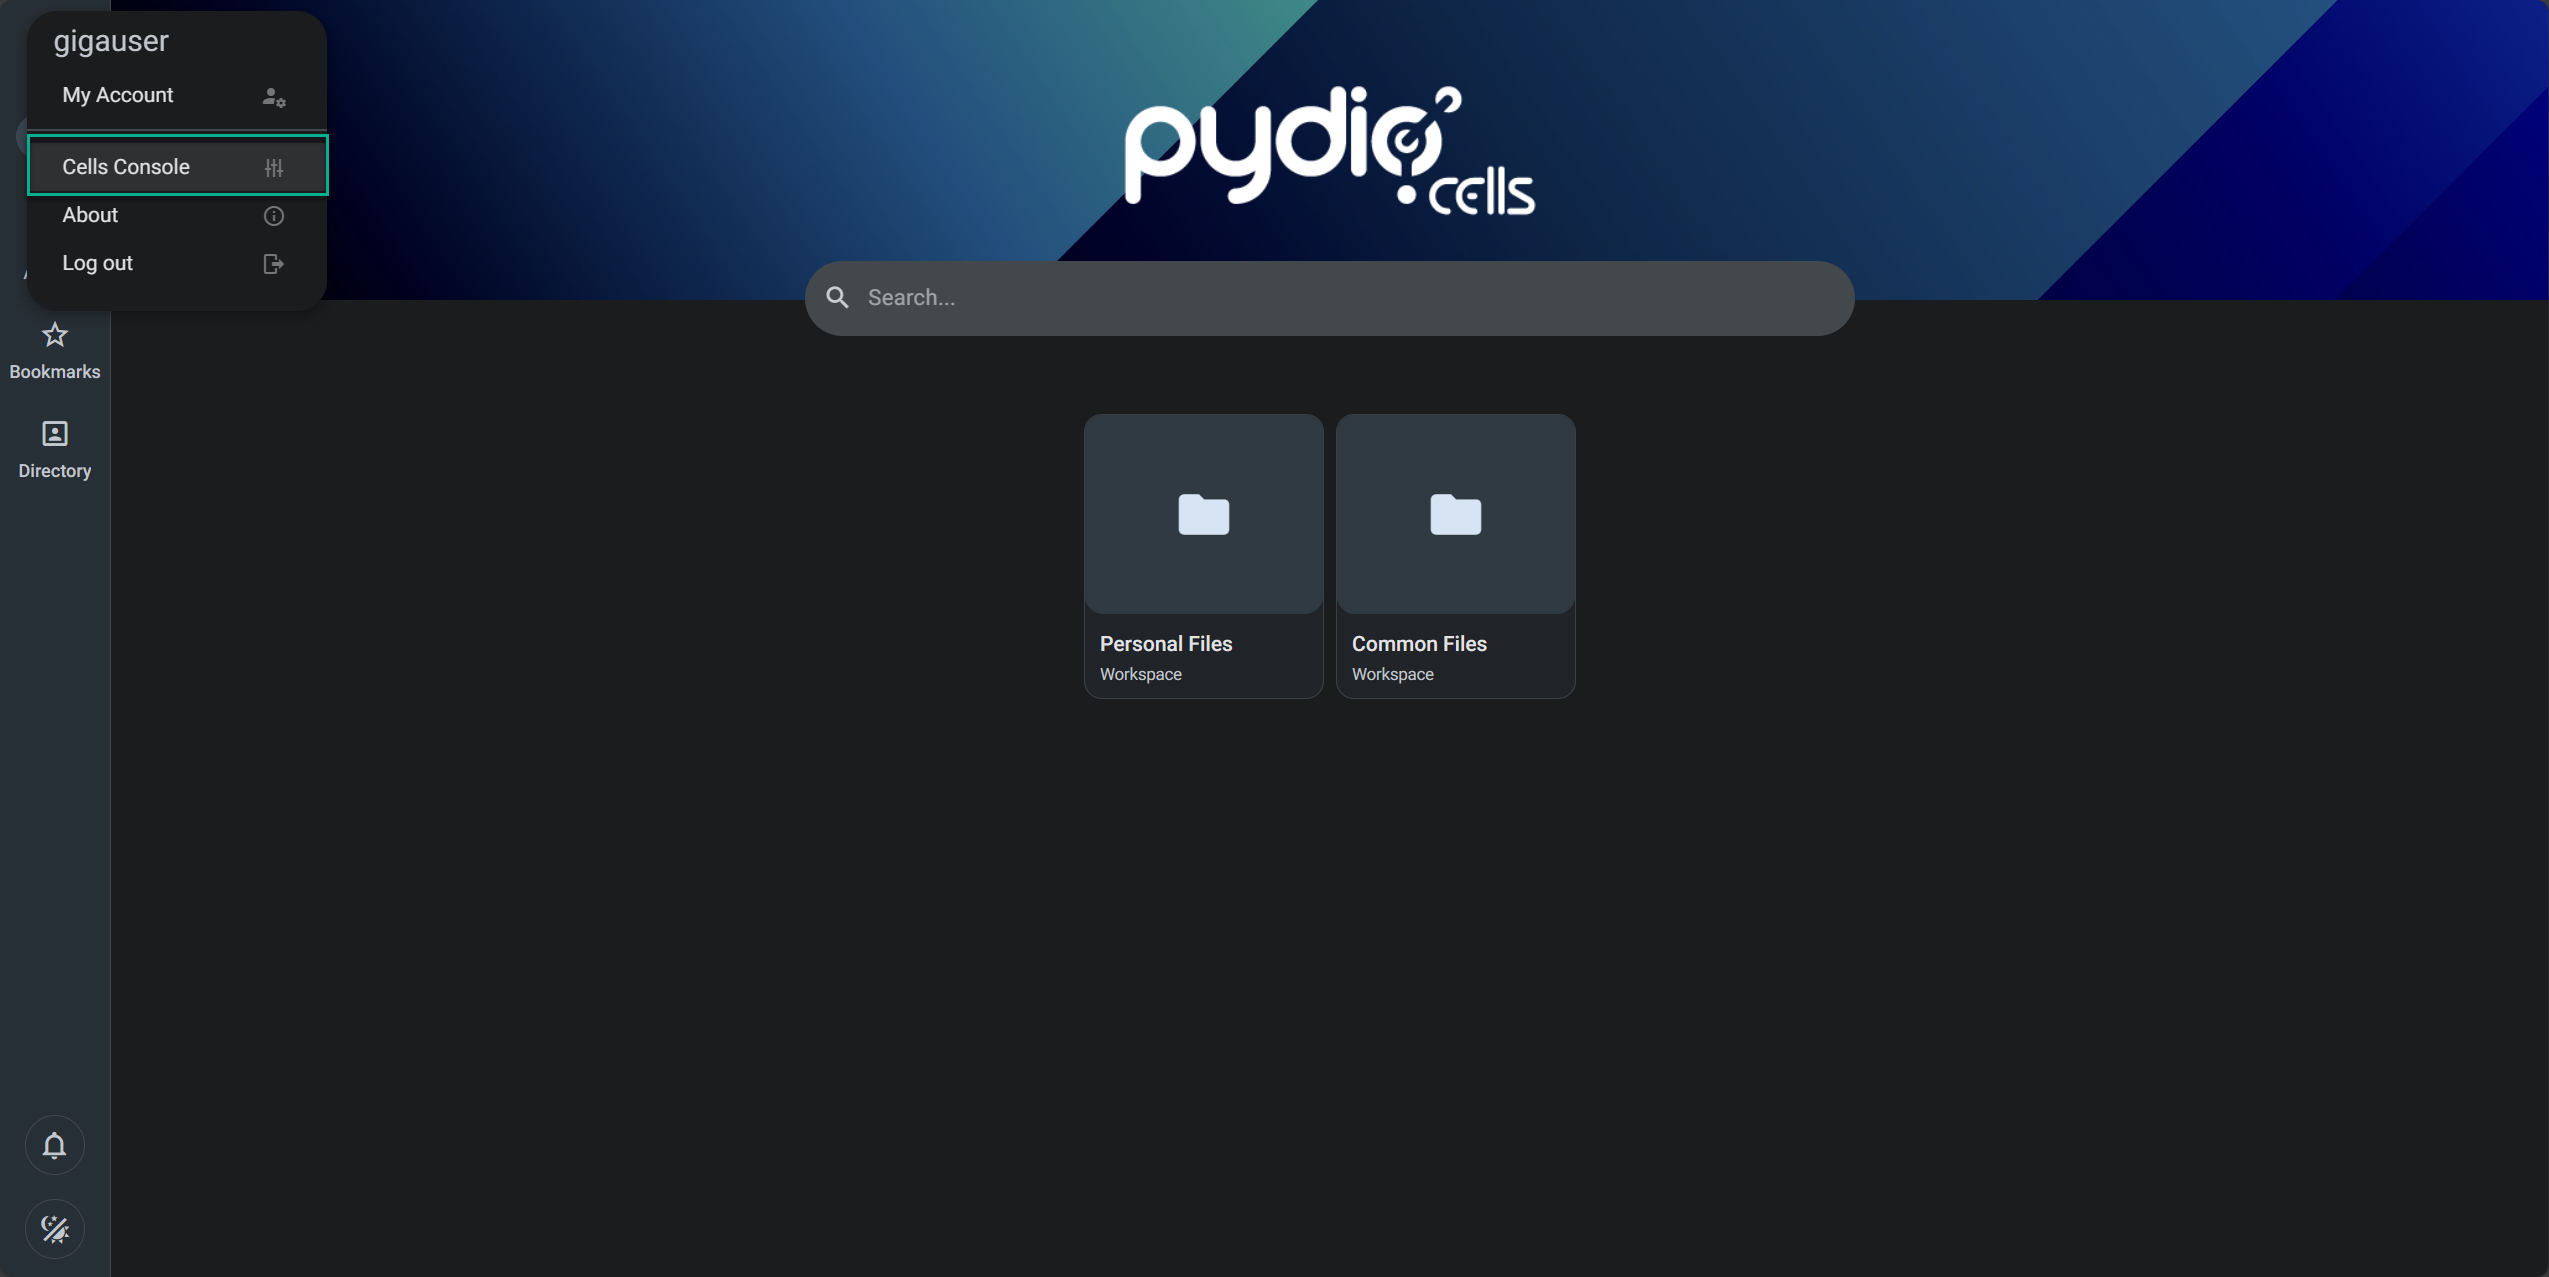
- Click profile icon at the top left corner and then click
Cells Console.
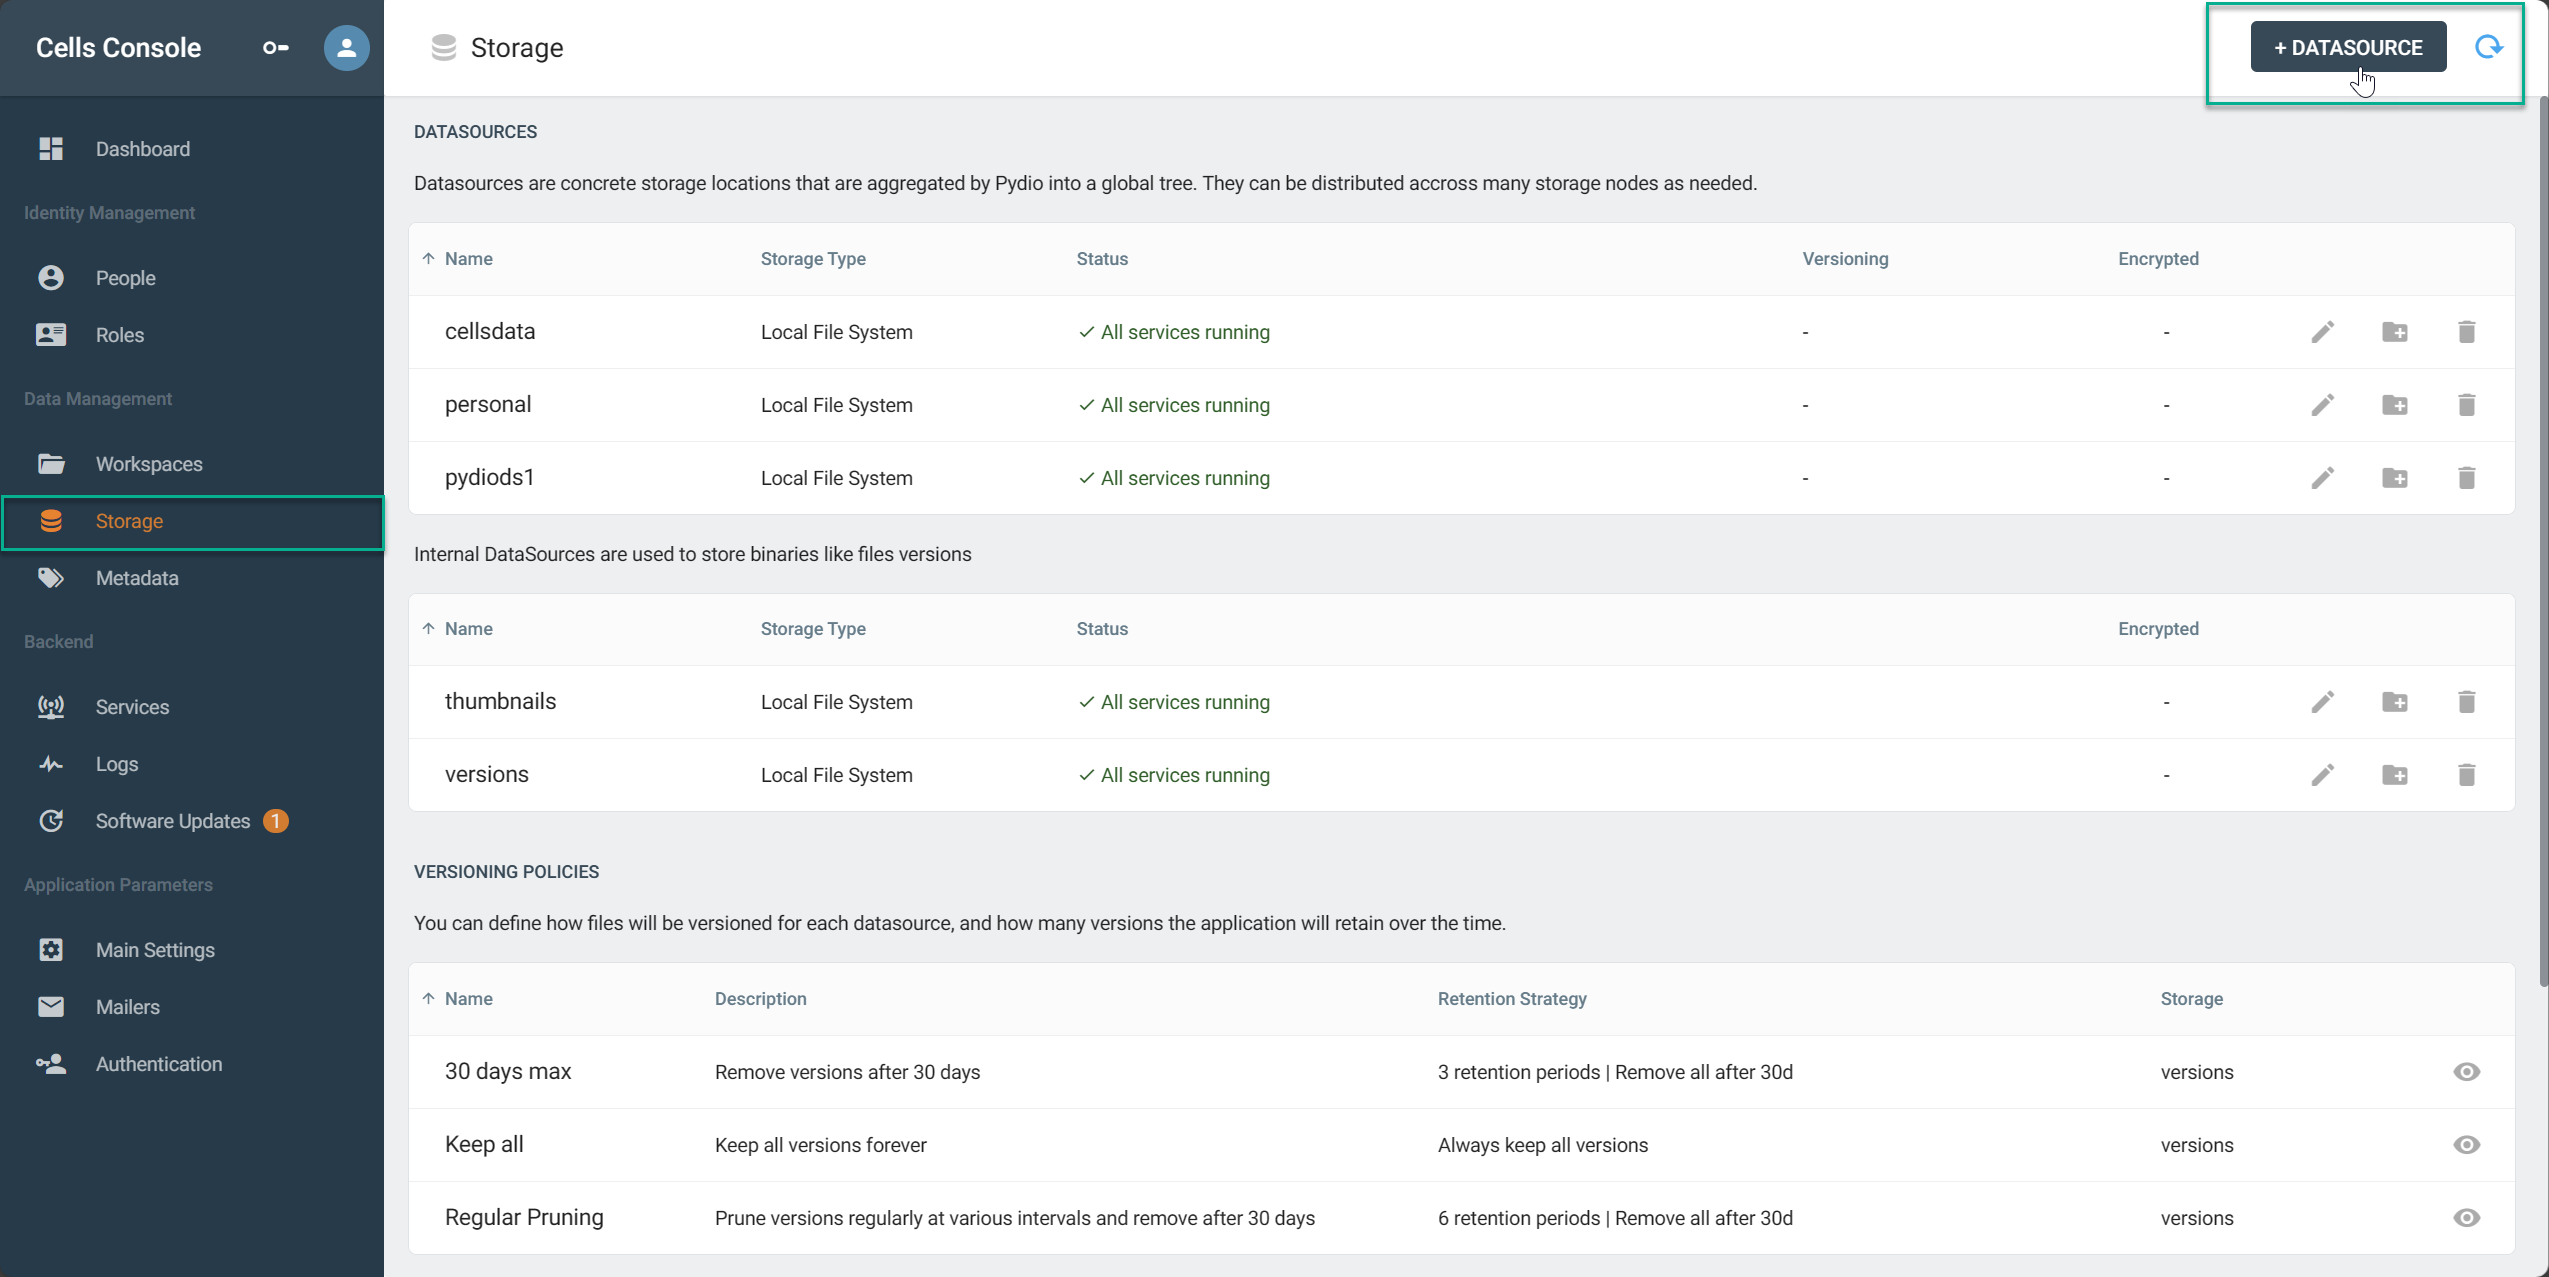
- Navigate to the
Storageoption and click+ DATASOURCEat the top-right corner.
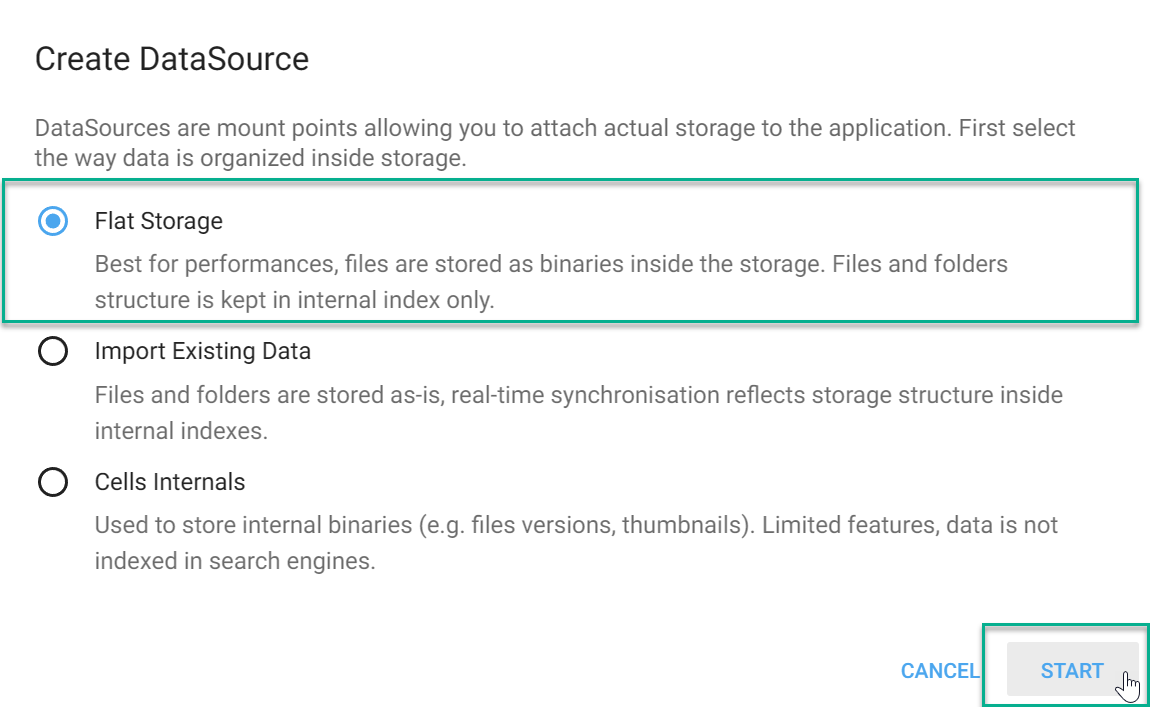
- Select
Flat Storageand clickStartto create your datasource.
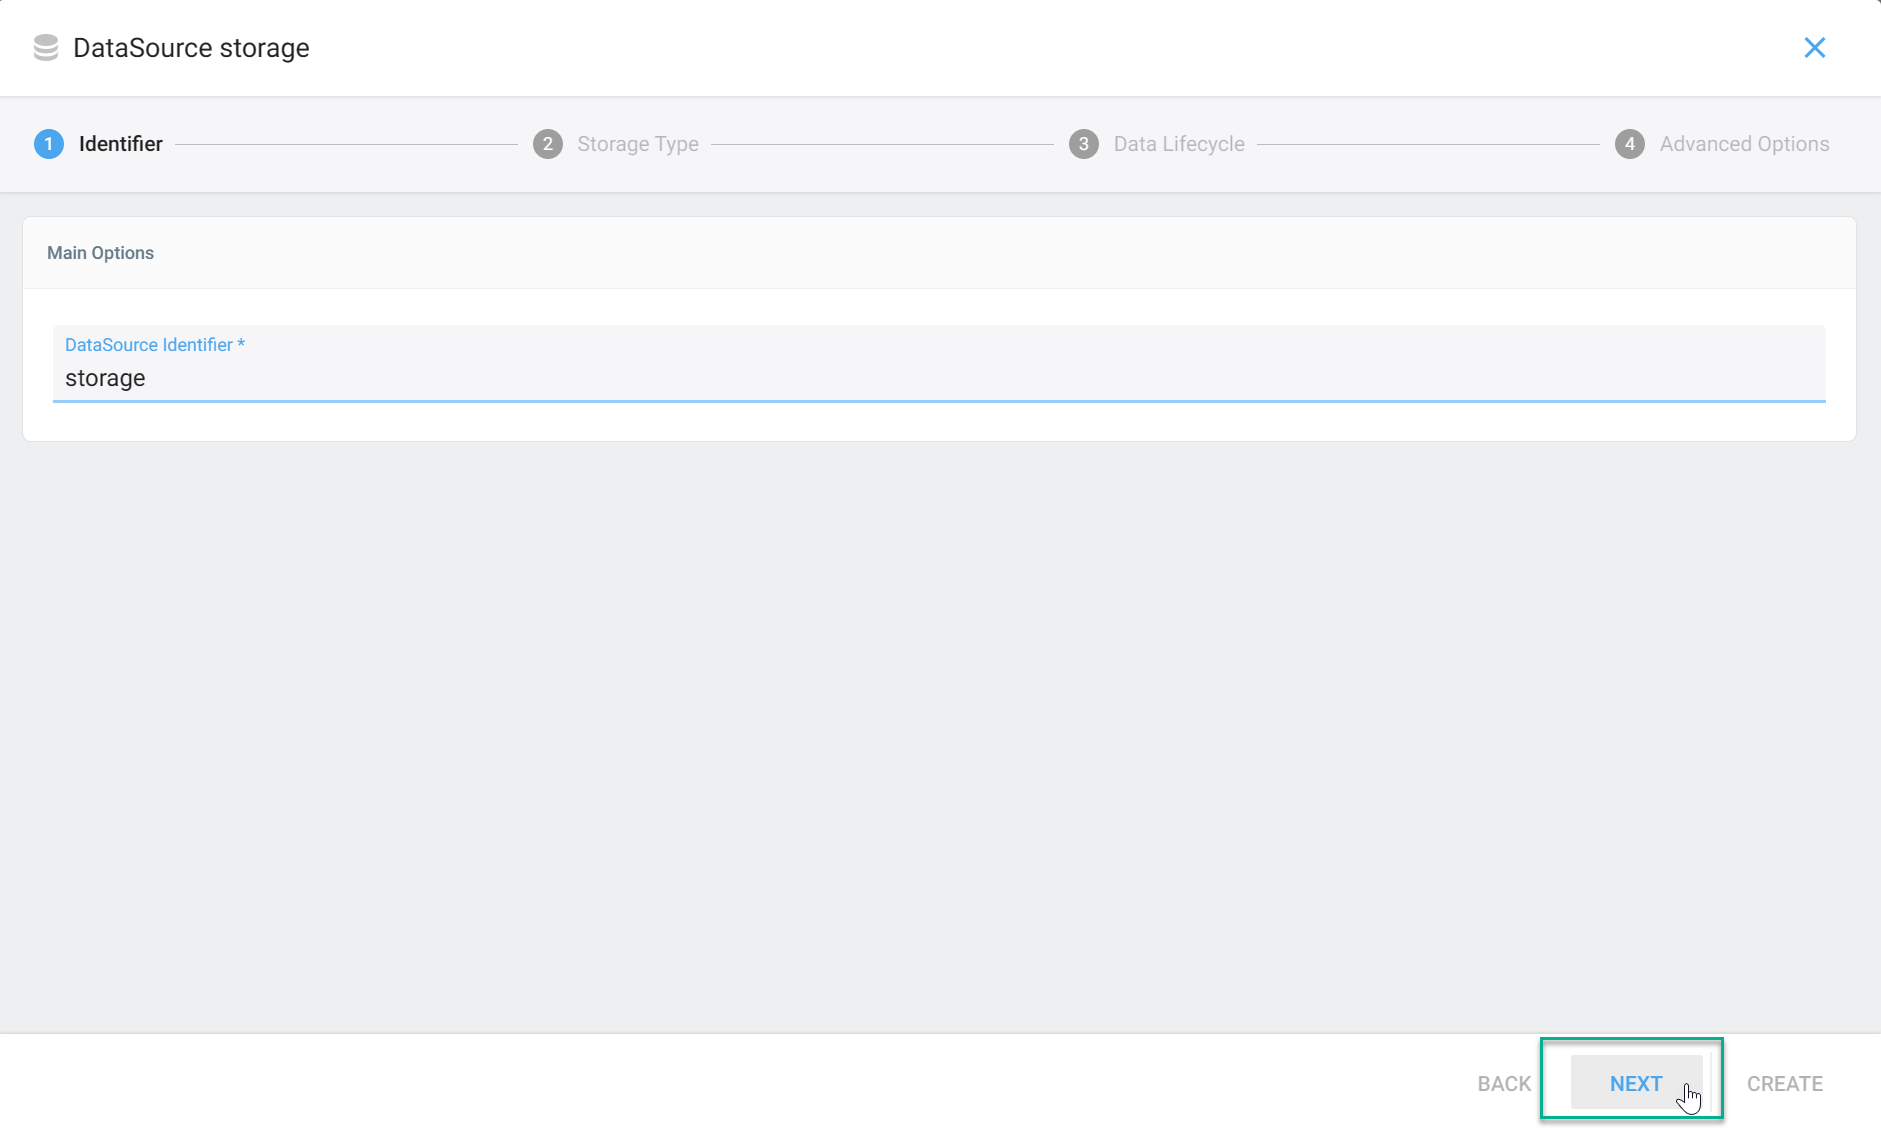
- Enter a identifier of your choice. We have used
storageas an identifier.
- We need to enter a folder path here that is two levels deep (such as
/folder/path). Hence we can’t use/storageas a path. We will use/homeX/USERNAME/storageinstead. HereXcan either be blank or a number. You can just type/homeand pydio will autosuggest your home directory.
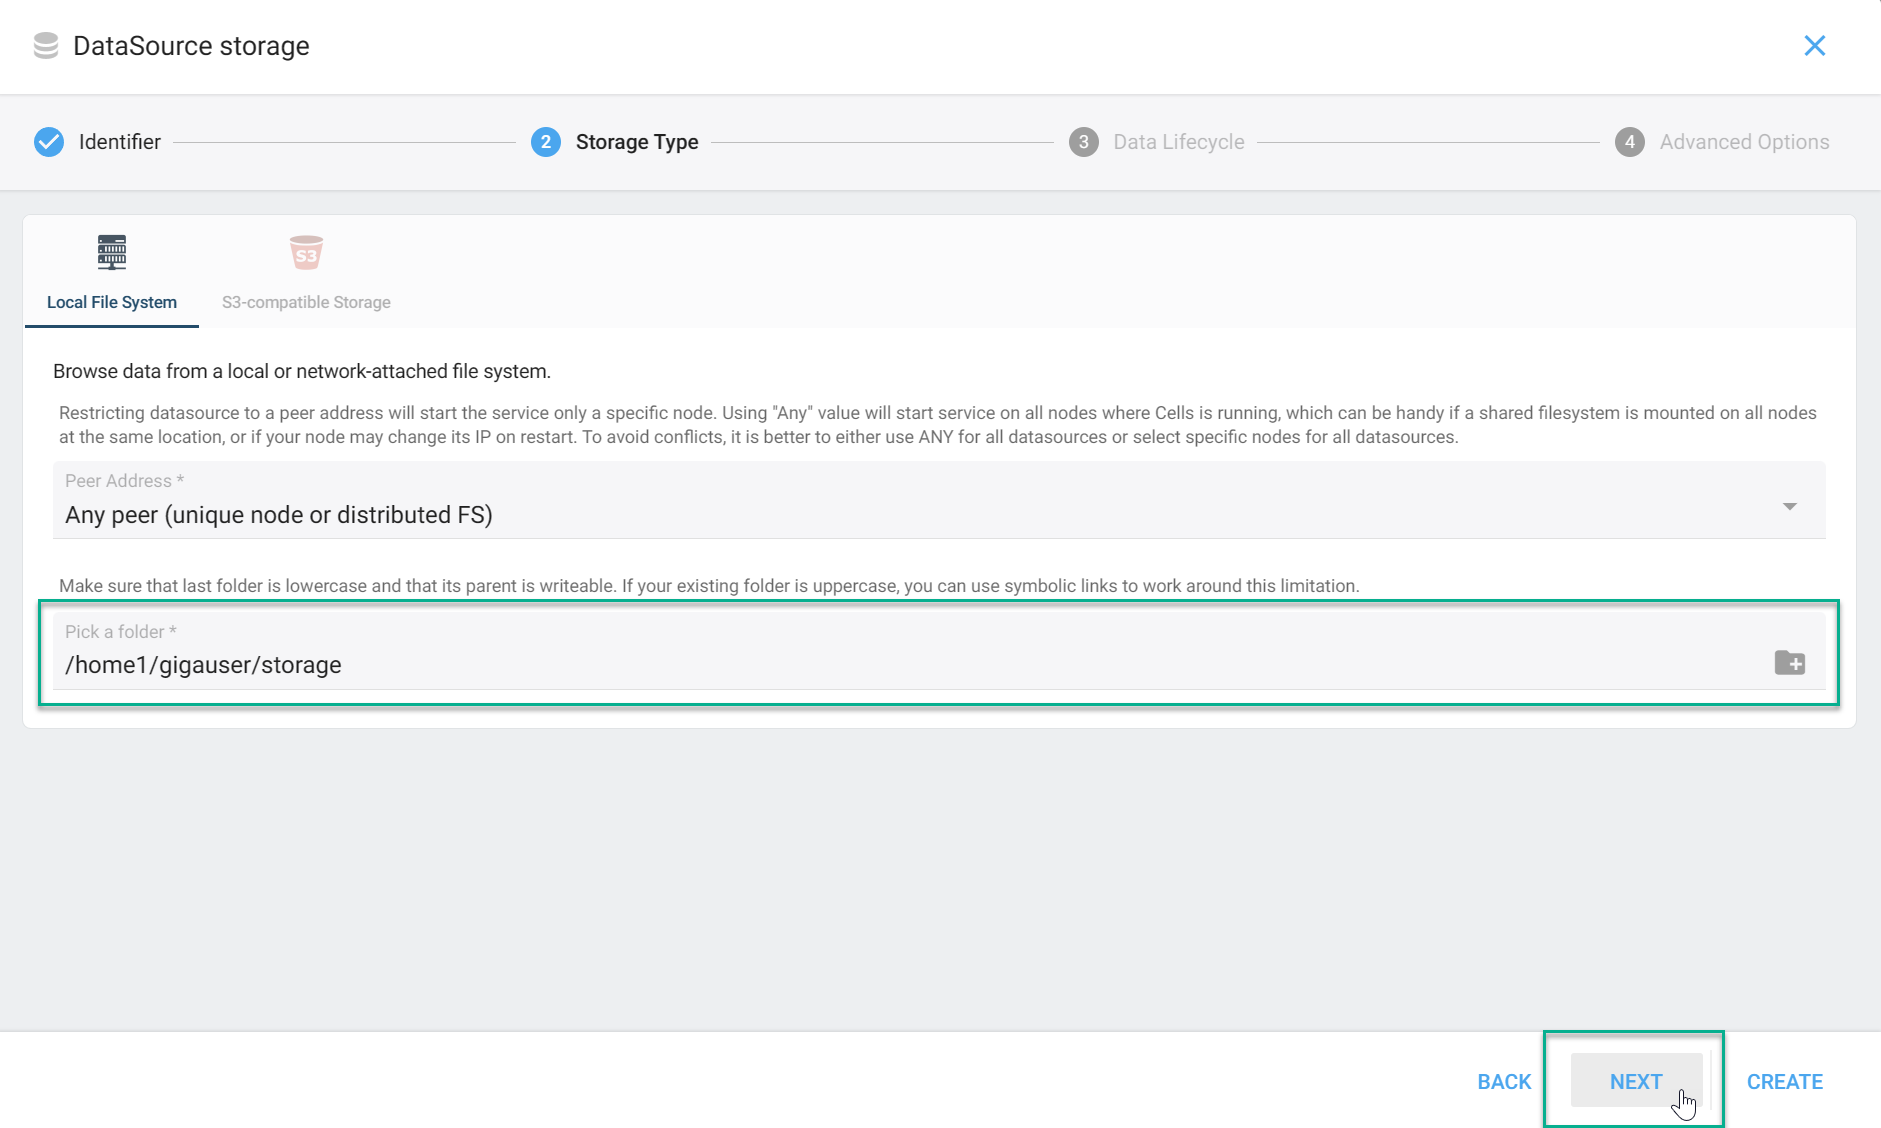
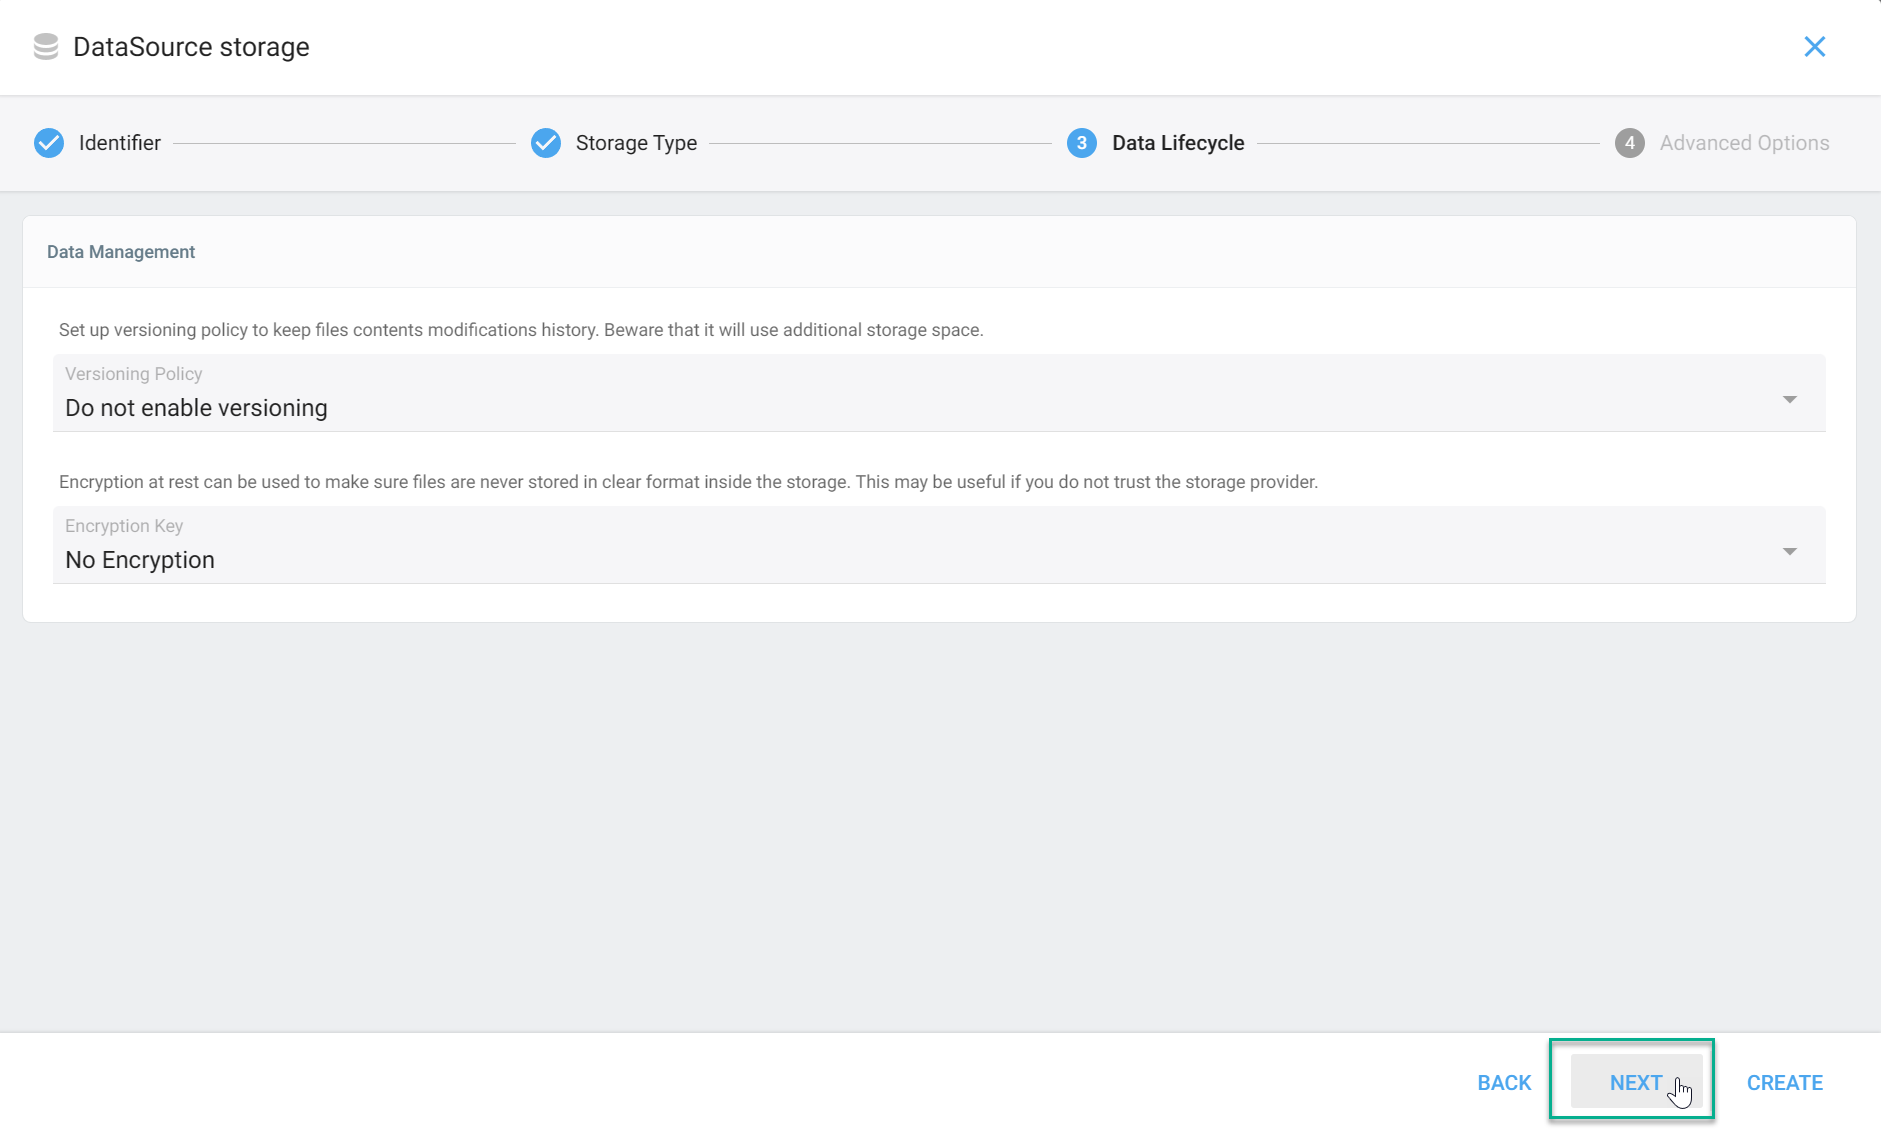
- Click
Next.
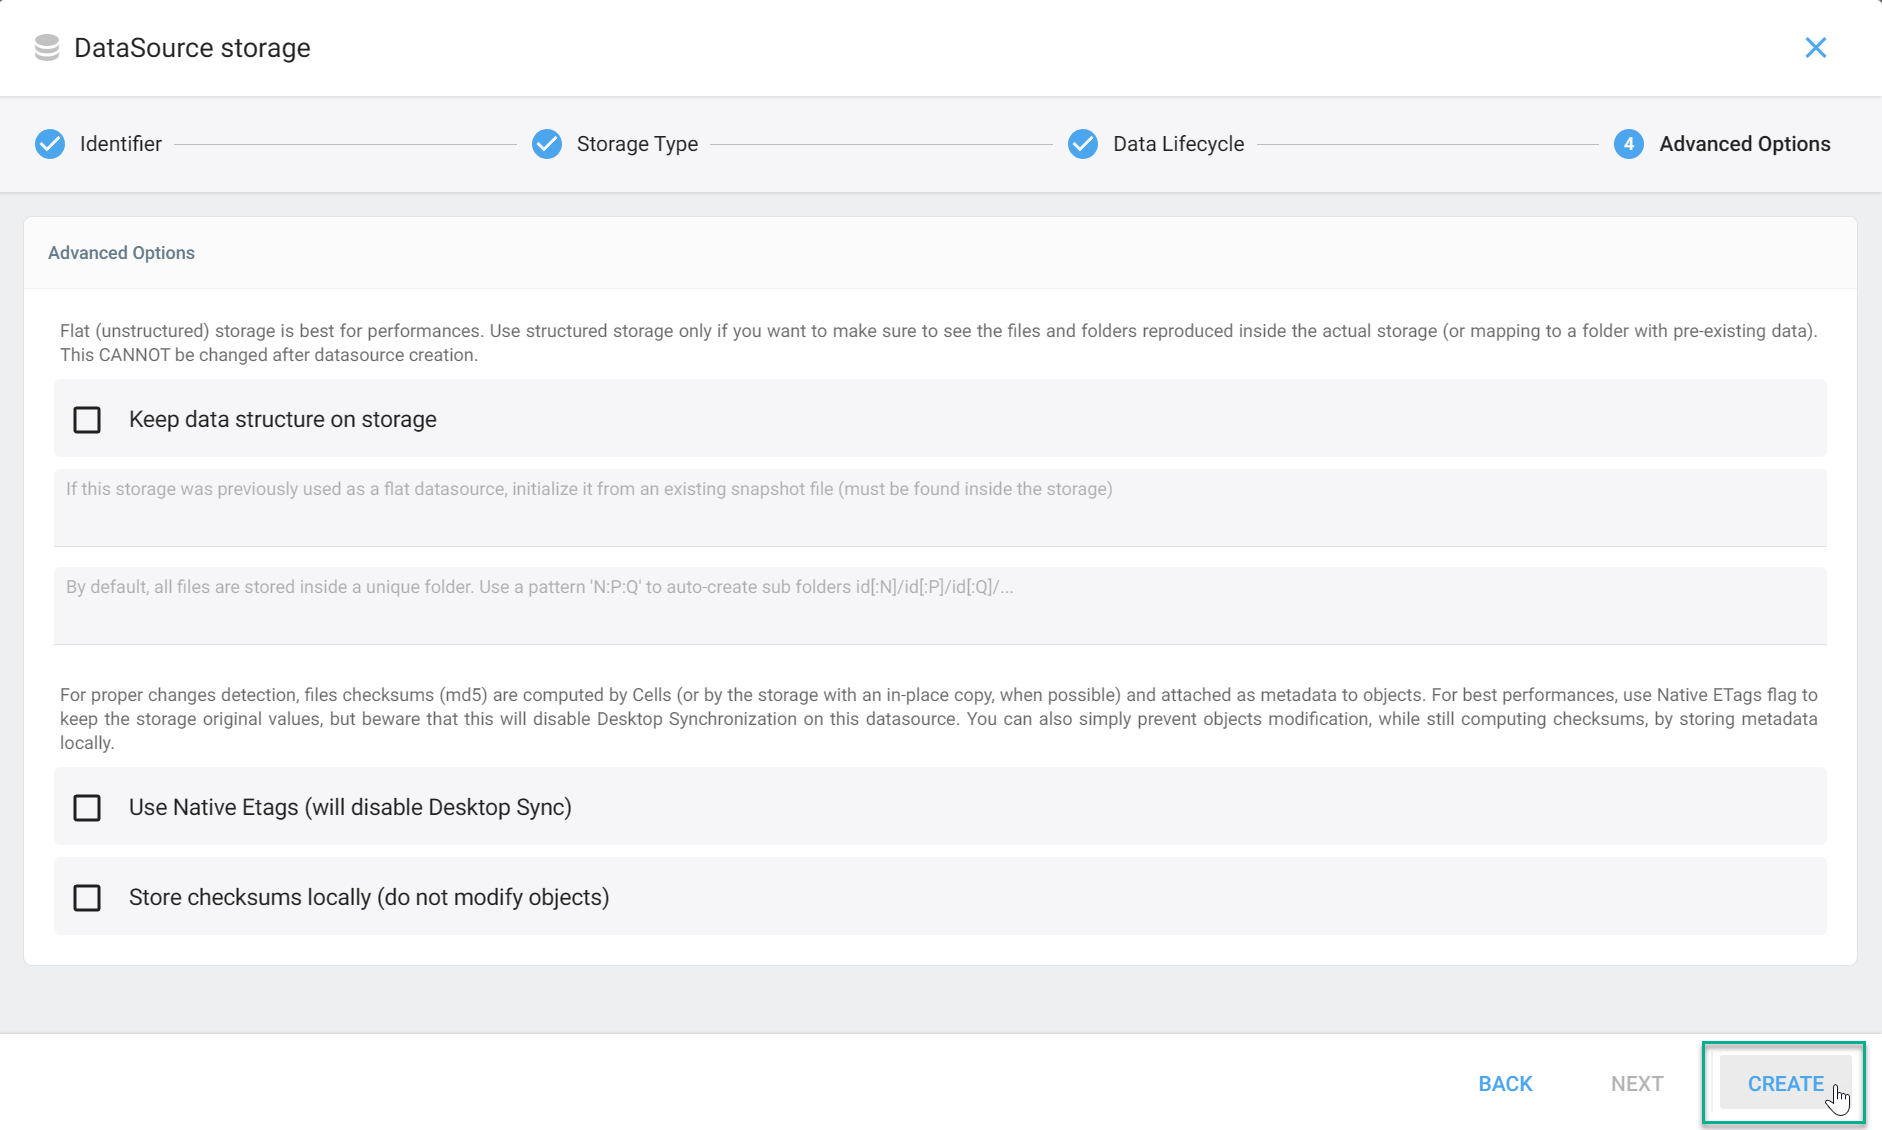
- Click
Create.
If you wish to import/view existing contents of your storage, check two additional options on this page Keep data structure on storage and Store checksums locally (do not modify objects).
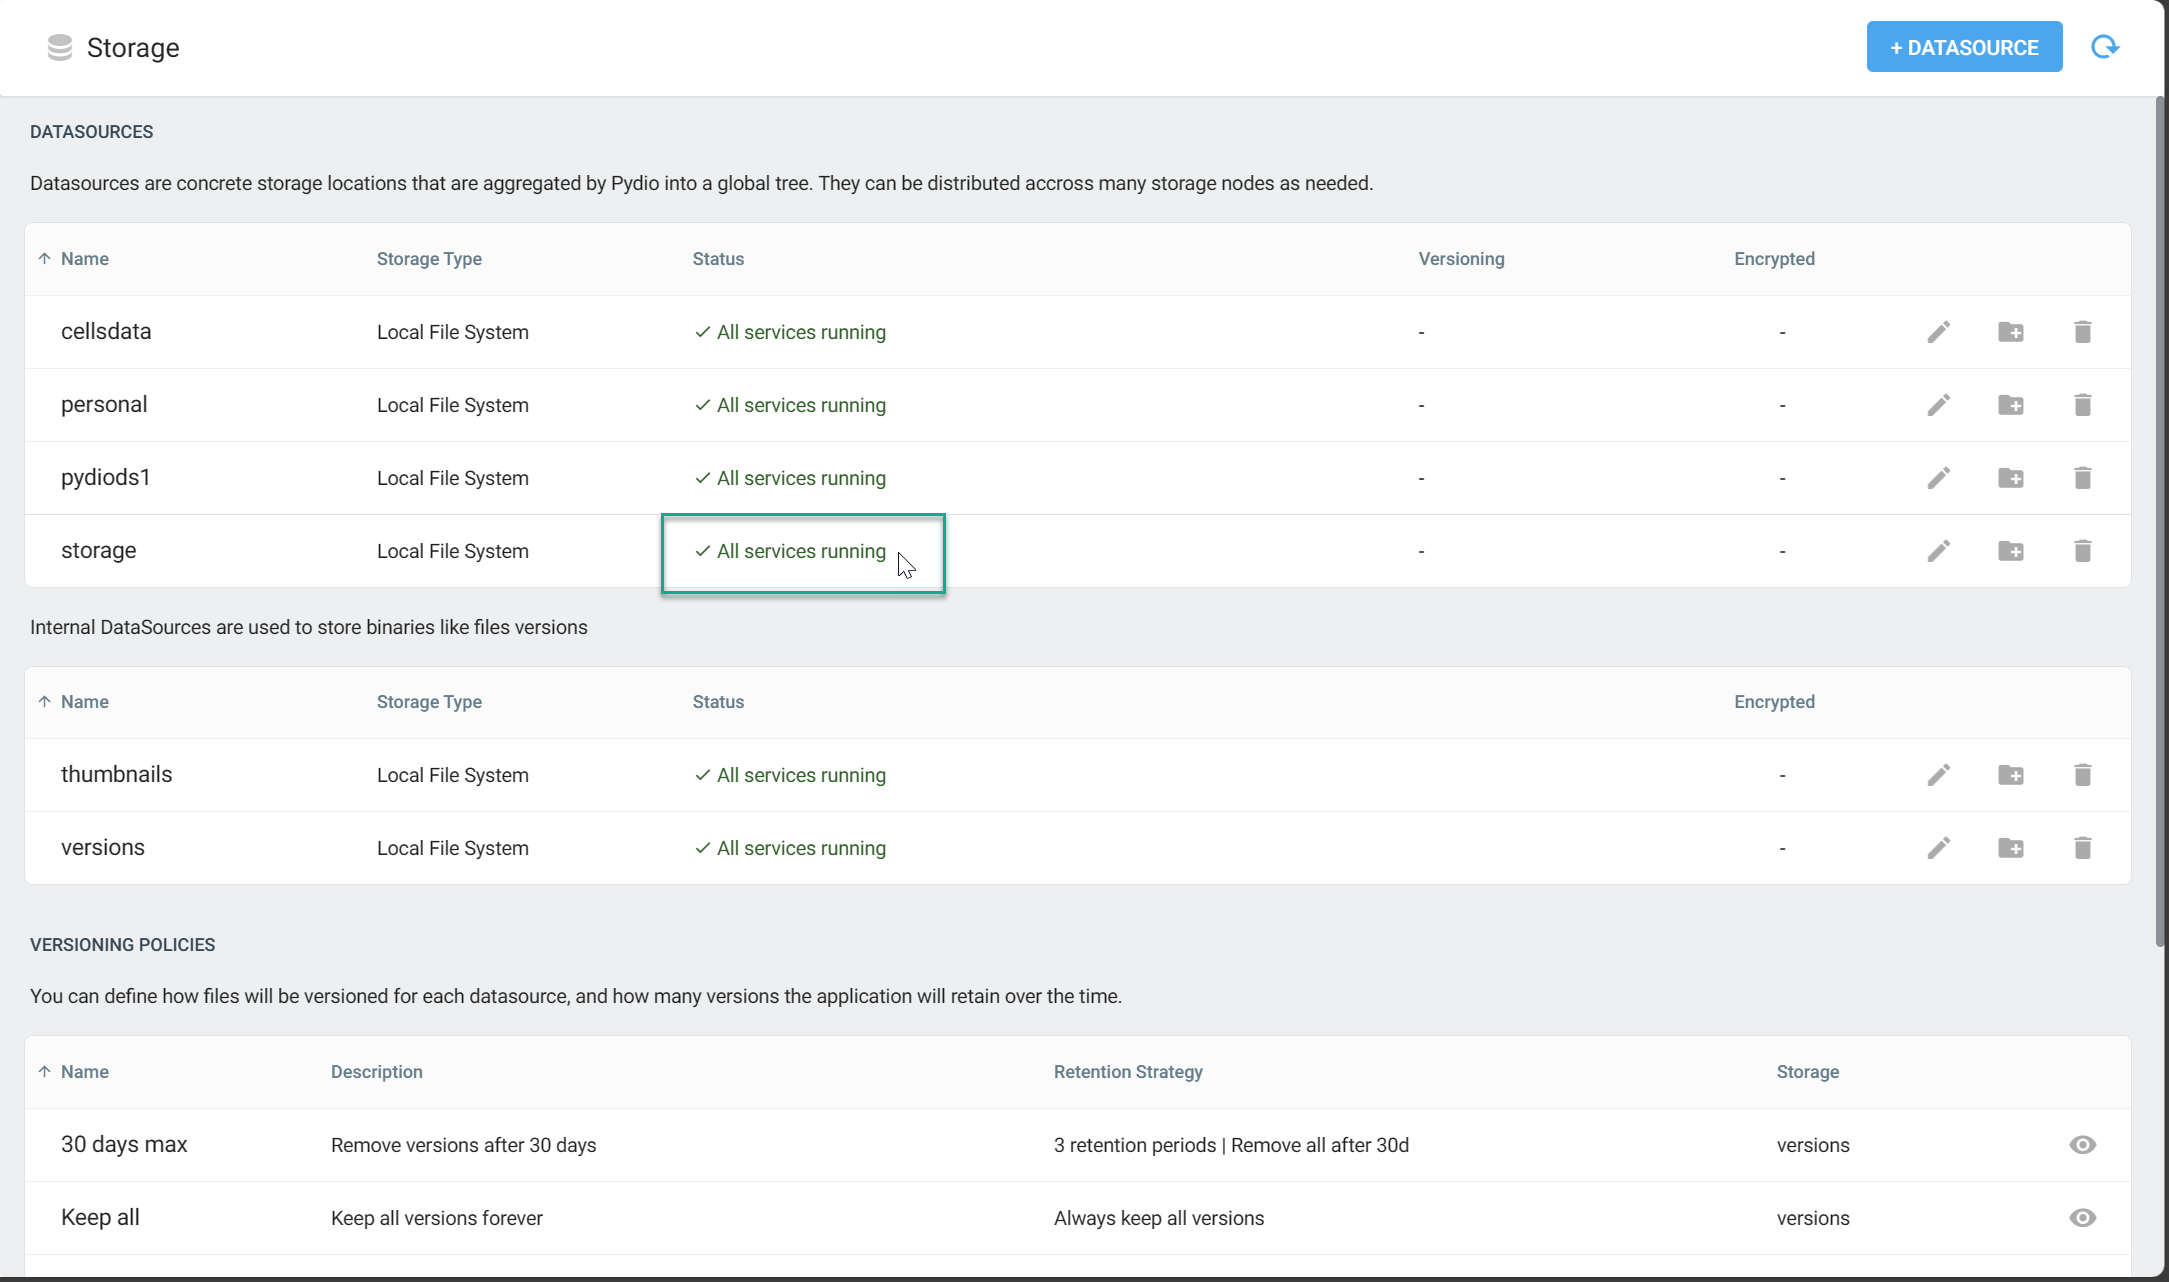
8. Wait for pydio to finish scanning your storage directory. Once done, the status of your datastorage will be shown as All services running.
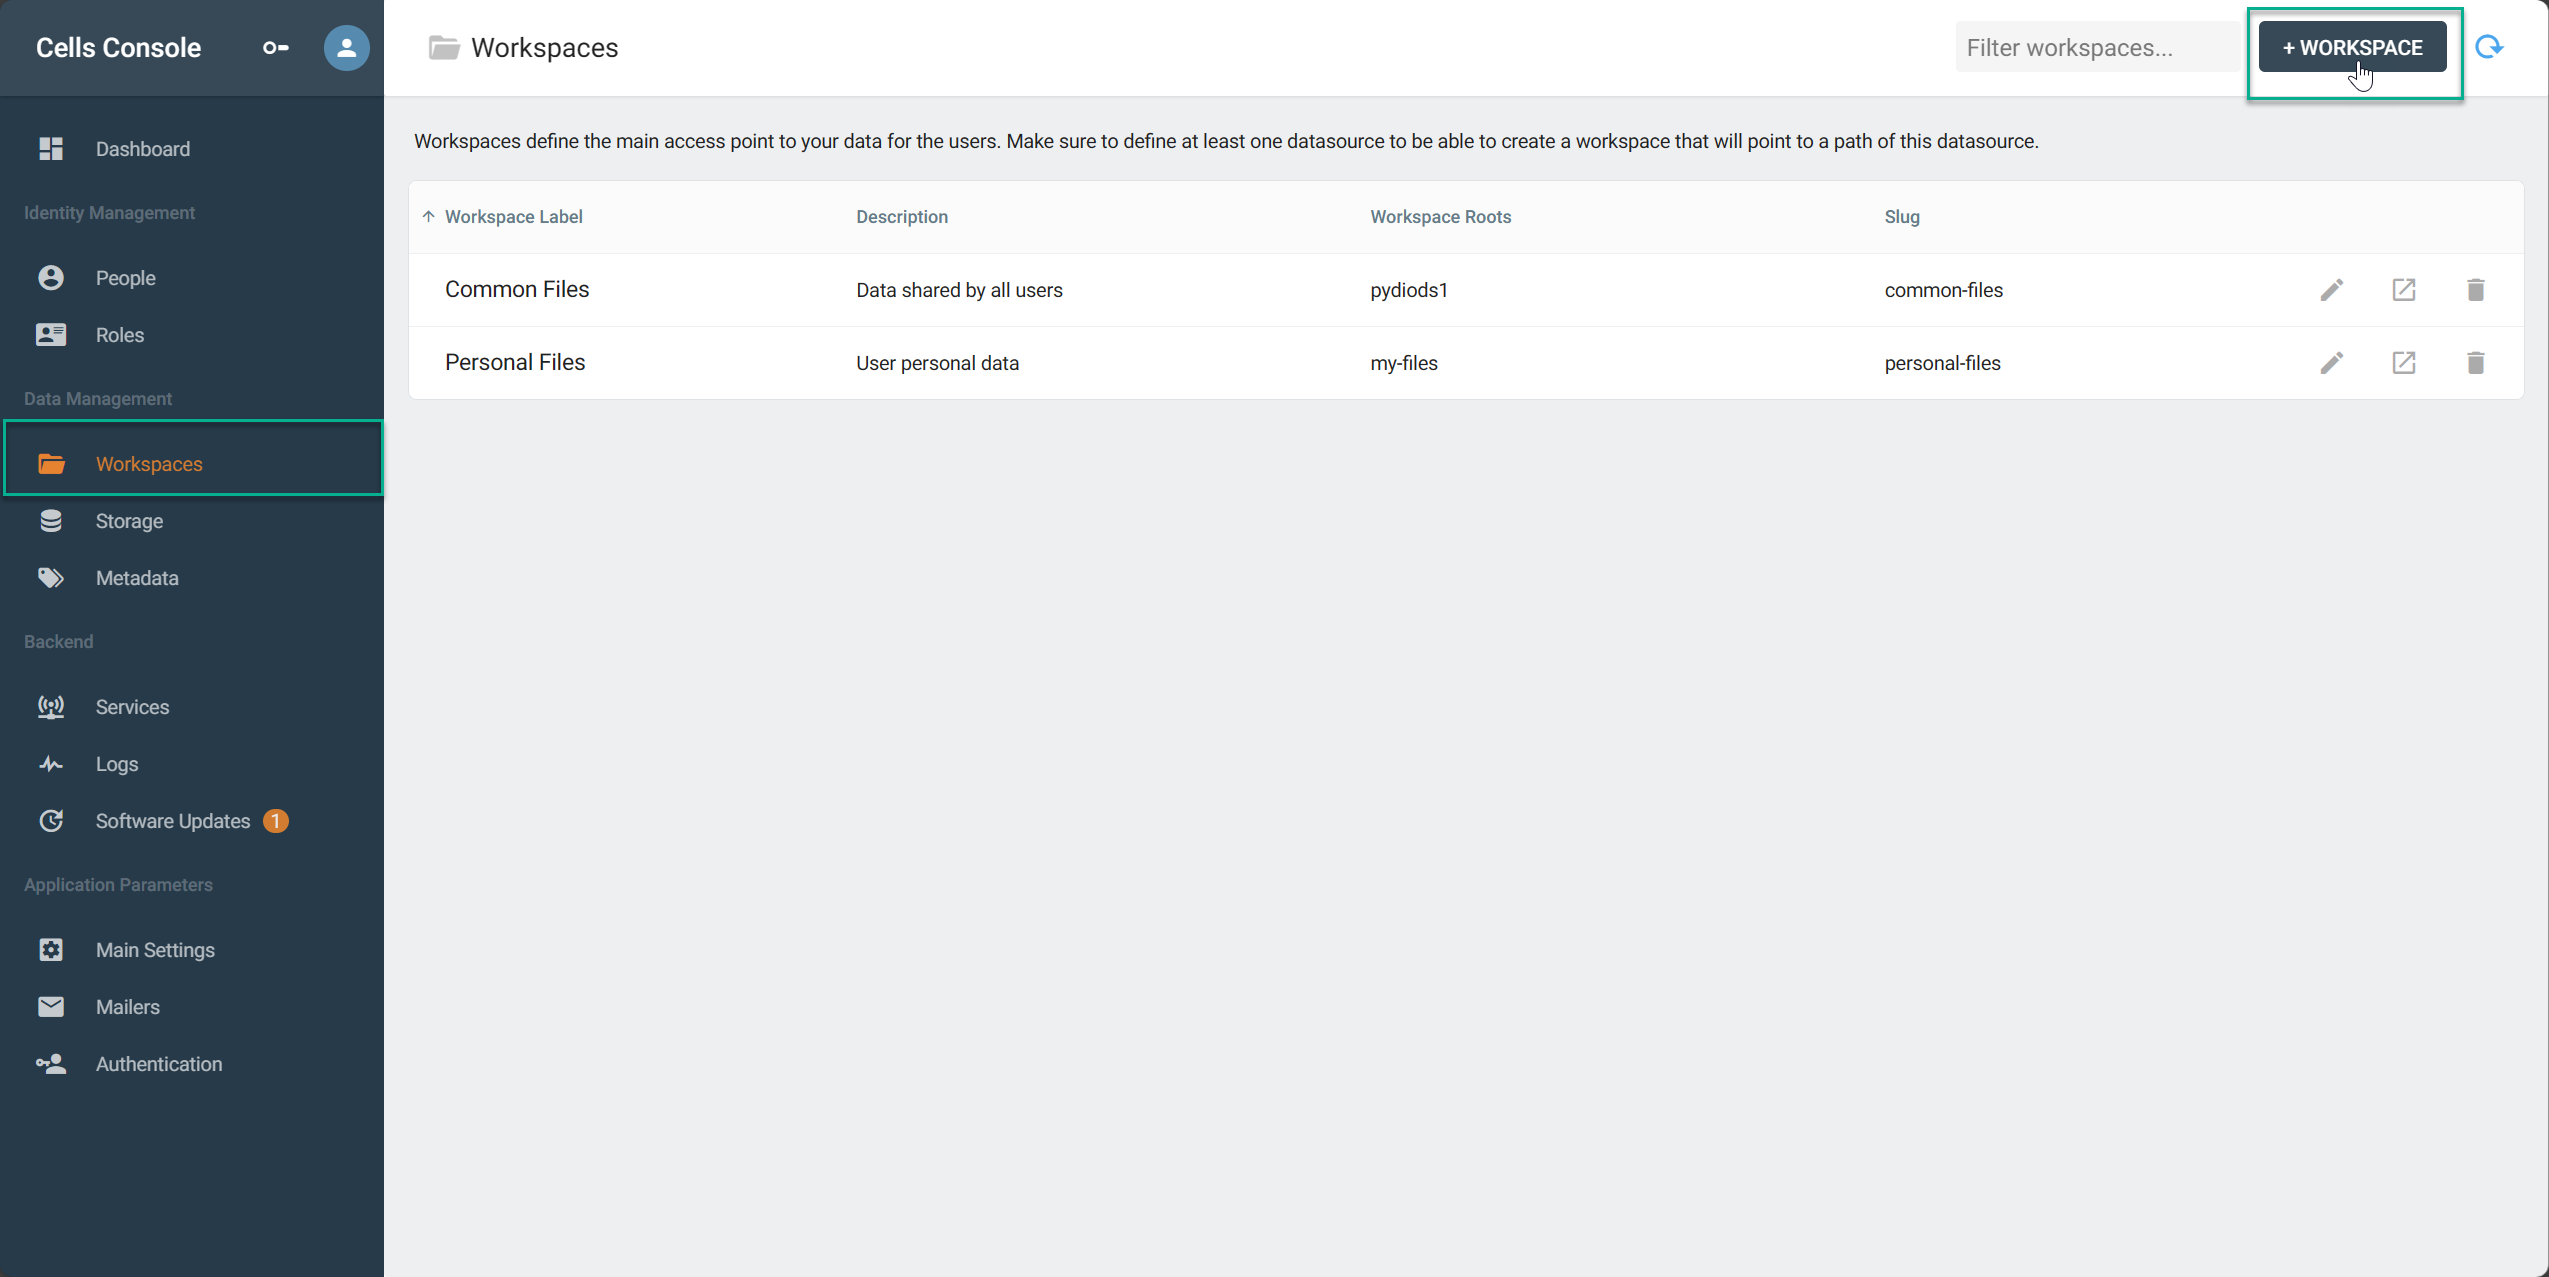
9. Navigate to Workspaces option at the left sidebar and click + WORKSPACE.
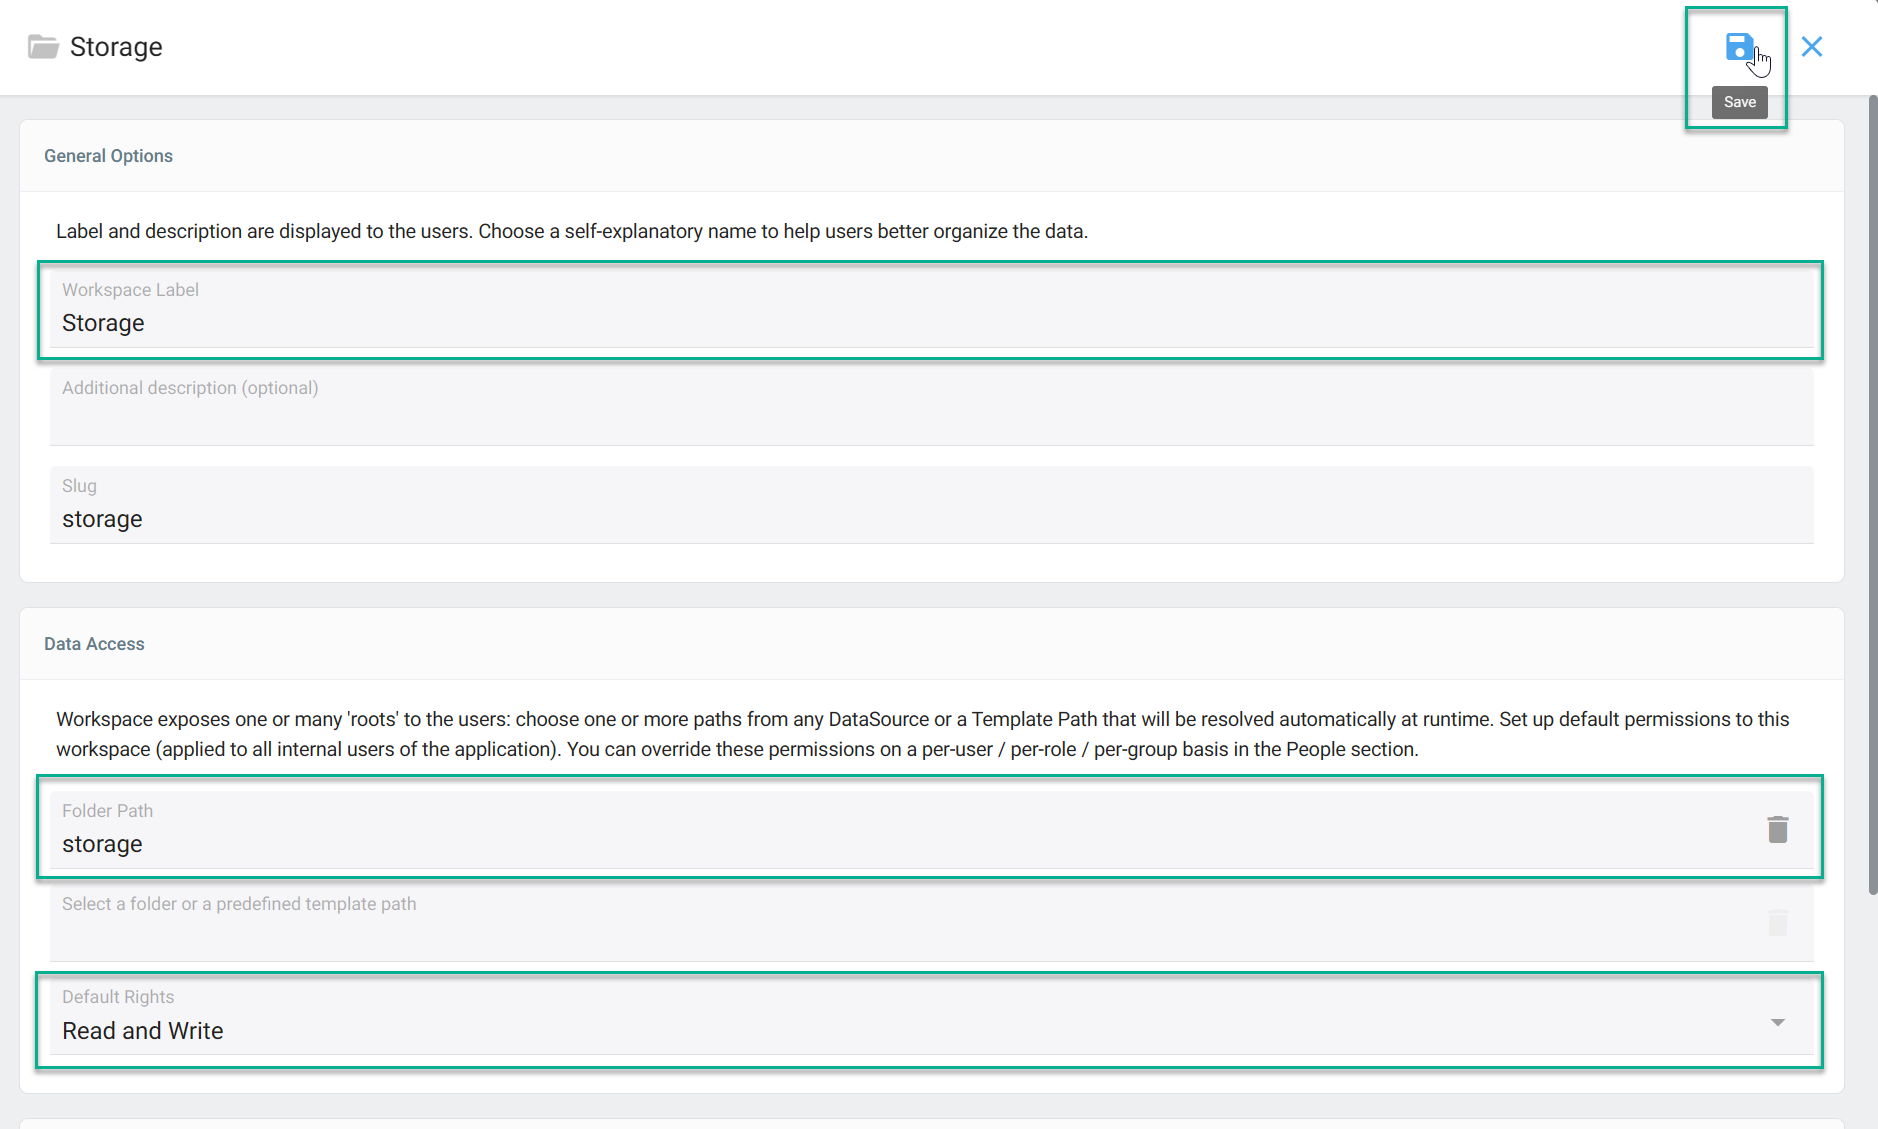
10. Set a label of your choice. Set a folder path which has the same name as our datasource created on step 5. Set default rights to Read and Write.
11. Click the profile icon at the top-left corner and then click Go back to main page.
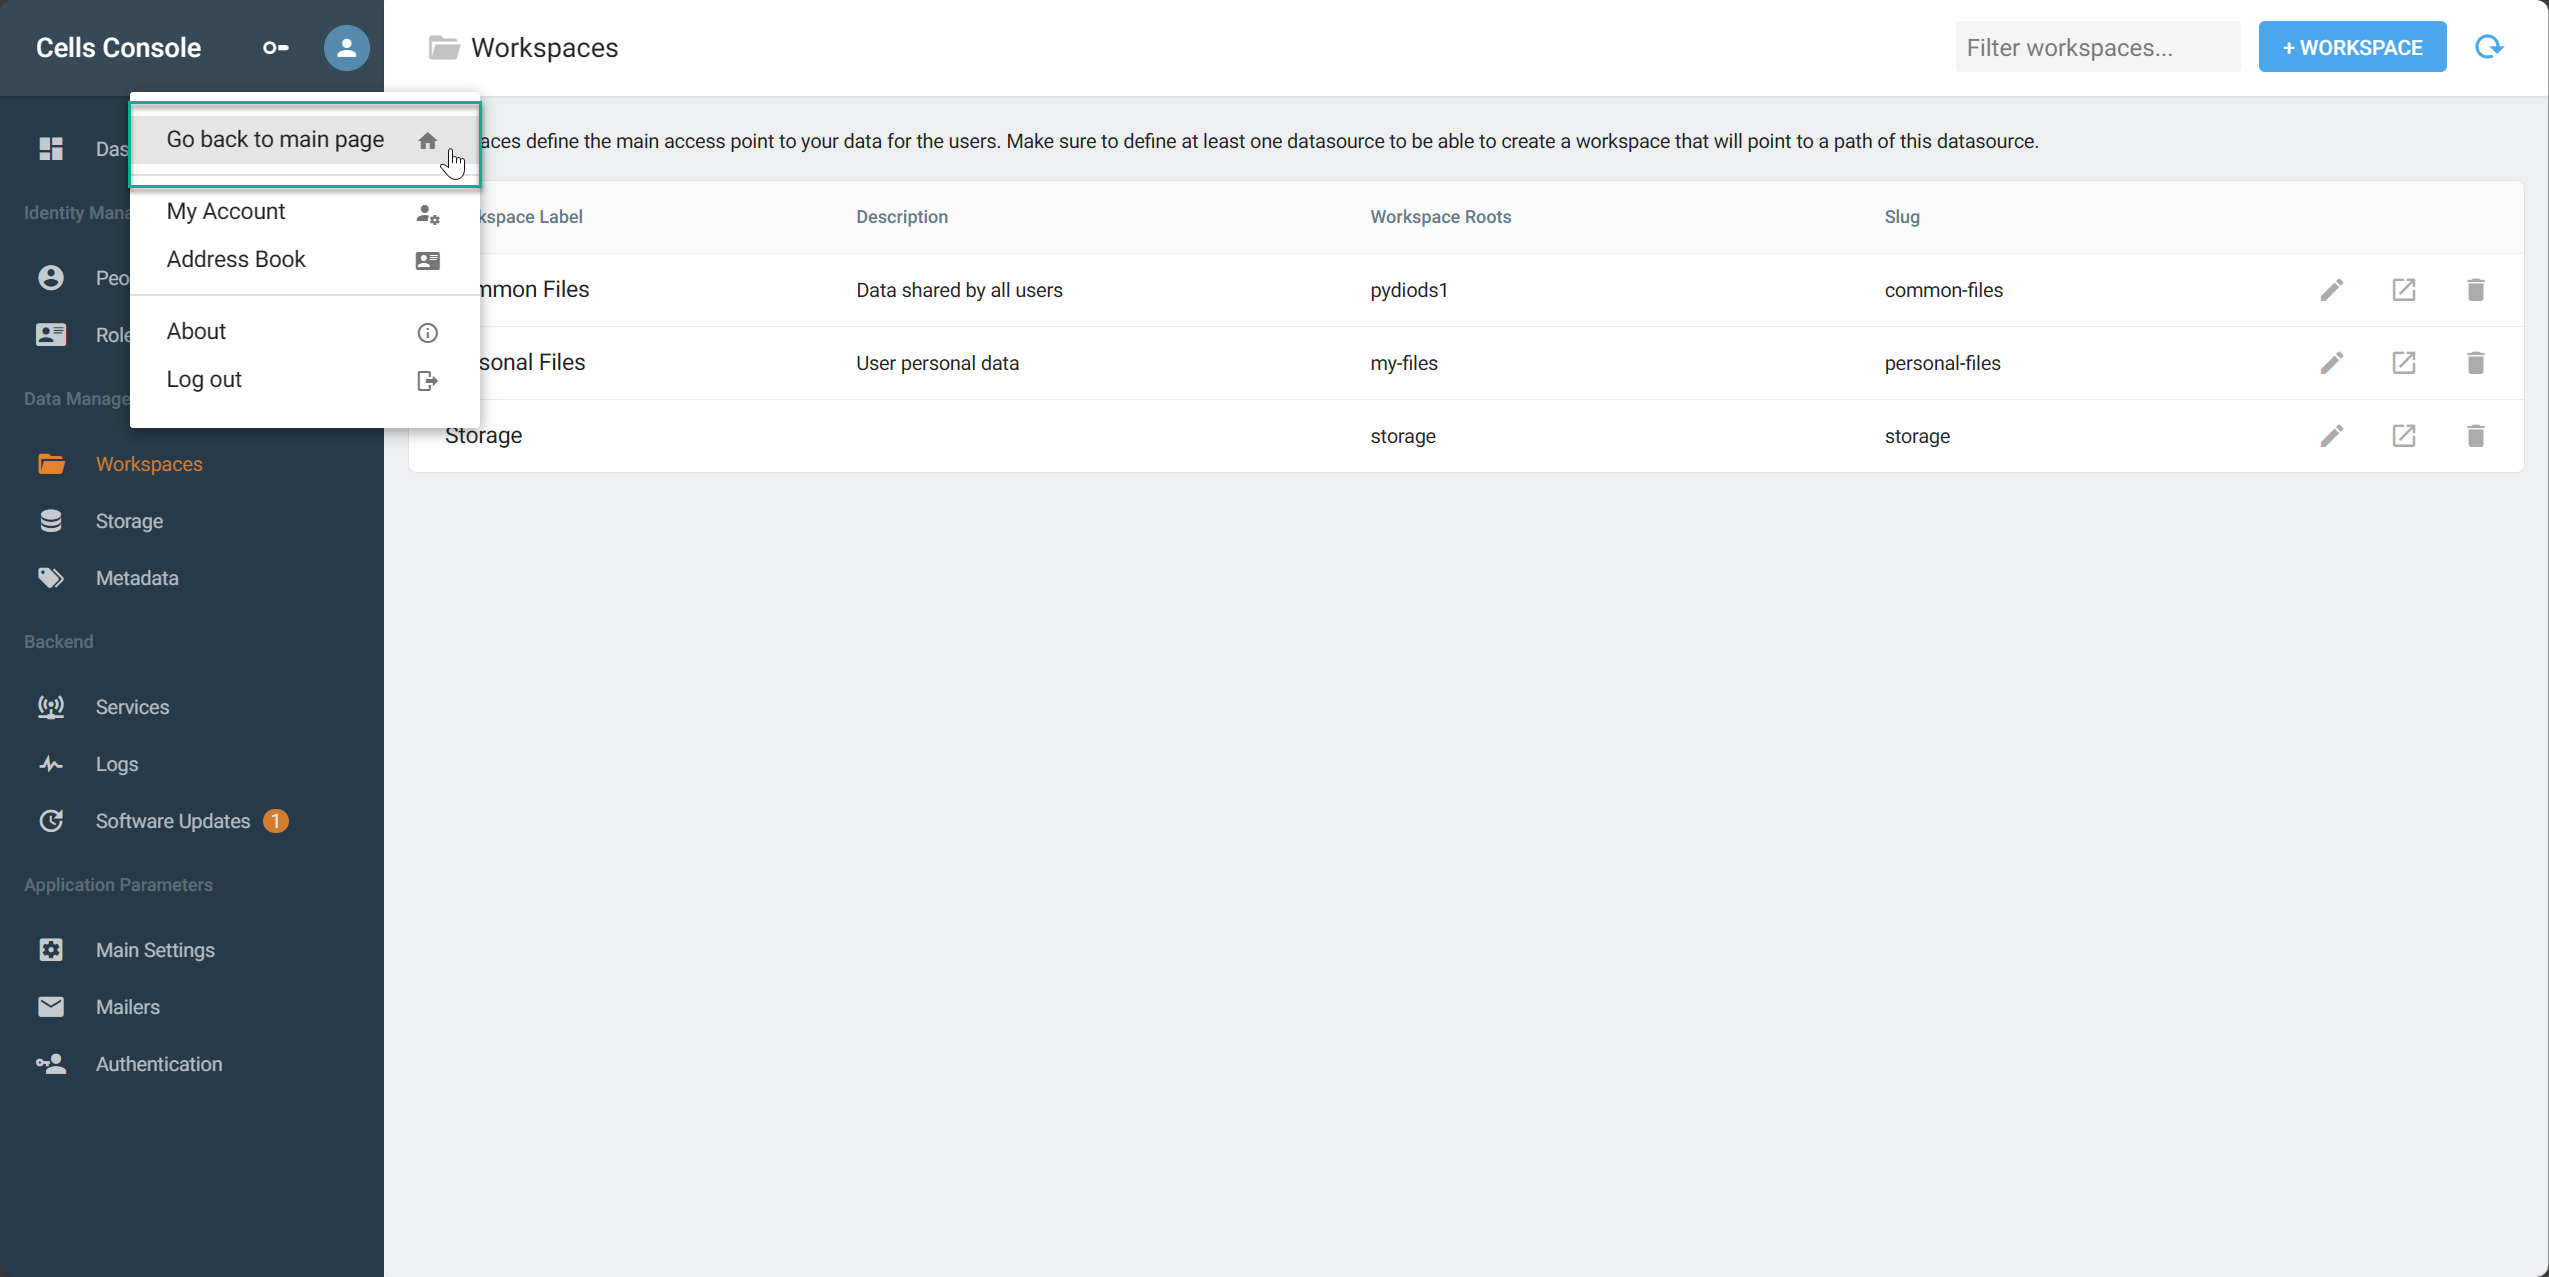
12. If everything is set properly you will find your storage directory on the main page.