¶ Intro
Emby (formerly Media Browser) is a proprietary media server designed to organize, play, and stream audio and video to a variety of devices.
![]()
¶ Availability
Please check our application chart to see which GigaDrive Plans are eligible to install this application.
¶ Features
- Your Media on Any Device Emby Server automatically converts and streams your personal media on the fly to play on any device.
- Easy Access Emby Connect makes it easy to enjoy your personal media while away from home. Just sign in and play.
- Live TV Stream Live TV to any device, manage your DVR, and enjoy your library of recordings.
- Mobile Sync Sync your personal media to smart phones and tablets for easy offline access. Automatically sync new content as you add it.
- Beautiful Displays Emby organizes your content into easy and elegant presentations. Your personal media will never look the same.
- Manage Your Media Easy web-based tools help you edit metadata and images, search for subtitles, and more.
- Manage Your Home Easily control content access for your children. Monitor and remote control their sessions as you need to.
- Parental Controls Specify parental restrictions for your children, create access schedules, time limits, and more.
- Easy DLNA Emby automatically detects Dlna devices on your network so that you can easily send content, remote control, and more.
- Chromecast Send videos, music, photos, and Live TV to Chromecast with ease.
- Cloud Sync Sync your personal media to the cloud for easy backup, archiving, and converting. Store your content in multiple resolutions to enable direct streaming from any device.
¶ Installing Emby
- Navigate to the Application Manager page and search for
emby. - Click icon to open the installation window and tap Install to start the installation process.
- Once the installation is complete, click icon to open the Access Info page. Then click Go To Application to access
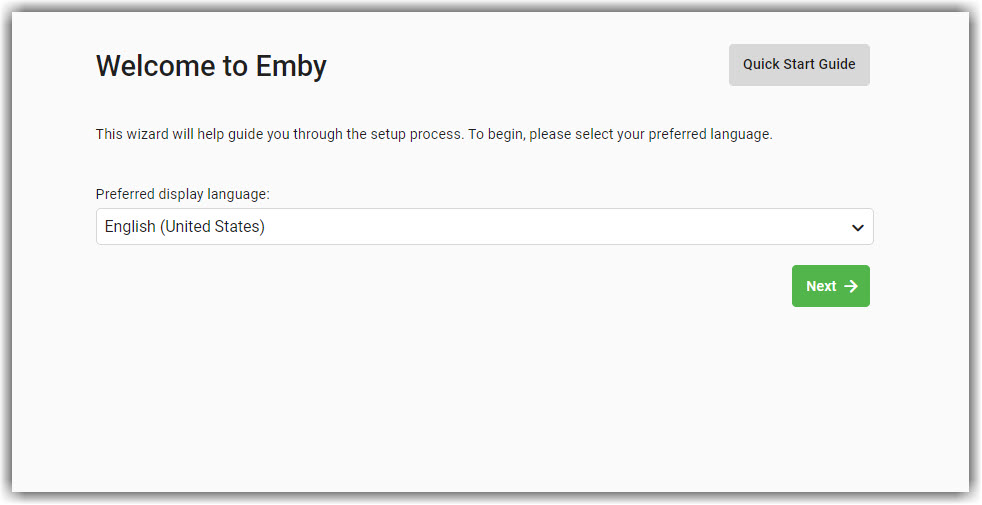
emby. - You will be redirected to the initial setup page which looks like the following image. Select your Preferred display language and click Next.
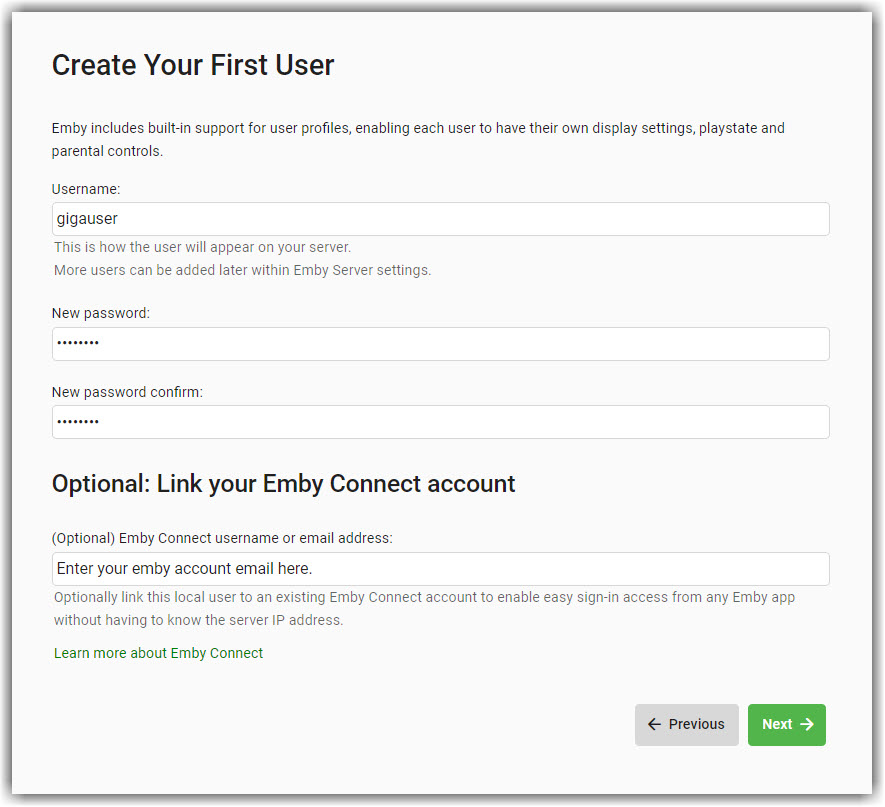
- Enter Username and Password of your choice and optionally enter your Emby connect username or email address in order to link your emby server to your emby connect account.
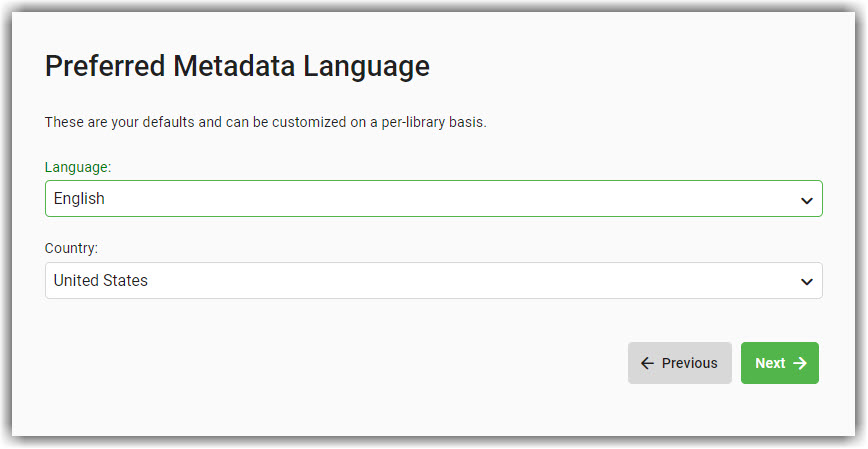
- Enter your Preferred Metadata Language and Country.
- Keep the rest of the options to their default settings and click Finish to complete the setup.
¶ Configuring Emby
- Once the initial setup is done, Navigate to the Application Manager page of your dashboard and search for
emby. - Click icon to open the Access Info page and note down HTTP port and HTTPS port which will be used later.
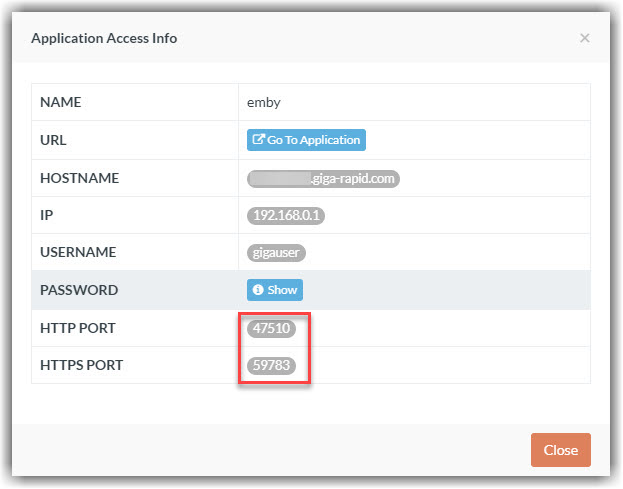
- Go back to your emby server’s homepage and click the top-right icon.
- Click Network under the Server section.
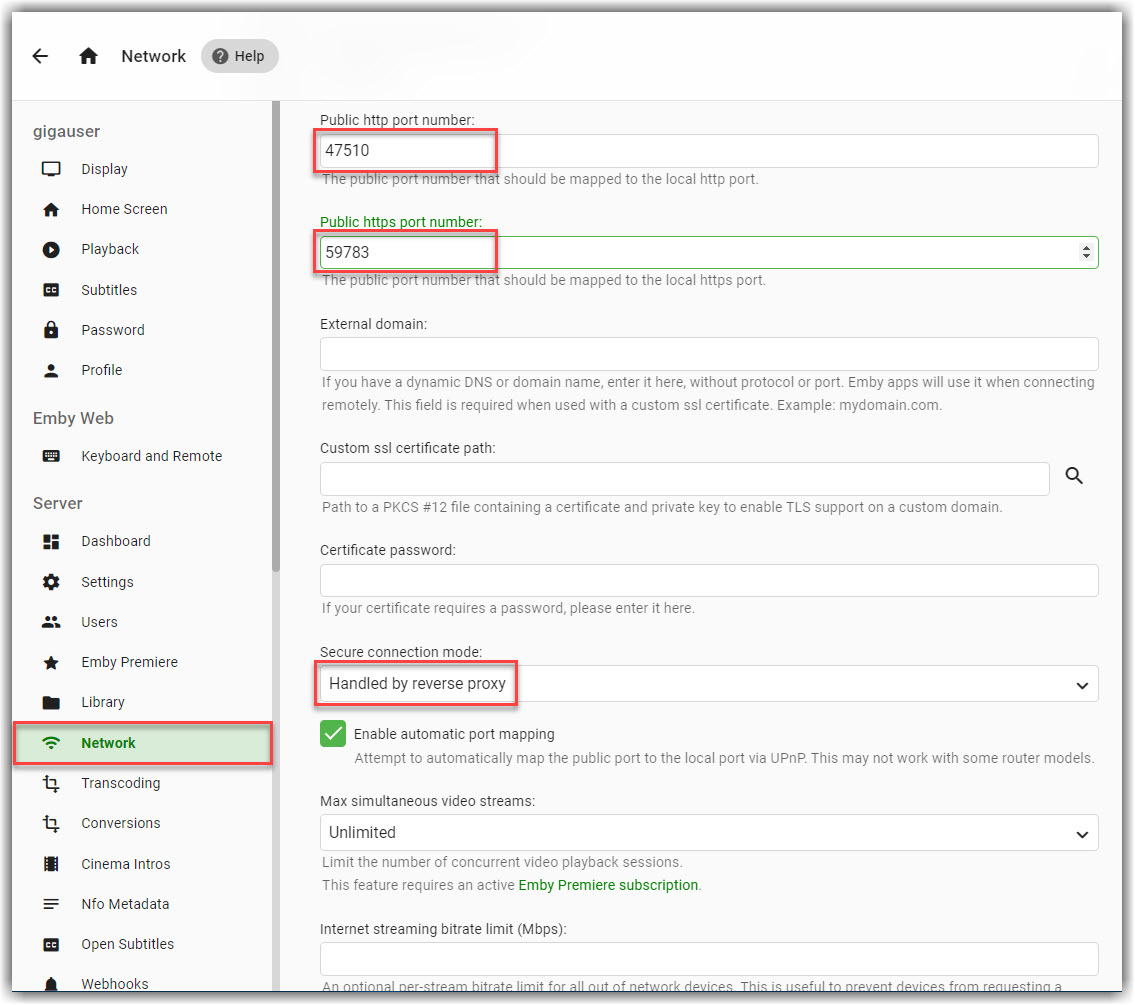
- Enter HTTP port and HTTPS port in the Public HTTP port number and Public HTTPS port number field respectively and set Secure connection mode to
Handled by reverse proxy. - Set
Custom ssl certificate path:to/config/emby_self_signed_key.p12and click Save button at the bottom. You also need to restart to make sure the SSL certificate is loaded correctly. - To add your media files, navigate to Settings > Server > Library. Click New Library.
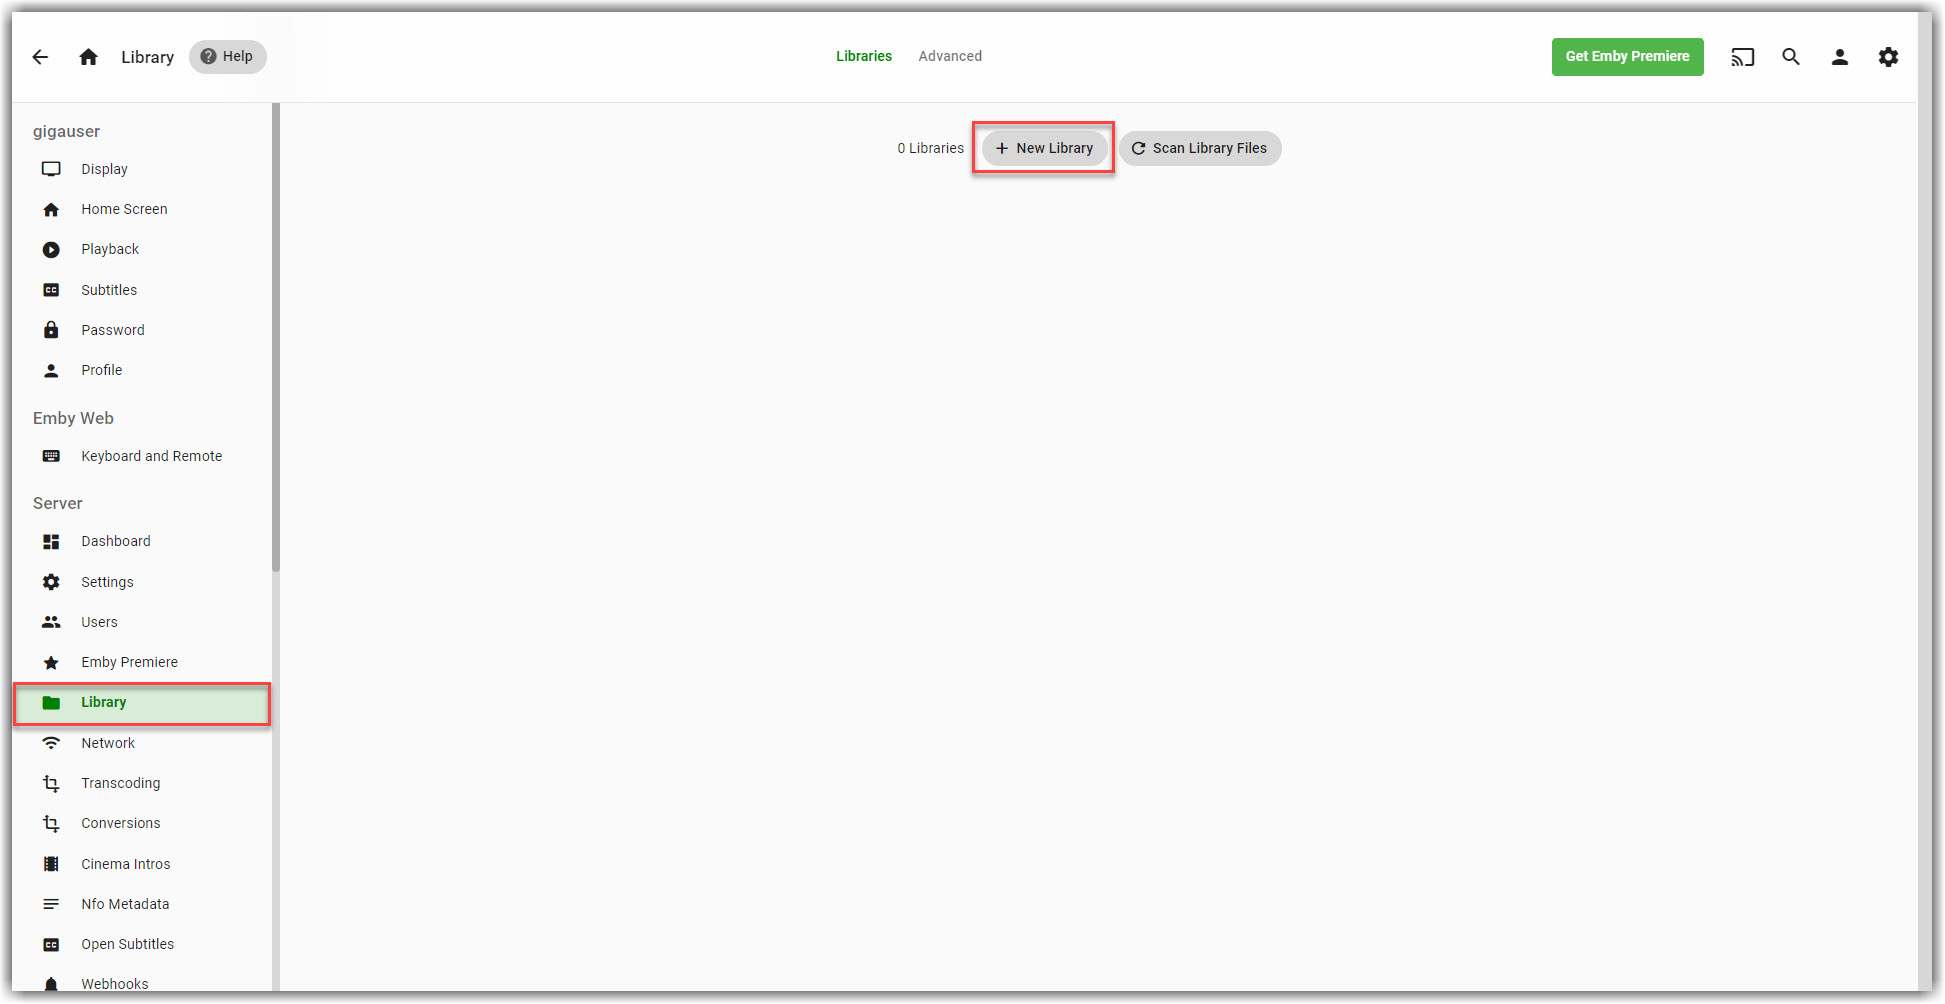
- Set your preferred Content type, Display name etc. Click icon to add folder(s) to your library.
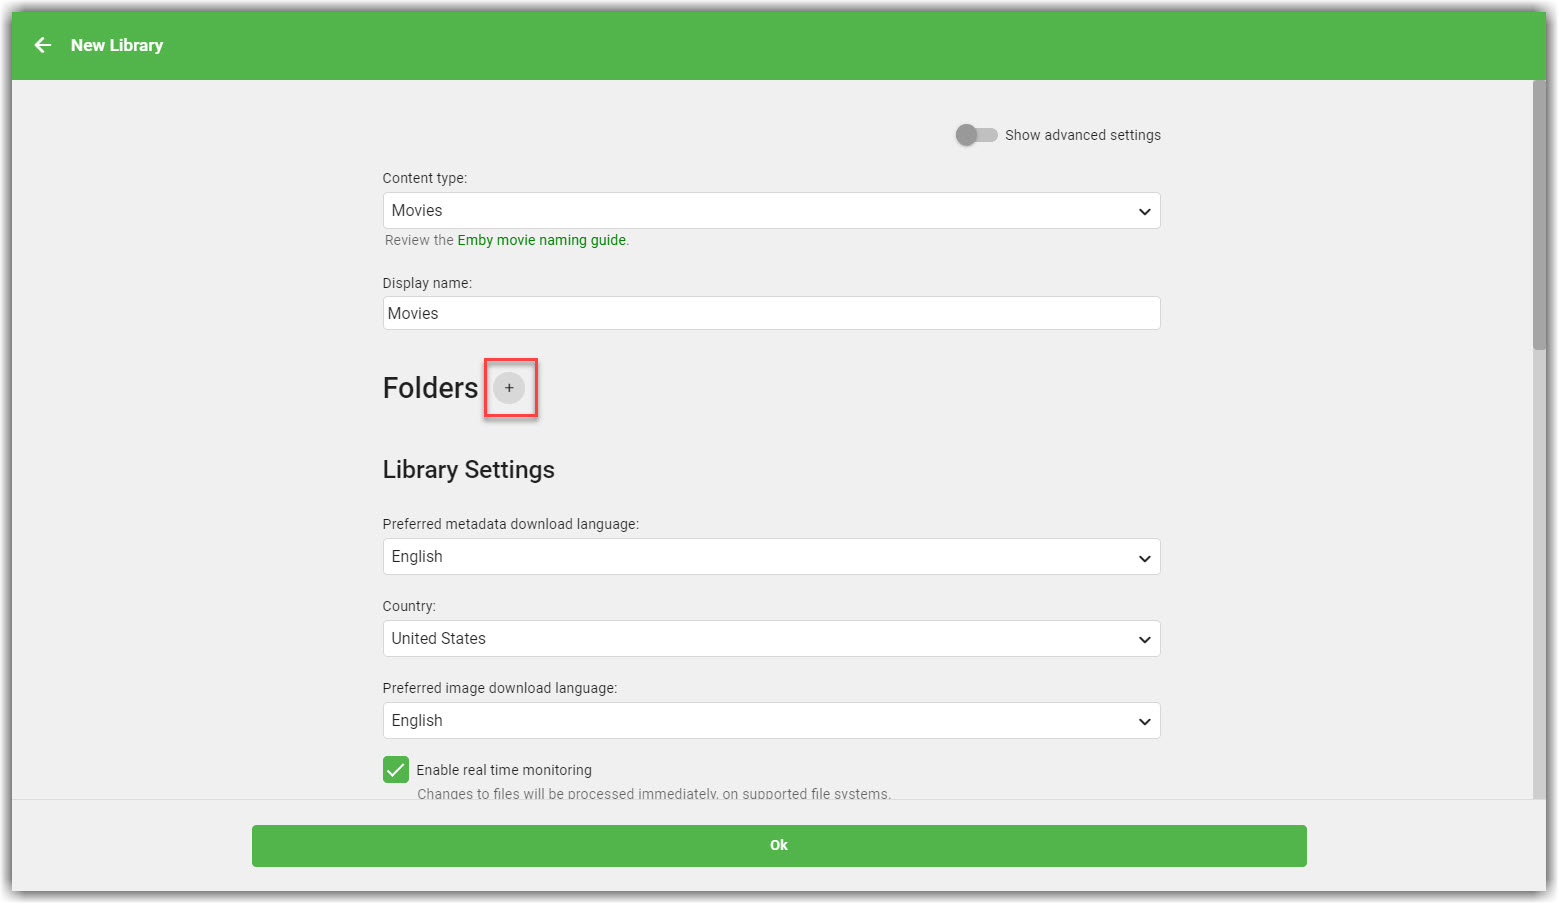
- Type
/storagein the folder field and tap the icon to list the contents of the folder. Then select your preferred folder.
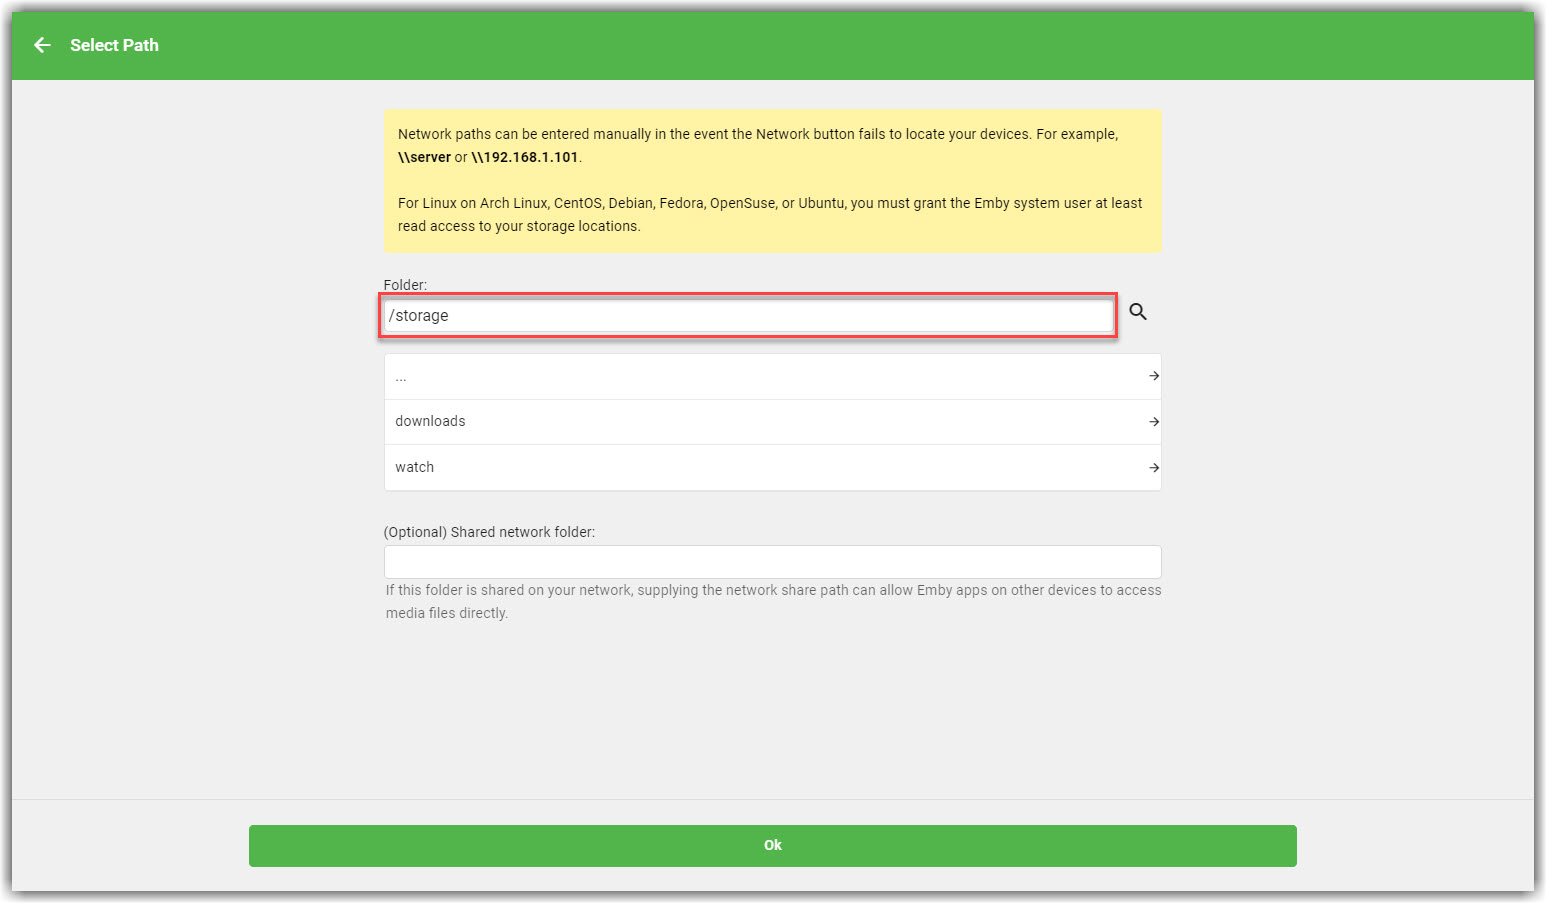
- Click Ok to finish adding adding a folder.
- Click Ok again to finish creating your library.